24 Ene 2024 Integrating Push Notifications into Angular Applications with Firebase Cloud Messaging
Push notifications can inform your users of important matters even when they are not actively using their computers. These notifications ensure that your messages reach everybody, improving response time and user engagement, as well as serving as a call to action in urgent scenarios.
Sending notifications to a web app can be done in many ways, but Firebase Cloud Messaging (FCM) stands out for its efficiency and simplicity, as it is a cross-platform messaging solution that enables real-time message delivery to users on multiple devices, including Angular web applications. This article will delve into integrating FCM with web apps.
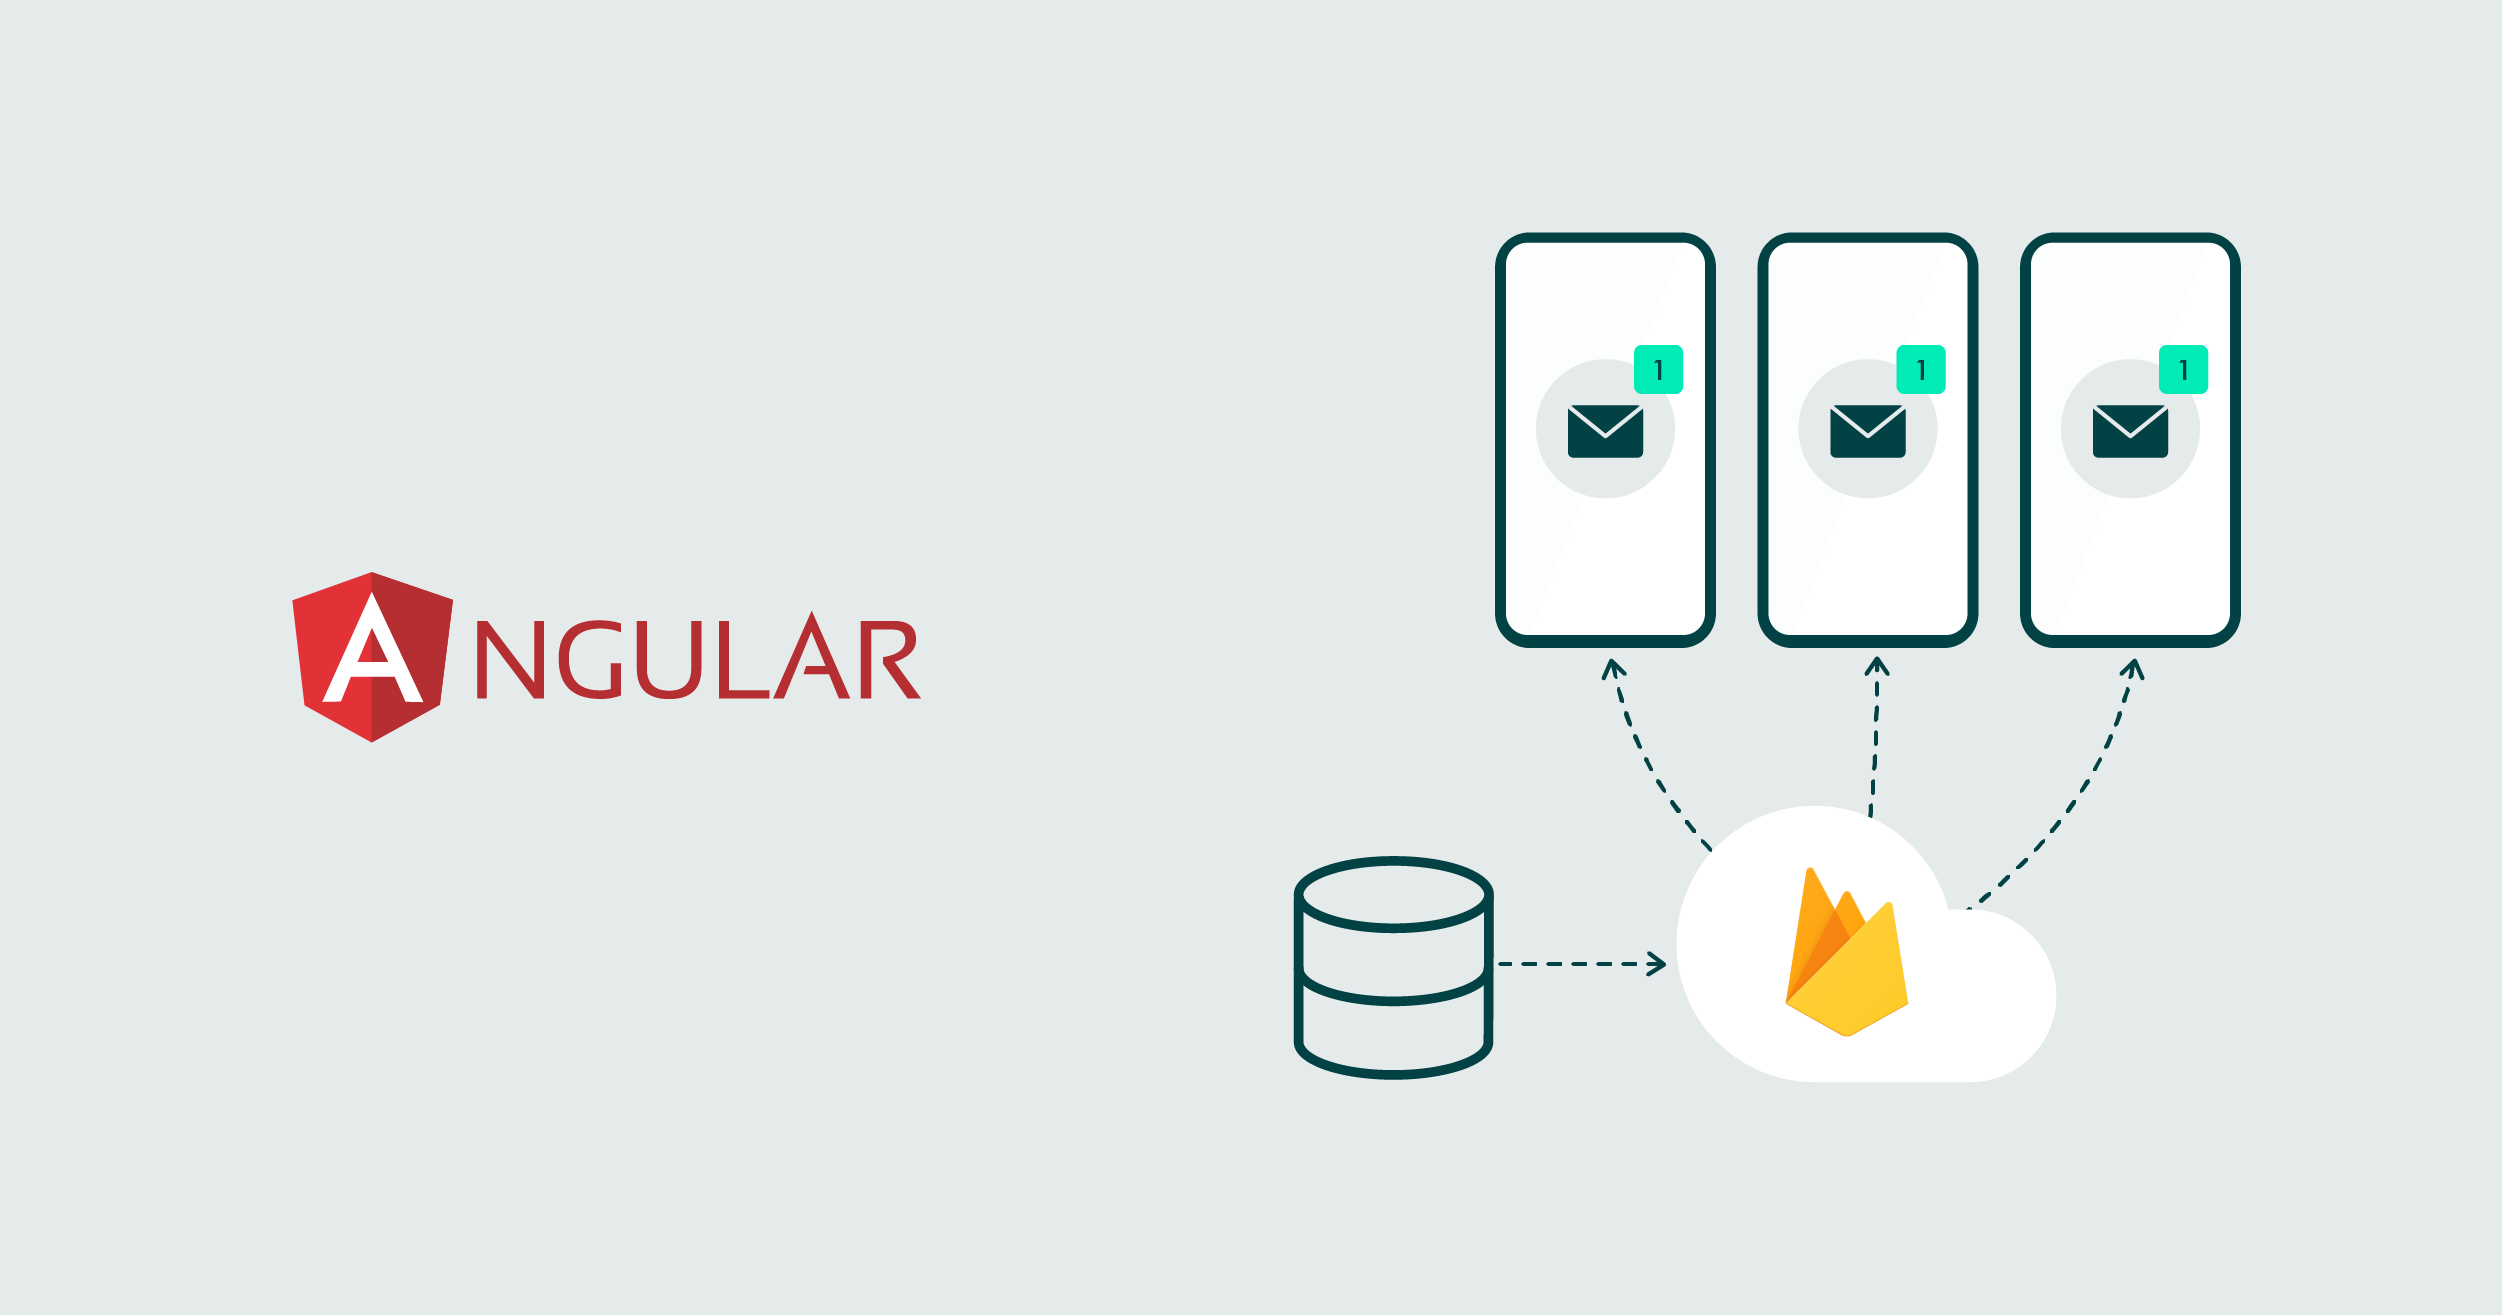
Implementing FCM involves two main components for sending and receiving messages:

Figure 1: FCM messaging components; the web application is selected as the client app.
- Trusted environment: This is where you build, target, and send messages. The FCM backend receives the message request, forwards it to the platform-specific transport layer, and delivers the message to the client app on the user’s device. For this environment, you can use Cloud Functions for Firebase or build a custom app server.
- Client app: This refers to the receiving end, which could be a mobile device or a web application. In our context it’s an Angular application. FCM messages can be both sent to and received from the client app via the Firebase Admin SDK or the FCM server protocol.
How Does It Work?
Firebase App Registration
- Navigate to the Firebase Console and access the Cloud Messaging tab to register a new Firebase app.
- Save the Server key and Sender ID for future reference.
 Figure 2: Sender ID in the Firebase console.
 - On the bottom of the Web Push Certification section, click on Generate key pair and save the newly generated key:
 Figure 3: Creation of Web Push certificate.
 - Once the Sender ID and key are ready, update and save your Firebase configuration with the Messenger Sender ID. Then, initialise Firebase and begin using the SDKs for the products you’d like to use.
 Figure 4: Firebase configuration taken from the Firebase console.
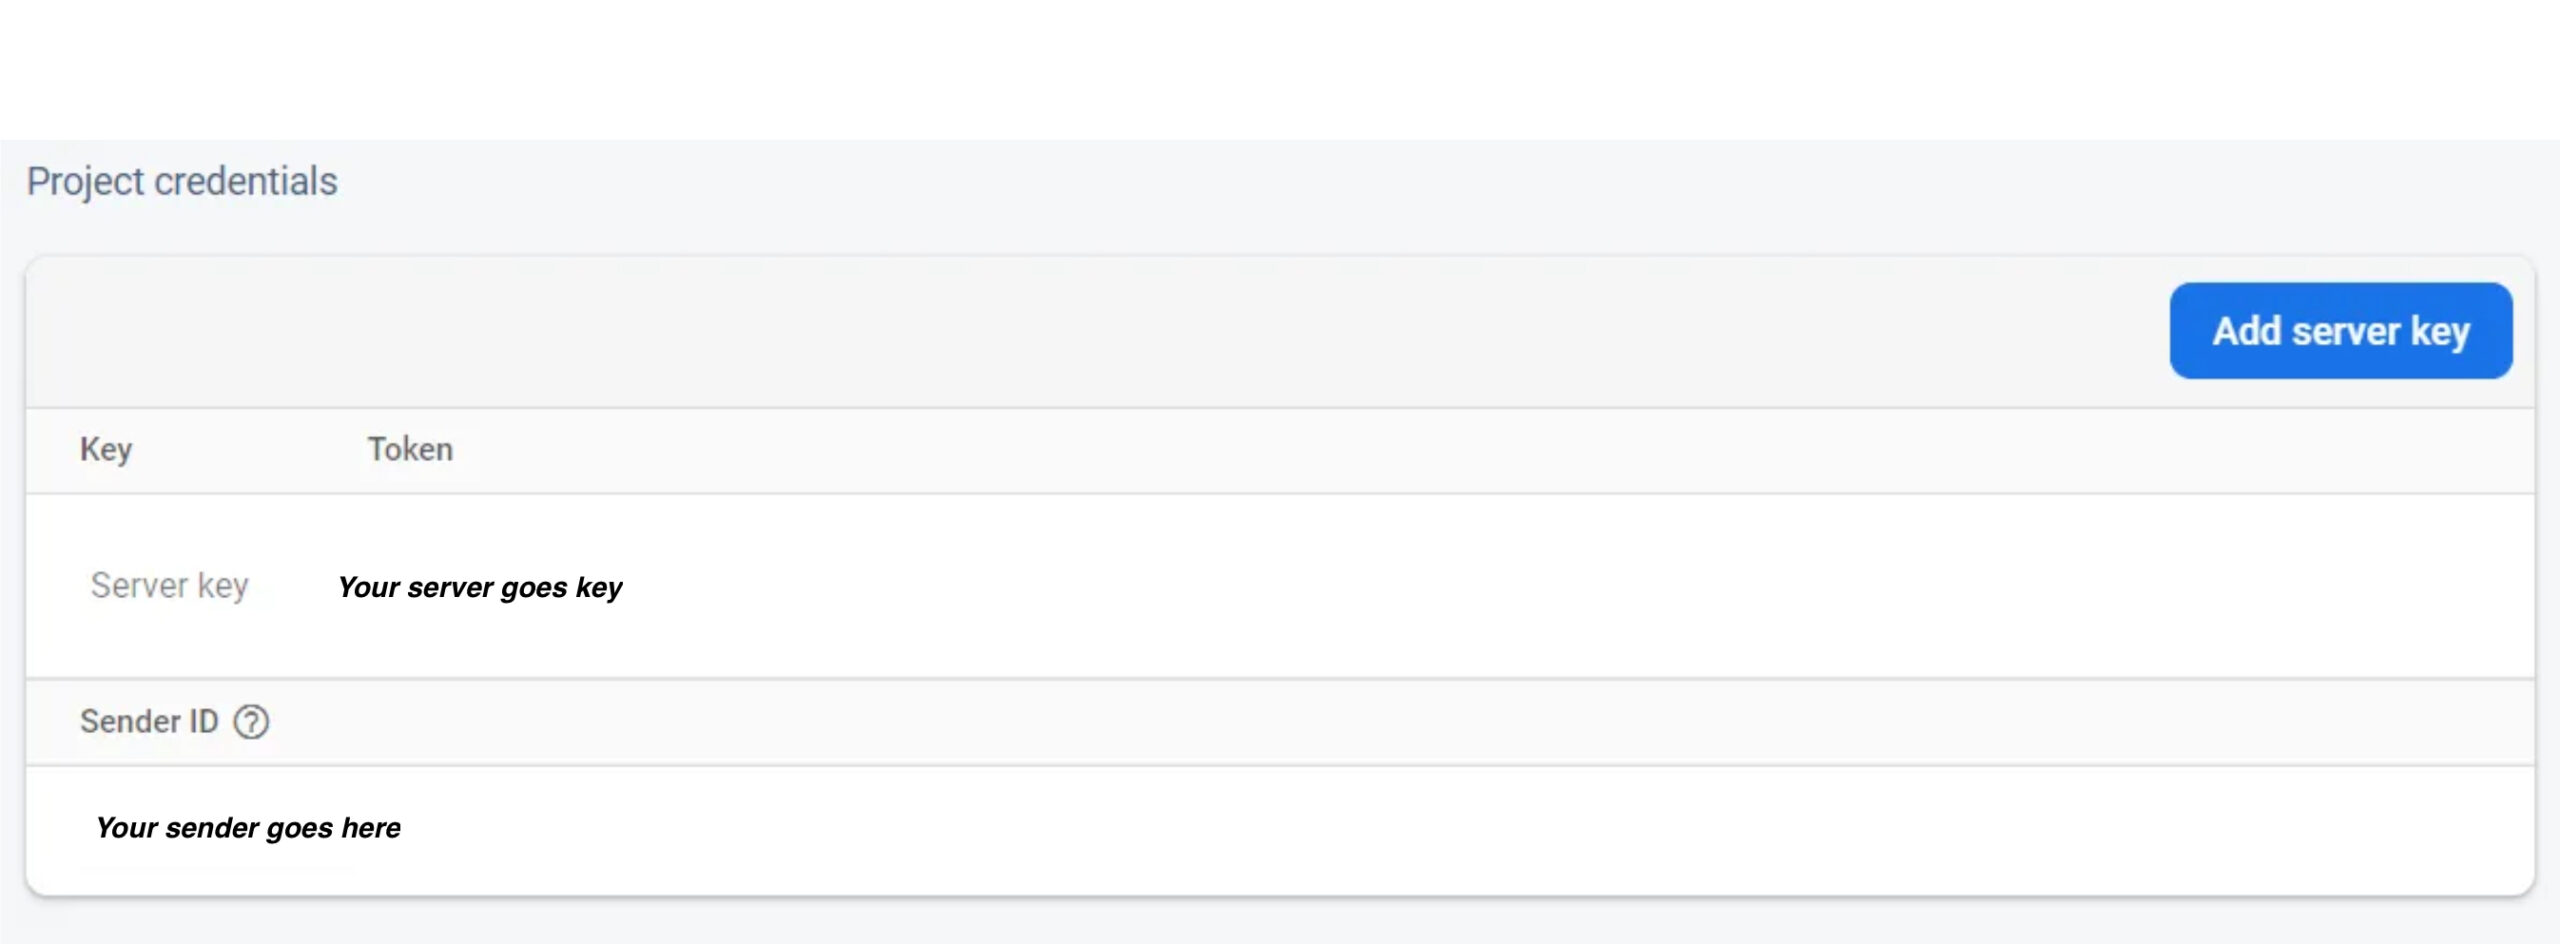 Figure 2: Sender ID in the Firebase console.
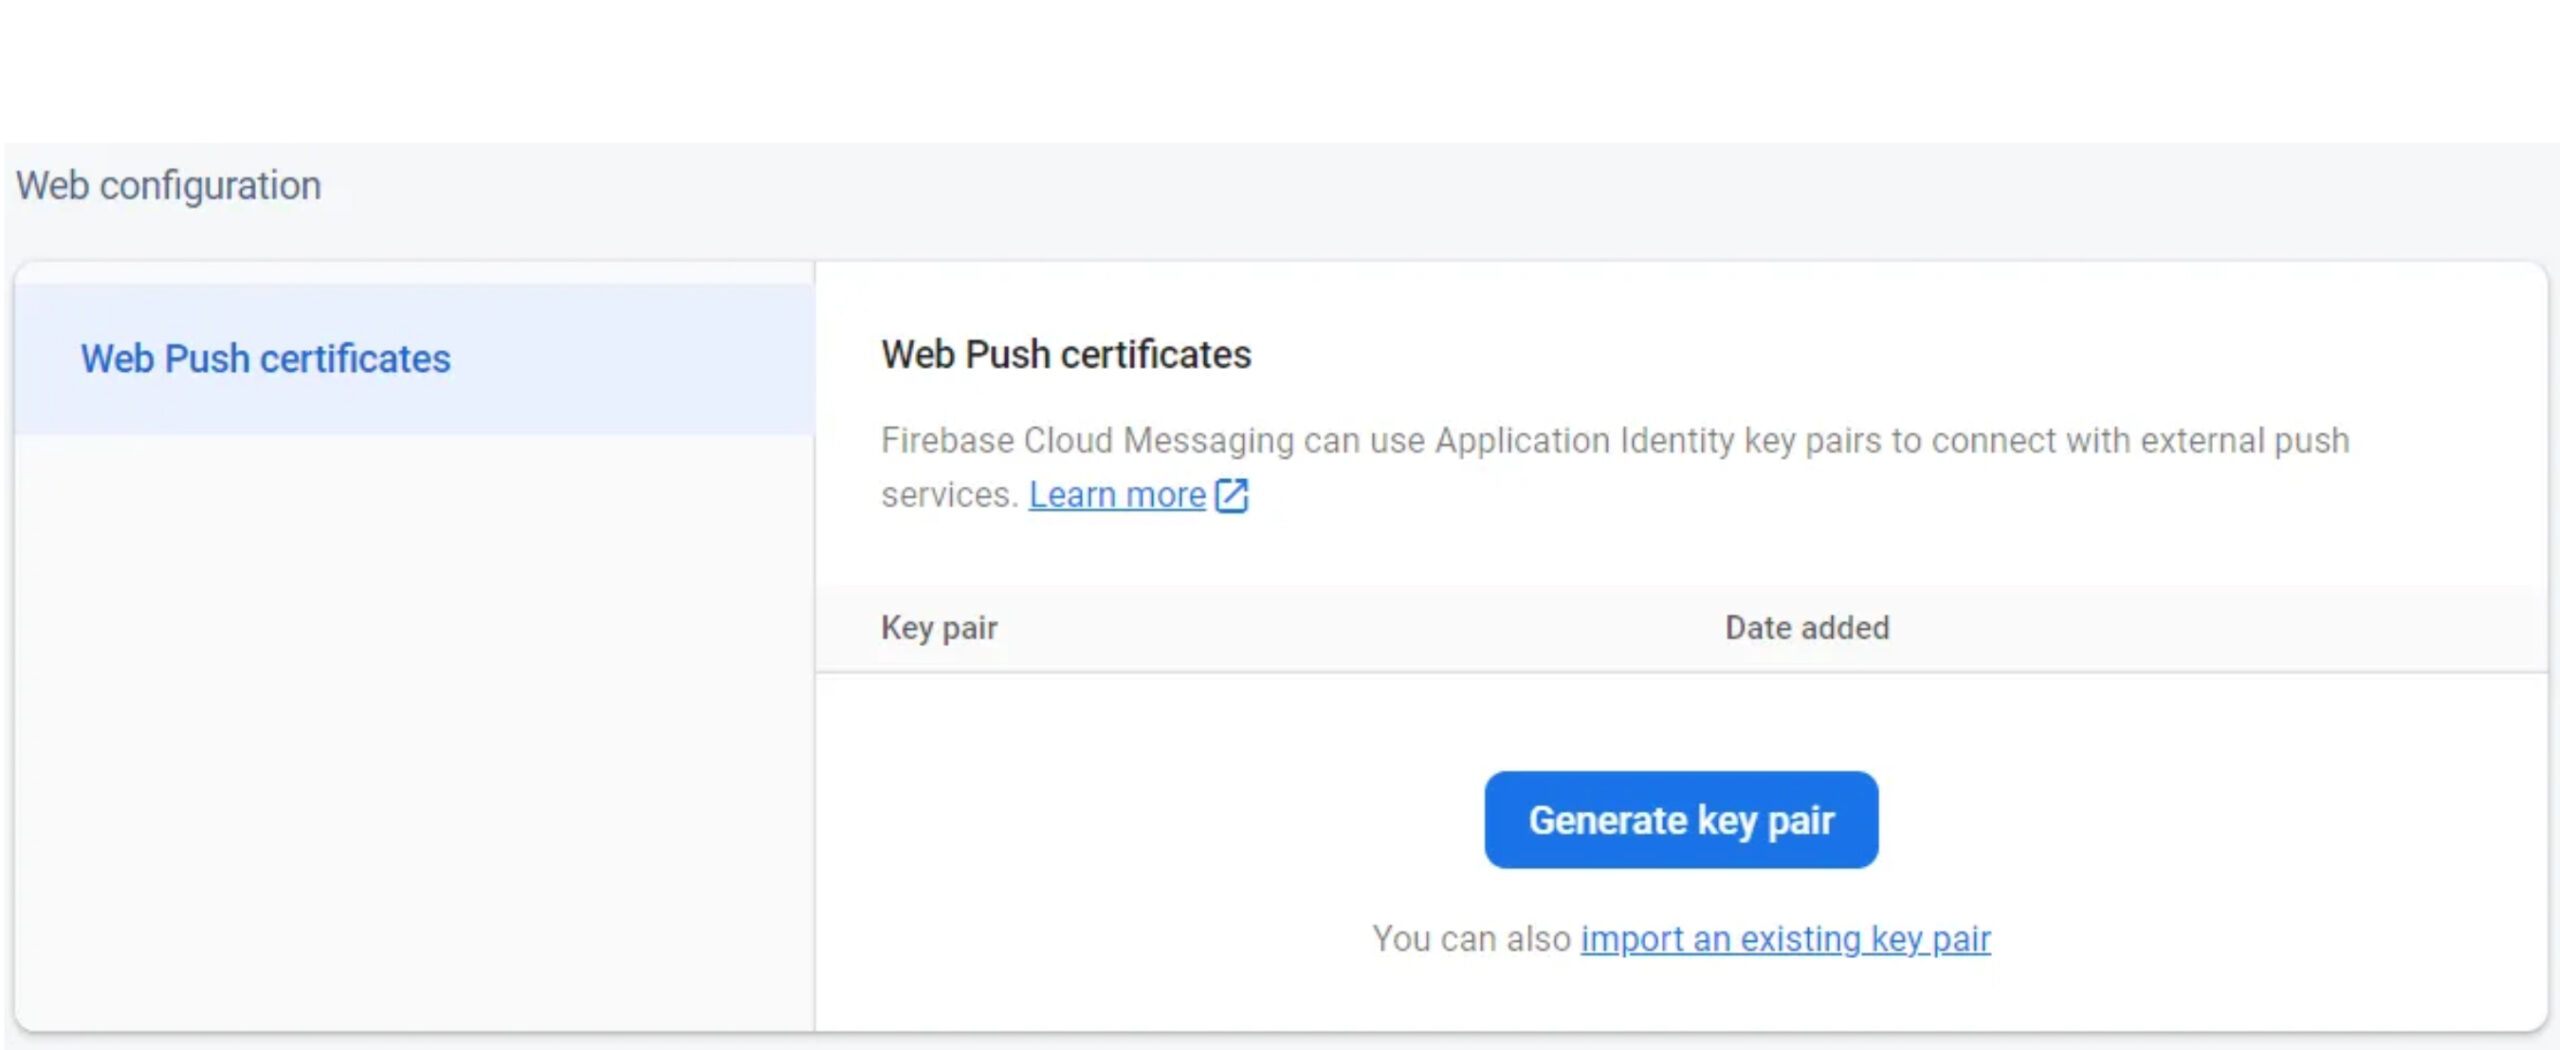 Figure 3:
 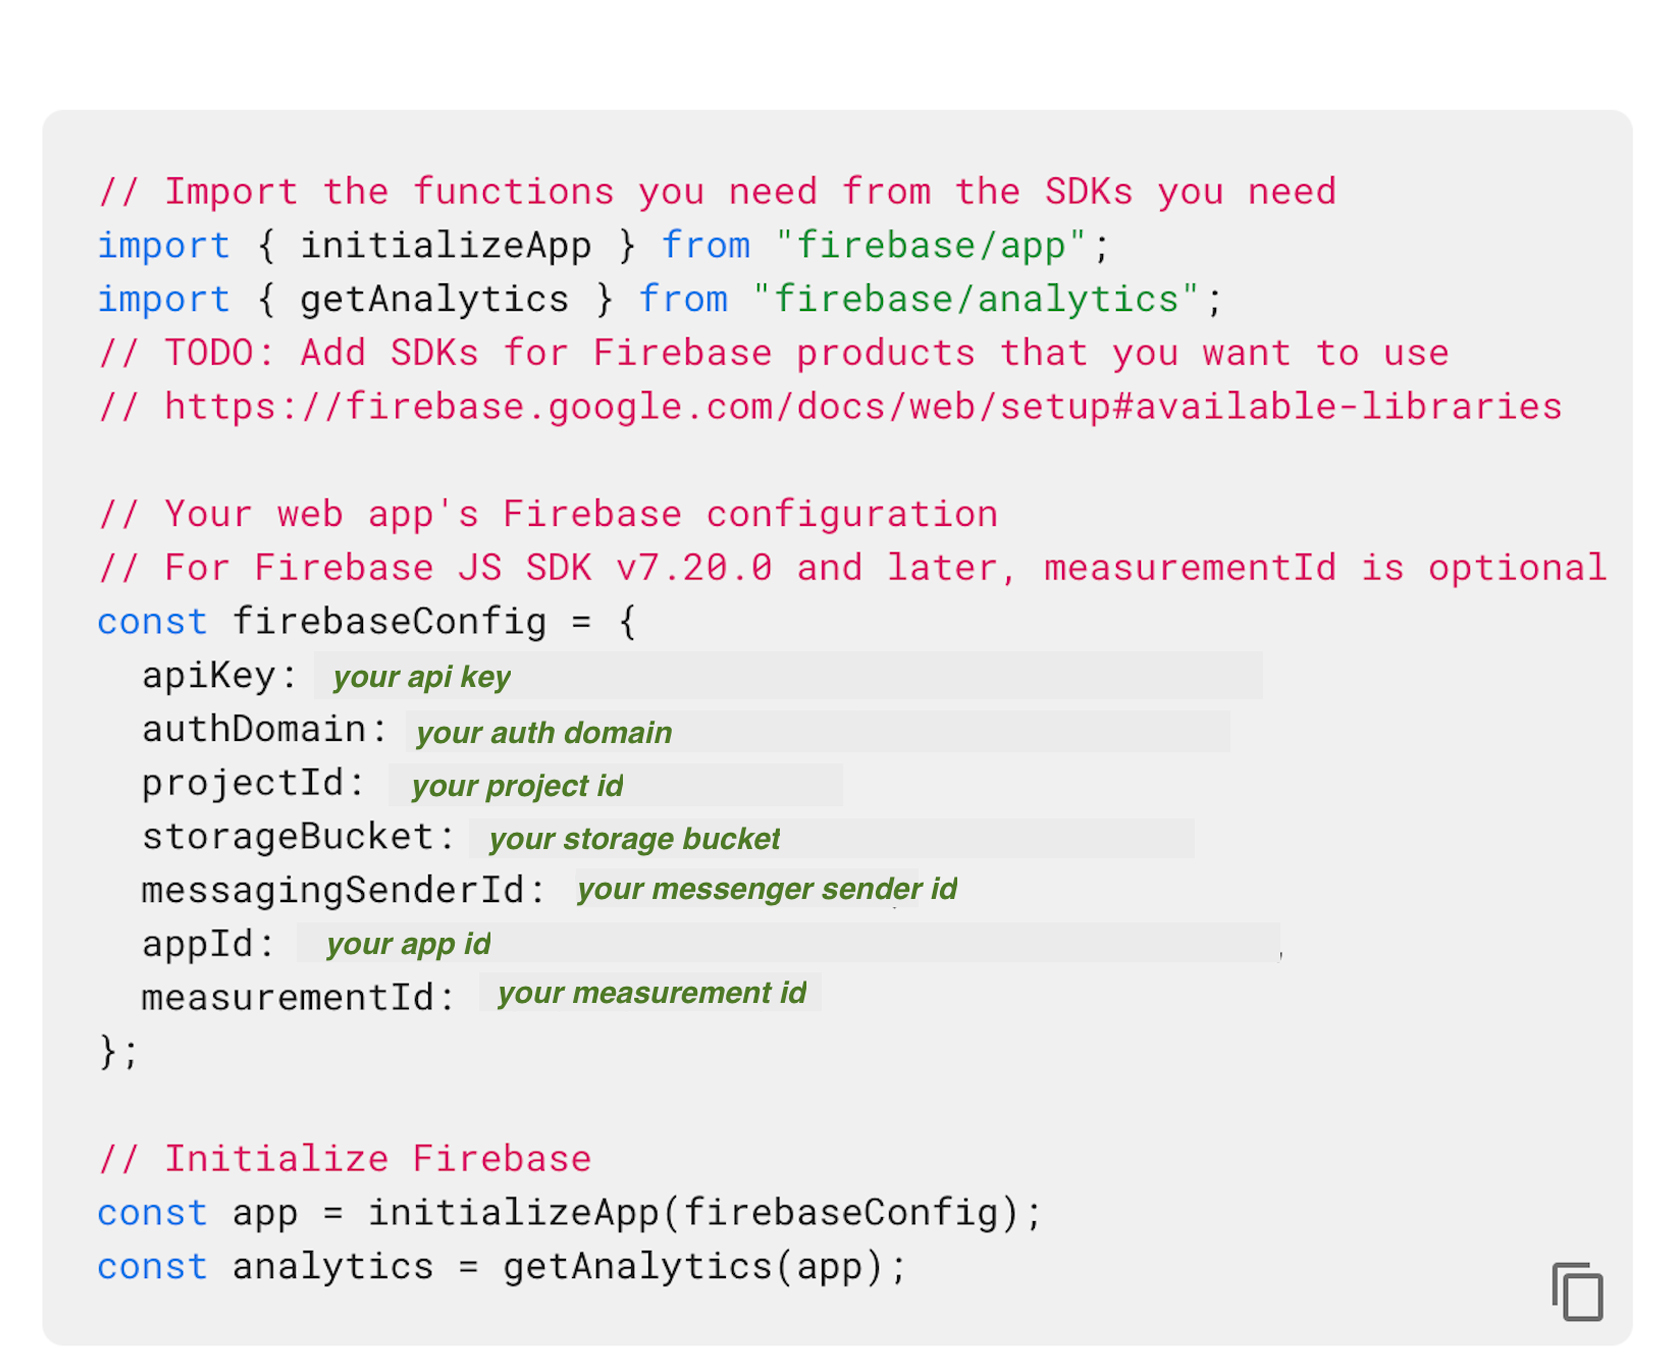 Figure 4:
 Integration with Angular
Install Firebase using NPM (Node Package Manager) and configure it by importing settings from your environment file.
Create both manifest.json and firebase-messaging-sw.js files in the same directory as your index.html.
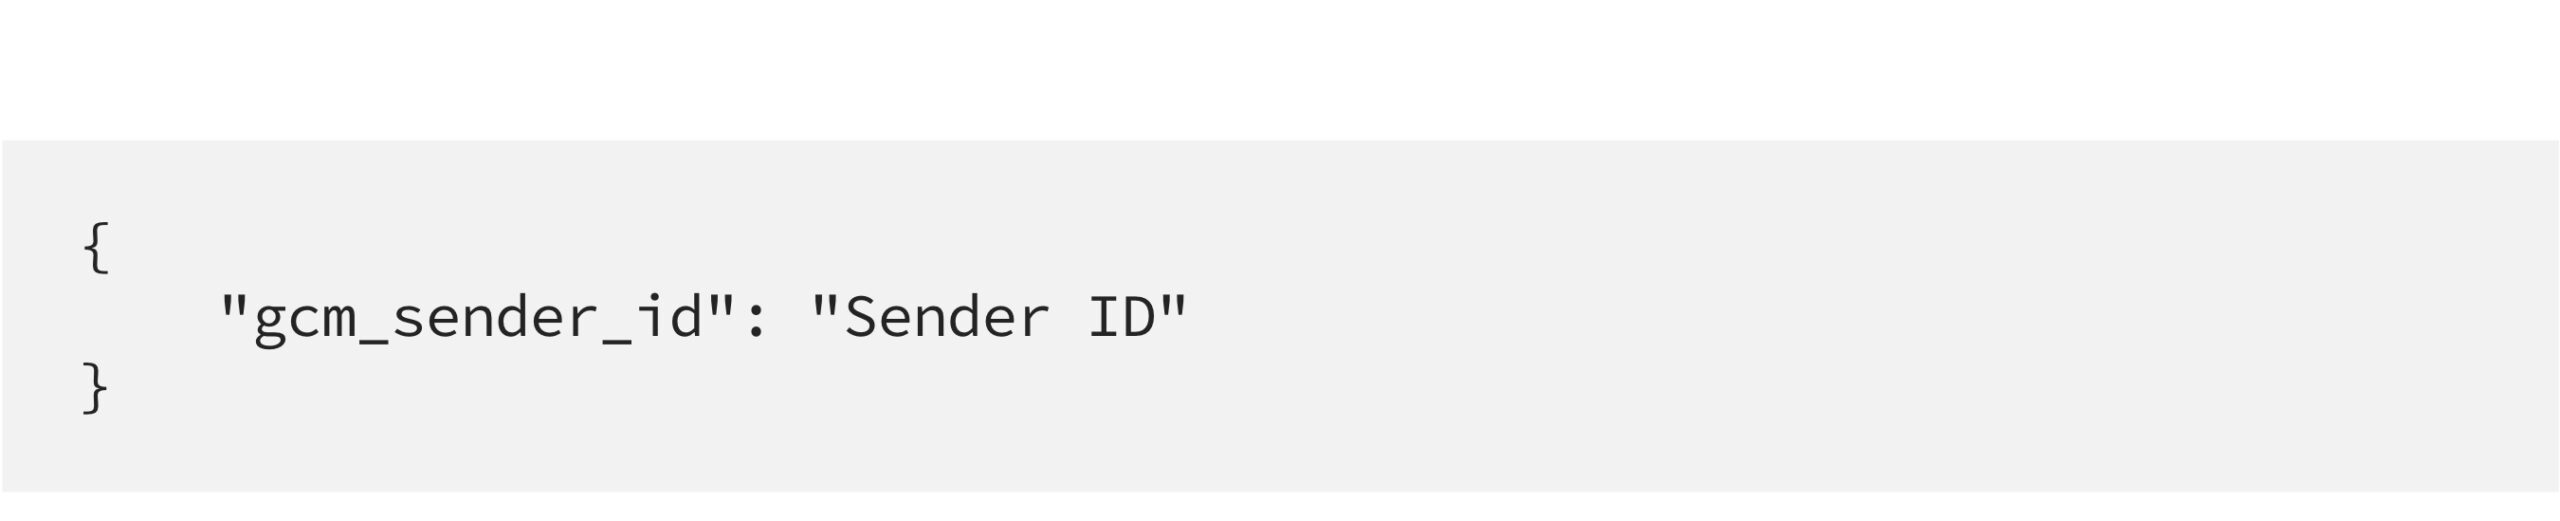
Figure 5: manifest.json file.
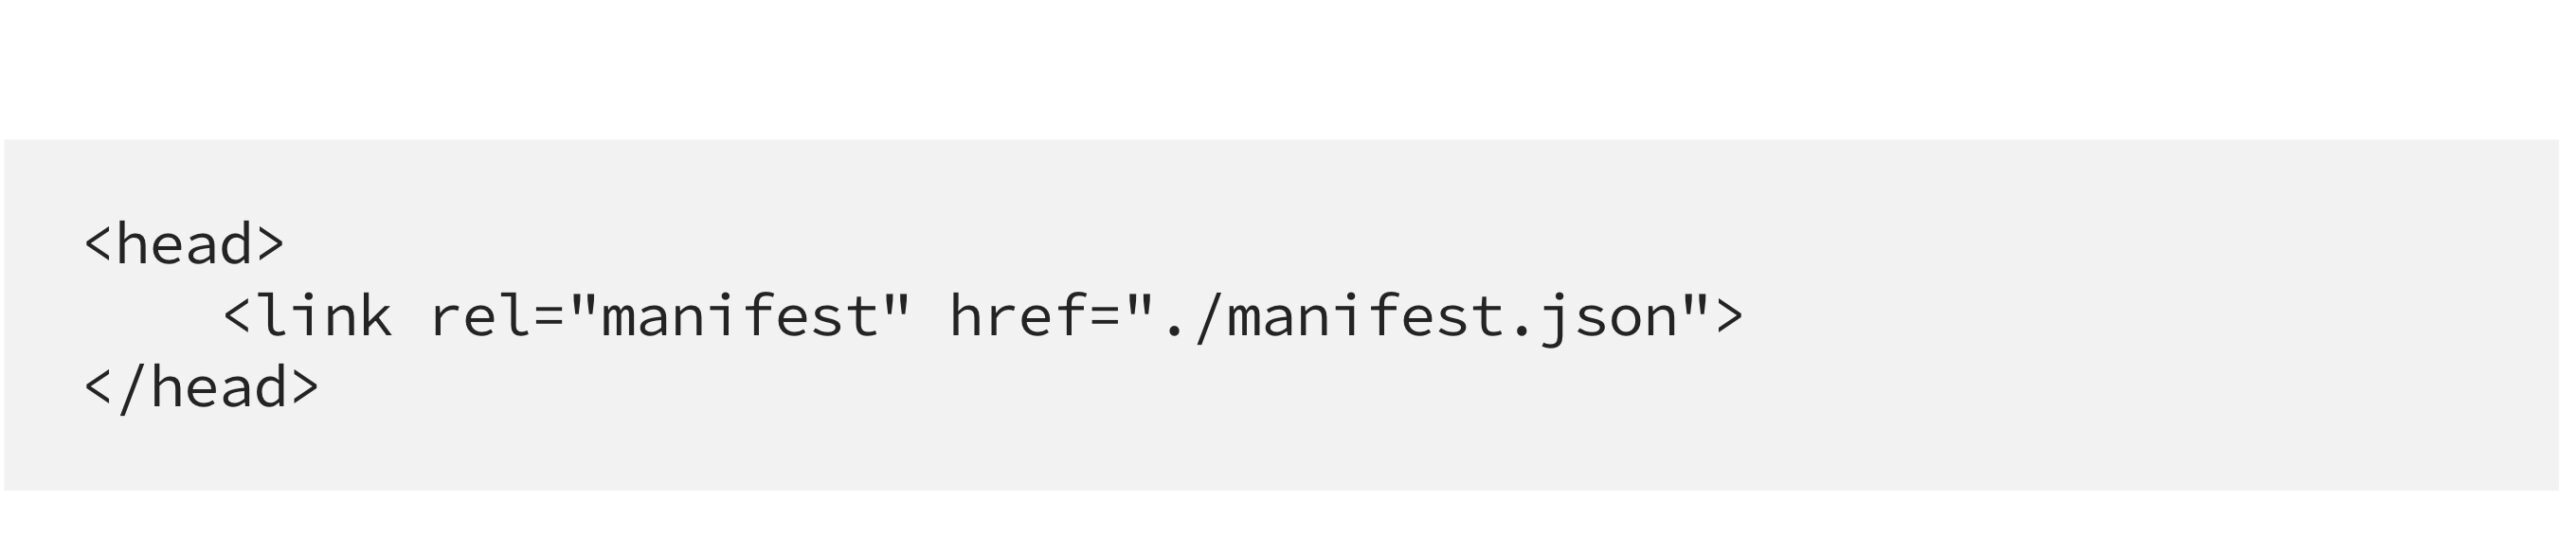
Figure 6: Add the manifest to index.html.
The service worker firebase-messaging-sw.js facilitates the connection between your application and the browser with FCM, enabling the detection and receipt of new messages from Firebase, even when the application is not actively running:

Figure 7: Service worker to interact with FCM from the app and browser.
Add AngularFire by executing the command ng add @angular/fire in your terminal. Subsequently, configure the Firebase CLI to automatically import your Firebase app, complete with Cloud Messaging functions, into your project. Whilst the initial installation of the Firebase package is essential to establish a connection between your app and Firebase during Angular integration, incorporating AngularFire is optional yet recommended as it facilitates the effortless and swift utilisation of all Firebase Cloud functions within your Angular application.
Message Types
Message reception by the client application, whether it is active or inactive, depends on the type of message being sent. FCM offers two distinct types of messages:
- Notification messages: Also referred to as «display messages,» these are managed by FCM and are ideal for automatically displaying notifications. They may also contain an optional data payload, which the client’s app handles if the user accepts the notification. Notification messages are received when your app is running in the background; they appear in the notifications tray.
- Data messages: These messages consist of user-defined custom key-value pairs and are processed by the client app directly. Data messages are suitable if you wish to handle message processing with your own client app code. Like notification messages, data messages can also include a data payload. They are received within your application when it is active and in the foreground.
You can create a mixed message, combining both notification and data types, where FCM manages displaying the notification data when the user is not actively using the app by adding it to the notification tray. Concurrently, the Angular app processes the message data when the app is in the foreground.
Conclusion
Implementing push notifications in Angular applications with Firebase, using Firebase Cloud Messaging, can be easily achieved with these technologies, and will markedly enhance instant responses to urgent actions and real-time updates of sensitive data within your workspace. Boasting capabilities such as sending both notification and data type messages, customising messages for various platforms, and controlling delivery options, FCM presents a robust solution for maintaining user engagement with your web application.
Here at ClearPeaks, our team of certified specialists will be more than happy to help you integrate push notifications into your applications, so don’t hesitate to contact us!