16 Jul 2025 Bringing Data to Life: Exploring AR in Flutter
In this blog post we’ll explore how to bring live data charts into the real world using a Flutter-only approach. You’ll see how to point a mobile app at a printed marker and have a chart widget appear in the right spot, all in Dart and with no native code required.
First, we’ll look at the Augmented Reality (AR) tools we tried and explain why we picked the one with the most reliable marker detection. Then we’ll show you how we connected a simple chart library to our AR view, so that the right graph shows up automatically, whether it’s sales figures for your team, customer positions in a store, or time-of-day stats in an event space.
Next, we’ll go into the main part of the POC: how the marker is detected in under a second, how we place the chart in its exact location, and how we can even switch charts based on which office area you’re in or your time zone.
And along the way, we’ll share the surprises we found, the tips that helped the demo run smoothly, and some real cases where this is a perfect fit, like reports that change based on location, or customer dashboards that always know where to appear.
Why We Tried Flutter + AR
Our goal was to make a demo that felt simple: point your phone, see a chart, and move on. We chose Flutter so we could write all our code in Dart and use the same app in both iOS and Android. This kept the setup easy and avoided the need for different languages or tools.
Flutter libraries and widgets helped us to add charts and AR features fast! Instead of learning native SDKs, we used Dart plugins and chart packages to handle most of the work:
- One codebase for both iOS and Android.
- Simple chart packages like FL Chart for line, bar, and area graphs.
- AR plugins that let us detect markers with a single function call.
With this setup, we could focus on the user experience. We made the chart pop up exactly on the marker, switch to different charts based on which room you’re in or the time of day, and the setup made it easy to tweak ideas quickly. Staying in Flutter meant our demo was faster to build, easier to change, and simpler to share with the team.
![]()
Source: Otto.de
Plugin Evaluations
ar_flutter_plugin
We first installed the ar_flutter_plugin and followed its setup guide from pub.dev. The idea is simple: you drop an ARView widget into your Flutter app and start working. But in our case, we didn’t get very far. Plane detection had trouble with flat or smooth surfaces, and it often failed to find anything at all on walls or ceilings.
To make it work, we had to tweak some native settings, which in turn caused conflicts with other packages. Even in simple scenes, performance was slow and inconsistent, so we moved on.
arkit_plugin
We then switched to the arkit_plugin, which provided better out-of-the-box tools, as well as built-in support for both plane and image anchors.
Plane detection still wasn’t perfect, especially on low-texture surfaces. But image detection worked well and placed the chart exactly where we wanted. Overall, it felt more stable and the setup was straightforward.
This made it the best option for our demo, not only because it worked well from the start, but also because it gave us what we needed to keep moving forward. Image detection was reliable, easy to use with our Flutter charts, and we didn’t need to waste time fixing small issues.
Other Plugins
We also had a look at a few smaller plugins, including:
These plugins are very lightweight and give you more control over the AR setup, but they come with some clear downsides: most of them aren’t updated very often and have little to no documentation. Some also lack important features like image anchor support, which was key for us.
While they might be handy in certain use cases, they didn’t give us enough flexibility or reliability to use them in this project, so in the end we decided to stick with the plugin that worked best off the shelf and allowed us to focus on building the experience we had in mind.
Building the Proof of Concept

For this proof of concept, we wanted to test how well Flutter could handle simple AR experiences focused on showing data charts. We explored some different approaches to better understand its limitations and potentials.
Plane Detection
We started by trying to detect flat surfaces like tables or walls, hoping to place charts directly in space. Detection worked in some cases, mostly on vertical surfaces, but it was often unstable, with a low refresh rate and drifting widgets. The experience didn’t feel reliable, so we decided not to use this option.
Image Anchors
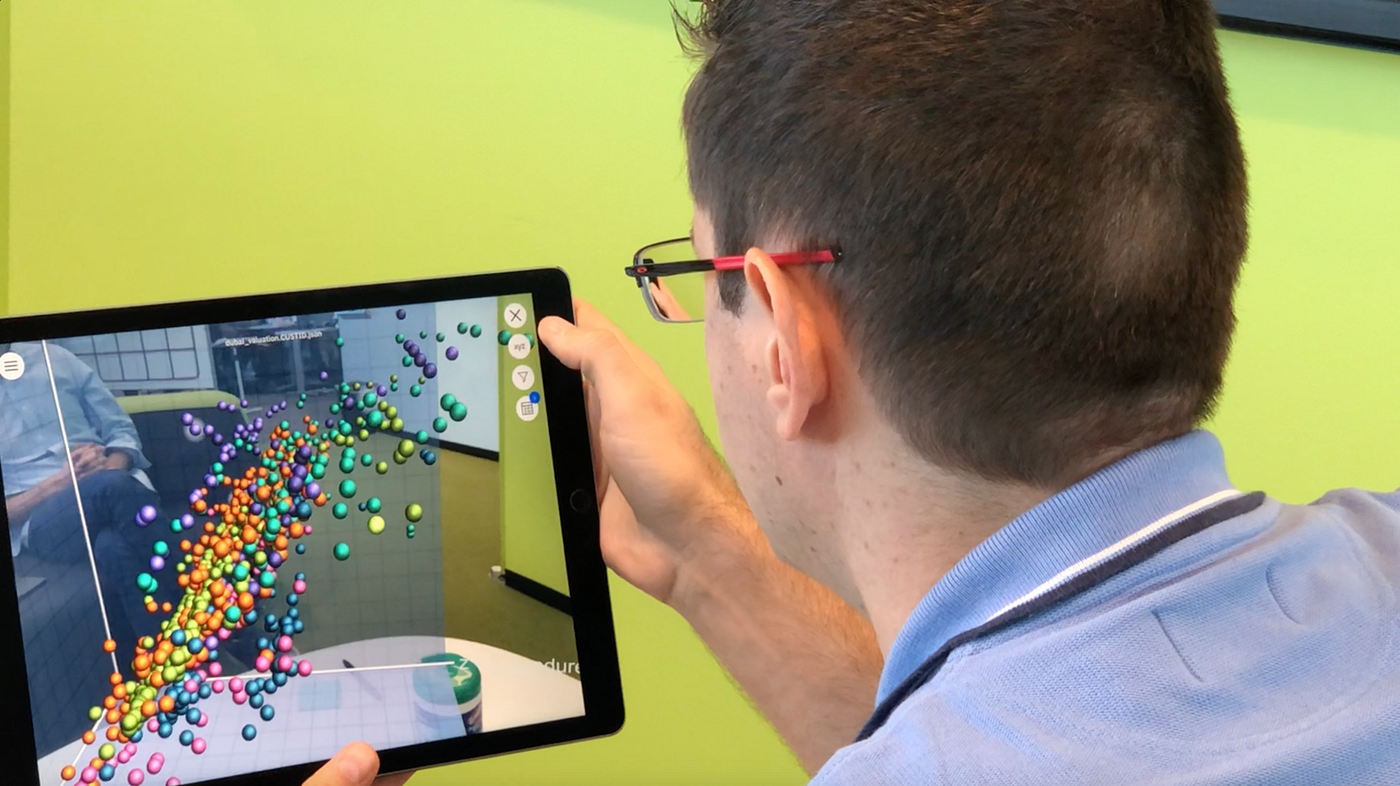
Then we tried printed markers, which turned out to be much more effective. The marker was detected in less than a second, the chart appeared in the right place and stayed fixed while moving the camera. It was easy to set up and didn’t require much adjustment; the only downside was that it still looked more like a UI element than a true 2D object in space.
3D Models with WebView
We also considered embedding 3D charts with AR support via WebView. This approach was overly complex for our needs as it required more tools, a longer setup time, and additional work to design the charts, and as our focus was on a quick and easy display, we decided not to continue with this either.
In the end, working with image anchors and simple Flutter widgets gave us the most solid results, allowing us to test the key interactions we had in mind and to push the boundaries of Flutter AR without needing to go native.
Source: Medium.com
Key Discoveries and Challenges
Image Anchors Potential
Once the marker had been detected, the chart appeared right where it should, without any need for adjustments, making it easy to create an experience where the chart feels connected to the real world. For use cases with known markers, this method is reliable and easy to set up in Flutter.
Plane Detection is not there yet
We tried placing charts on flat surfaces like tables and walls, but it often didn’t work. The system had trouble recognising smooth or flat surfaces, and when it did, the result was unstable. So it’s a feature that needs a lot of improvement before it can be used in real-world apps.
Delay Issues
Starting the AR view takes about 1.5 seconds, and detecting the marker takes up to another second. While performance is good once it’s running, these brief delays undermine the impression of a seamless, instantaneous experience.
Simple is Better
Using Flutter widgets and packages like FL Chart helped us to keep the project clean and easy to manage. We didn’t need to deal with WebView or 3D engines, which can be heavy and harder to control. Staying in Flutter helped us to focus on what we wanted to do.
Conclusion
As we’ve seen, Flutter lets you build a basic marker-based AR experience in no time at all, ready to display data charts in the real world, with no native code required. Today’s plugins are great for PoCs and rapid demos, but they still fall short on plane detection and natural widget placement.
This project has made two things clear: Flutter is a solid, flexible choice for simple AR visualisations, but the current toolkit isn’t ready for more advanced scenarios such as free-form spatial placement or high-precision stability.
To bridge that gap, our next step is to explore new solutions (for example, developing our own AR module or running lightweight AR models in-app) to get better control and performance for future projects.
If you’re tackling similar challenges or are curious about how AR-driven data visualisations could elevate your dashboards, our team would love to help you. Simply reach out to us today!