17 Ene 2019 Business Intelligence with Oracle Cloud 2
Article 2: Get ready with Oracle Analytics Cloud
This is the second blog article in our series Business Intelligence with Oracle Cloud, focusing on two important tasks related to Oracle Autonomous Analytics Cloud (OAAC). Firstly, we’ll go through the connection between OAAC and an Autonomous Data Warehouse (ADW) instance; secondly, we’ll detail how to connect to and upload the OAAC repository, also known as the RPD.
1. Connecting Oracle Autonomous Analytics Cloud (OAAC) to Autonomous Data Warehouse (ADW)
In the previous article we defined a standard full BI environment with Oracle Cloud (see diagram below), which is composed of the three main BI components (an ETL tool, a DB and a visualisation tool) and an extra optional one, the Autonomous Data Warehouse (ADW).
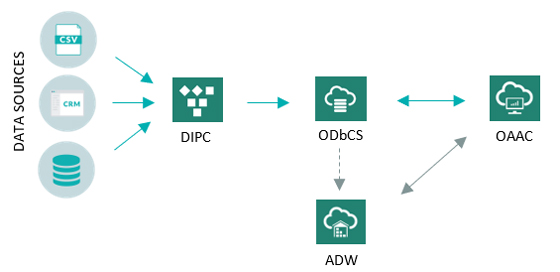
An ADW is a cloud database specifically designed to work as a data warehouse, automatically managed and upgraded by Oracle. In practical terms, an ADW can offer a significant data access performance boost when used as the OAAC main data source, instead of always accessing ODBCS.
If you are interested in connecting an ADW instance to OAAC, follow the steps below:
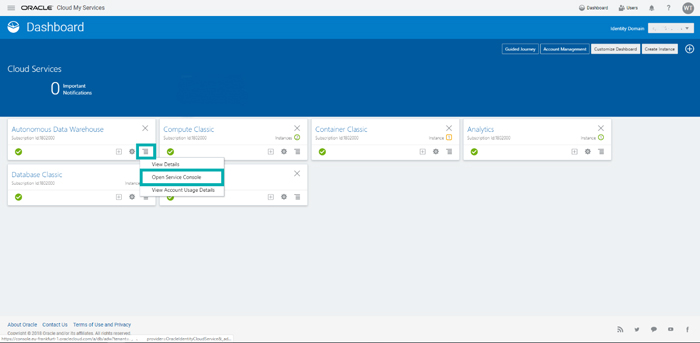
Step 1:
In the My Services page of your Oracle Cloud, open the Action Menu in the Autonomous Data Warehouse section and click on Open Service Console:
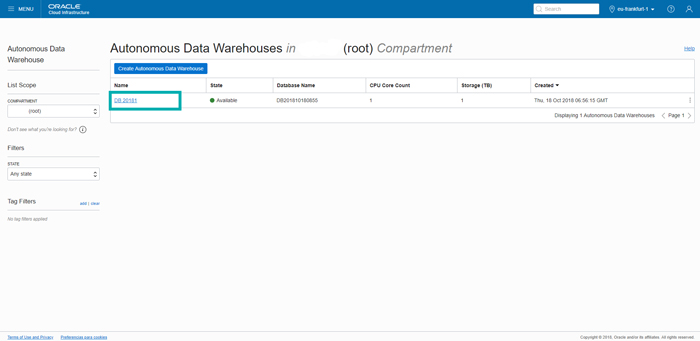
Step 2:
Once in the Autonomous Data Warehouse Console, click on the name of the instance you want to connect OAAC to:
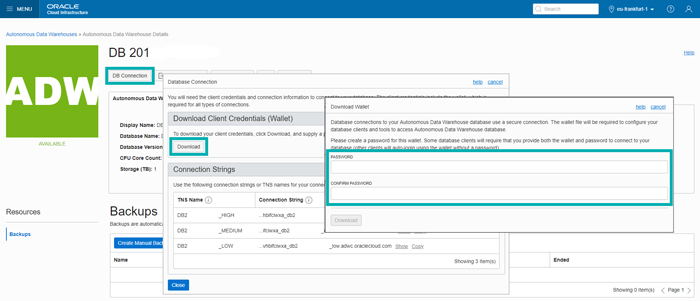
Step 3:
In the main page of the ADW instance selected, click on DB Connection and Download. A window will pop up asking you to define the password of the Client Credentials Wallet:
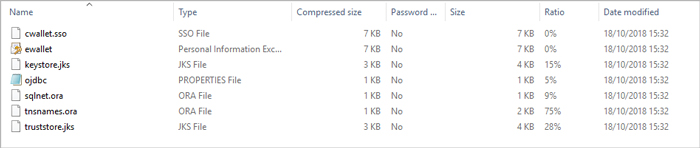
Step 4:
Once you click on Download, a compressed file with the following content will be downloaded:
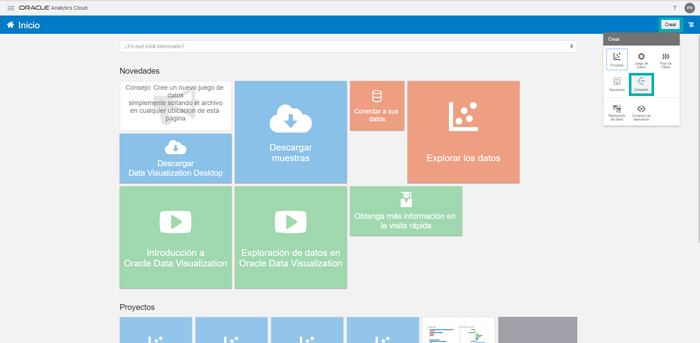
Step 5:
Once you’ve got all the ADW client credentials files, go to the OAAC entry page and click on Create and Connection:
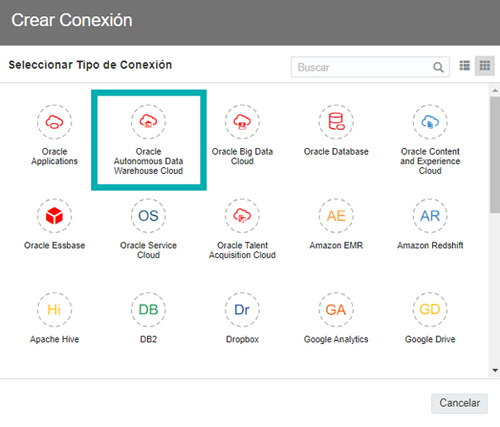
Step 6:
In the window with all the connection types, click on Oracle Autonomous Data Warehouse Cloud:
Step 7:
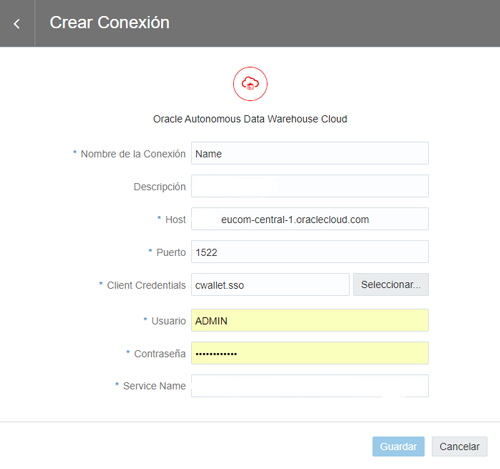
Finally, fill in the blanks of the Create Connection window considering that:
- Host, Port and Service Name can be found in the ora file (see step 4).
- In Client Credentials, attach the file sso (see step 4).
- User and Password are those you specified when creating the instance.
2. Connecting to the Oracle Autonomous Analytics Cloud repository (RPD)
One of the strongest points of the principal on-premise OBIEE is its repository, also known as the RPD, which stores the main BI-related metadata such as connectivity information, data modelling, aggregation navigation, caching and security.
Luckily, OAAC continues to use the RPD; although OAAC includes the Data Modeler feature which allows users to create star models in a more intuitive and attractive way, the principal and more complex data-modelling tasks are still performed using the Administration Tool which is part of the OAC Developer Client Tool. Note that OAAC requires a specific Developer Client Tool version which can be downloaded here.
As with OBIEE, developers may either connect to the online RPD server or download the file locally and open it offline. In this section, we’ll explain how to open the RPD file in both ways.
2.1. Connecting online to OAAC with the Administration Tool
When performing small changes, it is very easy to open and edit the RPD online, using the Administration Tool. This can be done by following these steps:
Step 1:
Open the Administration Tool located inside the OAC Developer Client downloaded previously, and click on the Open in the Cloud icon:

Step 2:
Specify the OAAC connection details:
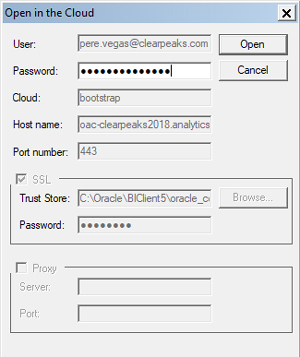
Note that the value of these parameters should be:
- User & Password: corresponding to the OAAC admin user. If OAAC is using Identity Cloud Service as a security provider, then a general Oracle Cloud admin user should be used. Note that this password cannot contain the character “!”.
- Cloud: bootstrap (the name of the service instance in your OAAC VM).
- Host Name: the OAAC URL (<oaacInstanceName>-<domain>.<region>.oraclecloud.com).
- Port Number:
- SSL:
- Trust Store: corresponding to the cacerts file located in: <OAC Client Home>\oracle_common\jdk\jre\lib\security\cacerts.
- Password: changeit (the default password).
Step 3:
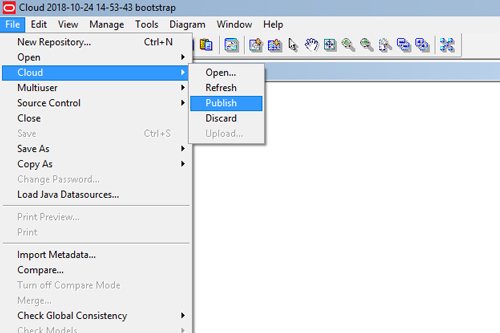
Once the RPD is edited, save and deploy it in the OAAC server by clicking on File, Cloud and Publish:
2.2. Connect Offline to OAAC with the Administration Tool
While connecting online is the fastest and simplest way to make small changes, working offline is highly recommendable for bigger developments, allowing better versioning control and avoiding possible RPD and BI server crashes.
To connect offline, the RPD file must first be downloaded from the OAAC instance to your local machine so it can be opened later offline with the Administration Tool. After modifying, it must be uploaded again to the cloud instance. The detailed steps are as follows:
Step 1:
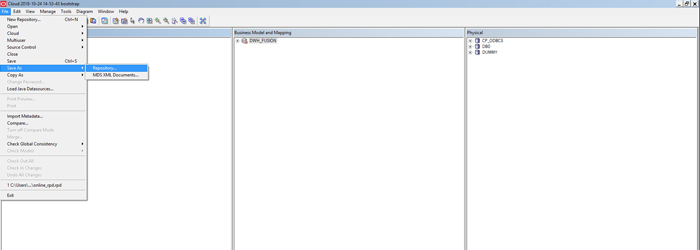
In order to save a local copy of the current OAAC RPD, connect to the RPD online as previously detailed, click on File, Save As and Repository, and finally choose the file location:
Another way to get the RPD file is by using the Manage Snapshots feature included in the OAAC Console, which allows you to create a snapshot of the current OAAC development and download it. This generates a BAR file containing all the compressed development files, including the RPD and the BI Catalog. The RPD file can be found in the datamodel folder after uncompressing the BAR file.
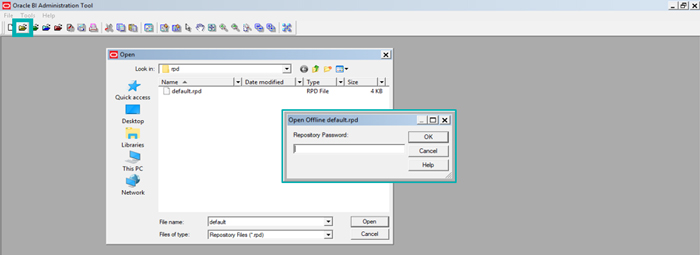
Step 2:
Click on the Open Offline icon and select the RPD file previously downloaded. A window will pop up asking for the OAAC admin password:
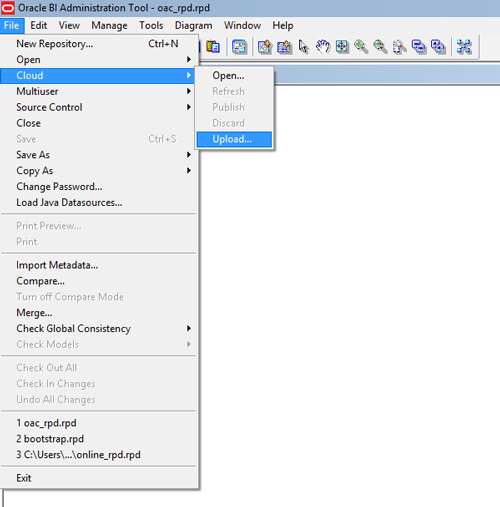
Step 3:
Once this is done, click on File, Cloud and Upload to upload and deploy this modified version into OAAC:
An alternative option to upload the RPD is through the Manage Snapshots feature included in the OAAC Console. It allows you to first make a copy of the current development version by clicking on New Snapshot, and then deploy the recently modified RPD by clicking on Replace Data Model. If the result isn’t what you wanted, you can easily return to the previous version by restoring the previously created snapshot.
Conclusions
While continuing to work with Oracle Cloud and OAAC, we have been able to see that the services are generally intuitive and offer significant advantages over on-premise solutions. Some relevant aspects are:
- OAAC can be connected quickly to other cloud and on-premise services, allowing you to start merging data and creating value.
- The OAAC Snapshots Manager feature offers a development versioning control solution that its on-premise synonym OBIEE12c doesn’t have.
- OAAC maintains the robust RPD and an appropriate Developer Client Tool to edit it. This BI metadata core, together with the new Data Modeler feature for smaller modelling tasks, ensures that any developer or user can meet their modelling needs.
In the third blog article, we’ll run through two more essential actions in your Business Intelligence environment with Oracle Cloud: connecting Oracle Data Integration Platform Cloud (DIPC) to Oracle Database Cloud Service (ODBCS) and executing data integration processes in Oracle Data Integration Platform Cloud (DIPC).
If you are still on your journey to cloud Business Intelligence, do not hesitate to consult us. Our BI and cloud experts will be happy to advise and help you along your way!
| Discover our related services
| ||
|
|
|