25 Jun 2015 Tableau quick integration in Salesforce
Salesforce is one of the leaders in the CRM sector and it is used in thousands of companies around the world. It is really useful software for managing the data of a sales department and it performs even better if you can combine it with Tableau. In this artile we explain you how to do a Tableau quick integration in Salesforce. If you integrate Tableau into Salesforce you will be able to have the departmental reporting on the same page, saving time and making better analysis of the data.
Tableau offers you a solution with the Salesforce Canvas Adapter, but depending of the level of integration needed you can implement the following very easily. With the method explained here you could save time developing the integration and therefore save money too.
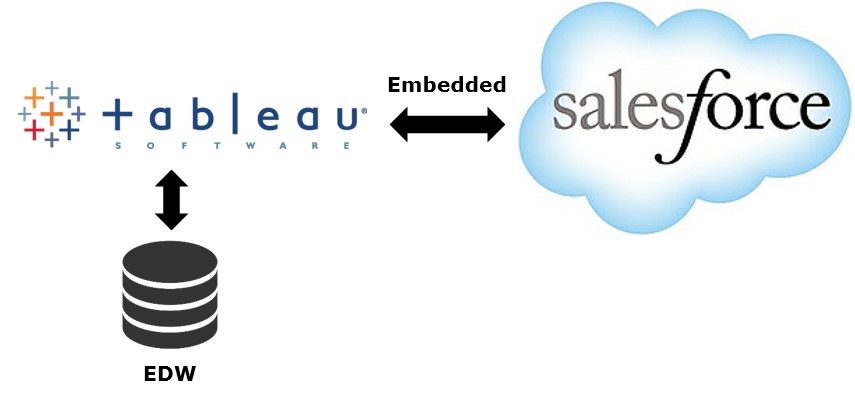
This method takes advantage of the flexibility offered by Tableau with the URL parameters and the facility to embed Tableau in an iframe. Also, Salesforce allows us to create some flexible objects with Apex programming language. Now we are going to explain the procedure for integrating Tableau with Salesforce in four quick and easy steps. Take into account that these actions need to be done in the dev version of Salesforce (sandbox) and then deploy it to production.
Step 1 – Tableau dashboard
Create a dashboard in Tableau and publish it to the server. This Dashboard has to be filtered with an available field in Salesforce. For instance, the ID for a certain account can be the perfect candidate if you are sure that exists in the EDW and in Salesforce. Once published, the URL provided by Tableau Server will be useful in the next step.
Step 2 – Visualforce page
Create a Visualforce Page in Salesforce:
This part can seem scary if you are not used to Salesforce development, but following this step by step guide can help you without needing previous knowledge in this area. All that is necessary to do this is to access the developer console in the sandbox environment.

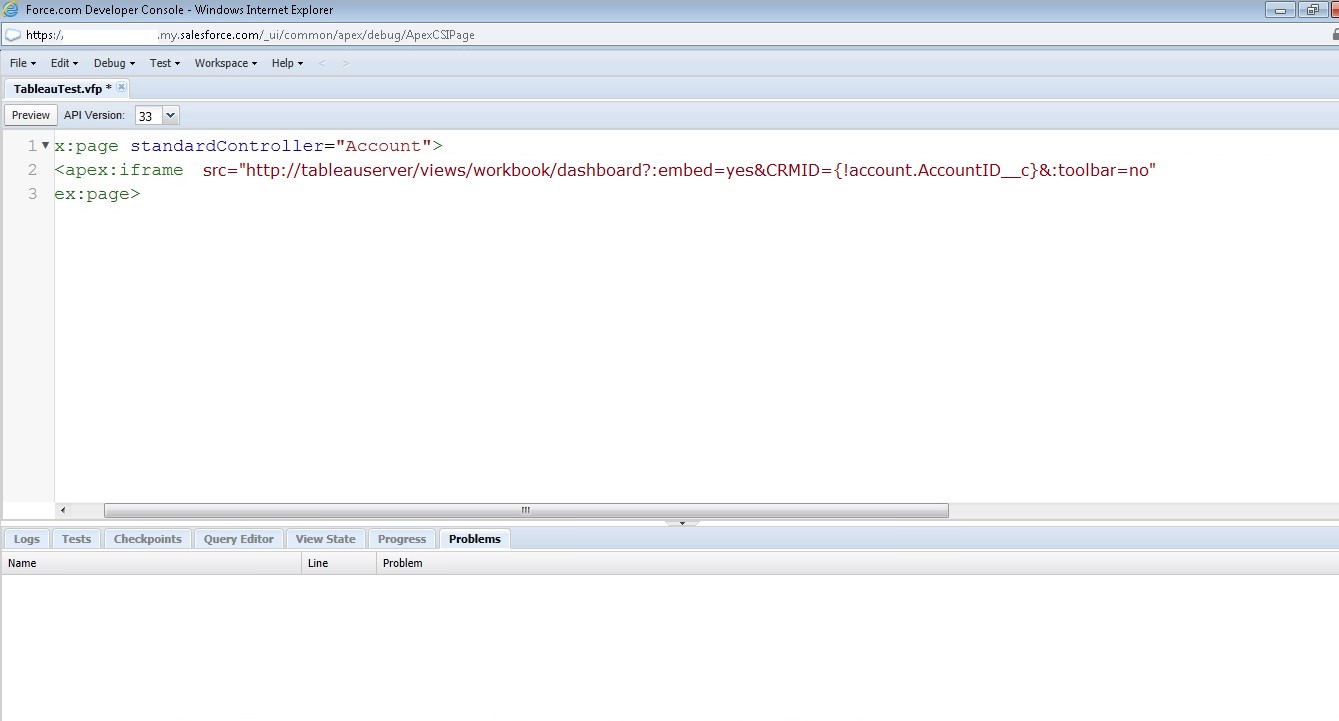
Once inside the developer console is time to add the apex code below. The URL copied in the previous step needs to replace the red one. The filtering field in Tableau must replace the blue variable and the ID field of Salesforce replaces the green one. Name it and save it as a visualforce page.
<apex:page standardController=”Account”>
<apex:iframe src=”http://tableauserver/views/workbook/dashboard?:embed=yes&CRMID={!account.AccountID__c}&:toolbar=no”
height=”1110px” width=”1160px” scrolling=”true”/>
</apex:page>
Now we are going to analyse the relevant parts of this code:
- <apex:iframe – apex code to create an iframe where the Tableau dashboard will appear.
- http://tableauserver/views/workbook/dashboard – URL of the published dashboard in Tableau server.
- ?:embed=yes – parameter to embed the dashboard into the iframe.
- &CRMID={!account.AccountID__c} – part of the URL to filter the view. CRMID is the field used in Tableau and has to be set as a filter in the dashboard. !account.AccountID__c is the ID of the accounts used in Salesforce. Both fields have to be common.
- &:toolbar=no – Parameter to hide the toolbar.
- height=”1110px” width=”1160px” – height and width of the iframe. It is advisable to be the same as the Tableau dashboard (unless using automatic size).
- scrolling=”true” – enables the option of having a scroll in case it does not entirely fit.
The console will look like this:
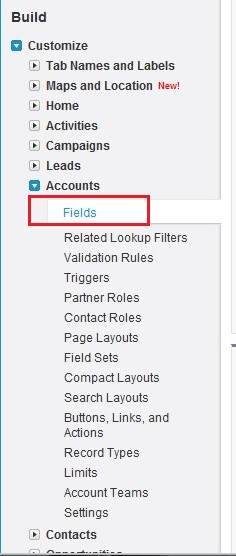
(!) The common fields for which Tableau has to filter have to be defined in {!account.AccountID__c} section of the code. To detect the proper name of the Salesforce field it is advisable to go to the fields section just to ensure that you are picking the correct name and not the alias that is used in the view.
Step 3 – Create Salesforce section
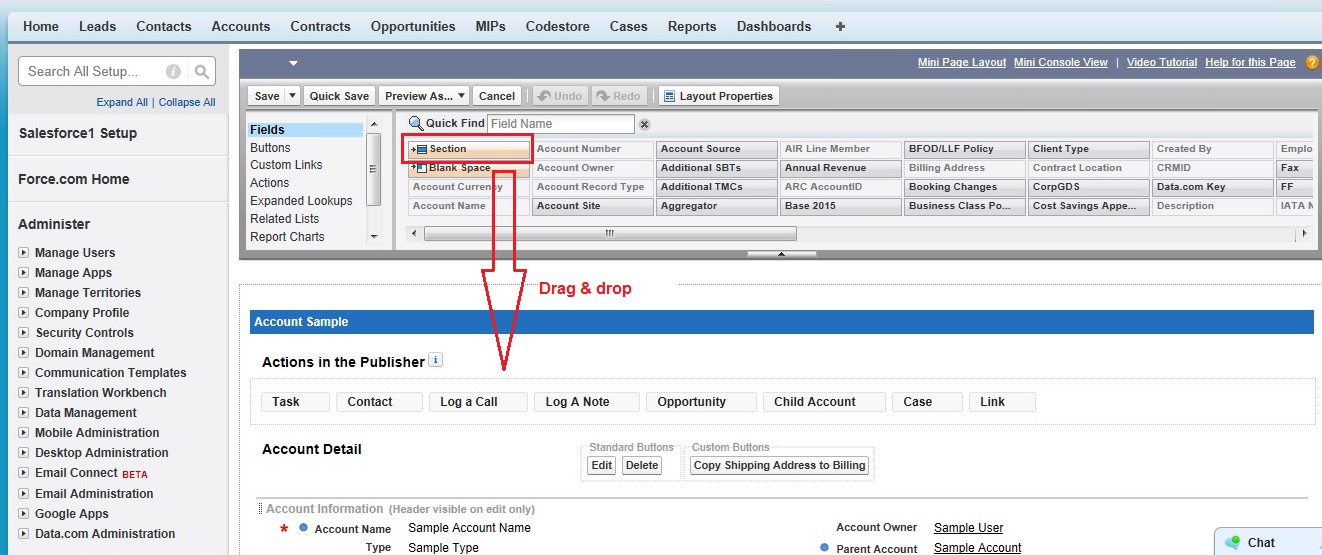
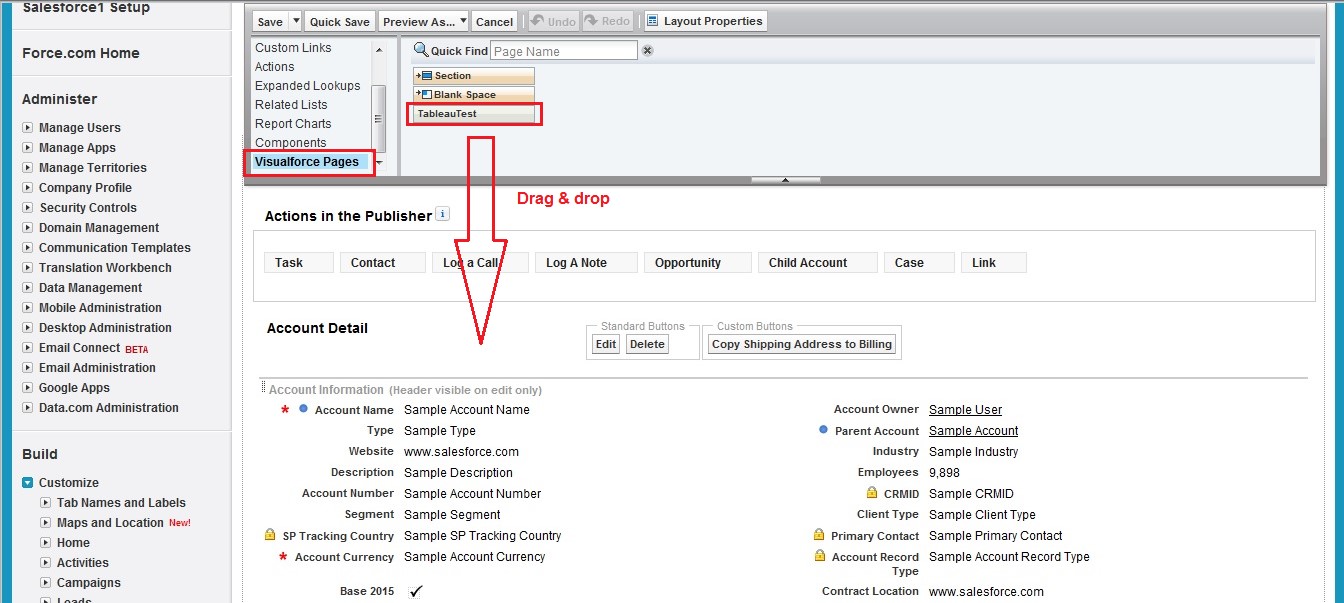
To create a section to place the Tableau dashboard you will have to edit the page layout. To enter the editor mode press the “Edit Layout” link.

Afterwards, drag and drop the section object to the desired emplacement and name it.
Step 4 – Add Visualforce page
The next step consist in drag and drop the Visualforce page that we have created in step 2 to the “Tableau Reporting” section added in step 3.
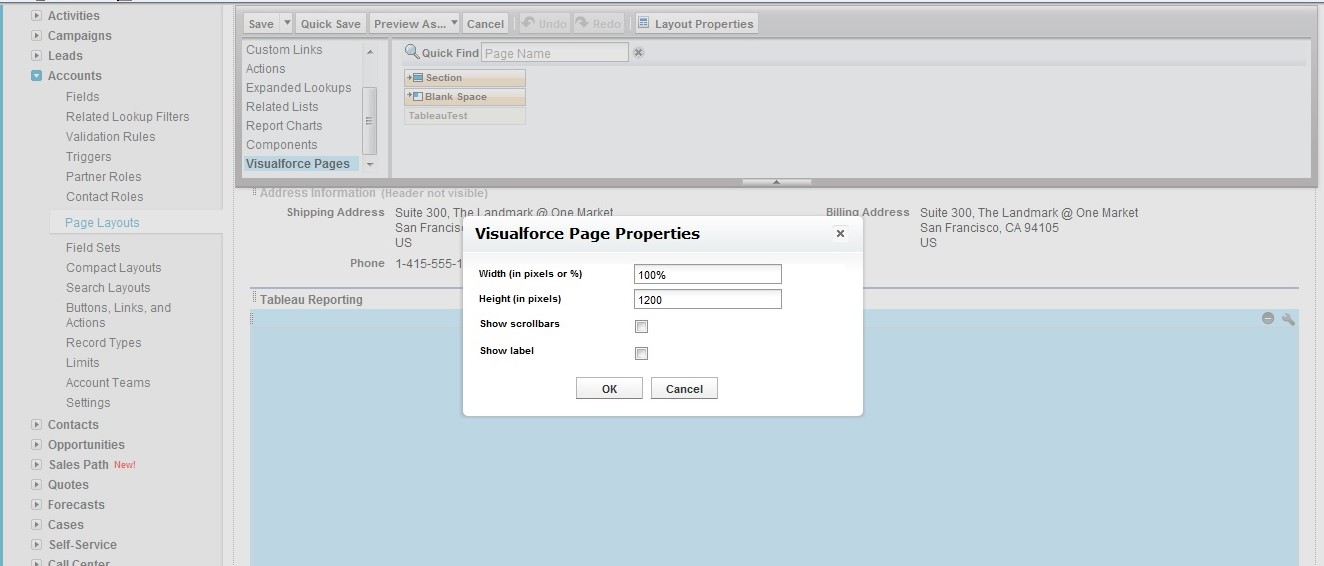
Once added, it is possible to edit the dimensions of the Visualforce page pressing the settings button.
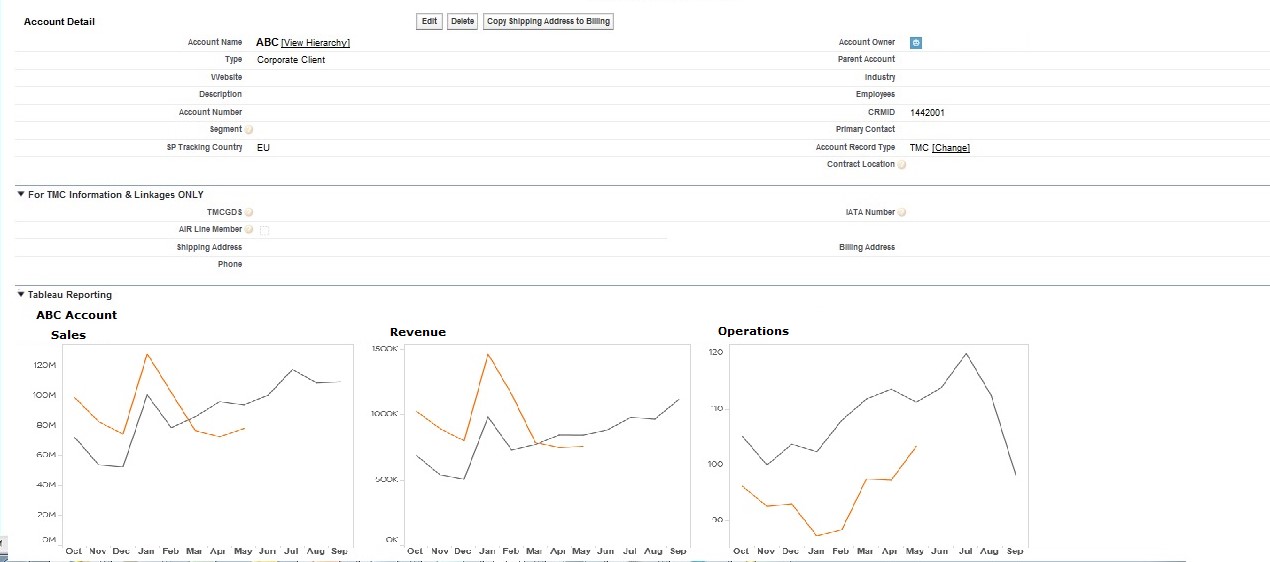
Finally, you will have to save the layout and the Tableau report will appear in your account view filtered by the account that you are visualizing. Each time that you change the account in Salesforce the Tableau report will also change. The final result will look something similar to this:
Enjoy your integration!