15 Oct 2026 Git Integration in Microsoft Fabric: A Practical Guide to Branch Out
In this blog post, we’ll explore how to use the Branch Out feature in Microsoft Fabric when developing new features or making changes to existing workspaces.
We’ll walk through a simple, end-to-end example:
- Create a feature workspace using Branch Out and select only the items we need.
- Make changes in the isolated feature workspace.
- Commit the changes and raise a pull request (PR) in Azure DevOps.
- Merge the changes back into the main development branch.
This approach is especially useful when multiple developers are working on the same workspace. It allows each developer to isolate their changes in a dedicated workspace, reduces conflicts, provides a safer testing environment, and makes it easier to follow a proper Git-based development workflow.
Prerequisites
To follow this use case, you’ll need:
- A Microsoft Fabric capacity and an existing workspace already connected to the main branch of a Git repository.
- An Azure DevOps project with a Git repository connected to the workspace (a Basic licence is required to use Azure Repos).
- Sufficient permissions on the Fabric workspace: To perform a Branch Out, you must have the required permissions to create and configure the new workspace or use a Branch workspace admin profile.
Architecture Overview
The diagram below illustrates the overall development flow we’ll follow in this example:
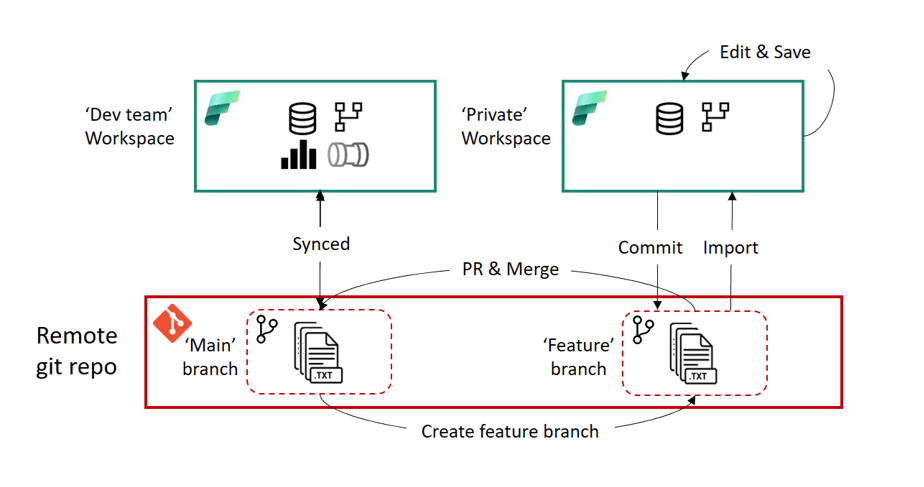
Figure 1: Architecture overview. Source: Microsoft documentation
- The Dev workspace is connected to the main branch and stays in sync with it.
- When we branch out, Fabric creates a new feature branch and a corresponding branch workspace.
- We make and test our changes in the feature workspace, then commit them to the feature branch.
- Finally, we create a pull request, merge the changes into the main branch, and then update the Dev workspace.
This pattern allows developers to work in isolation whilst still following a controlled Git-based promotion process.
Use Case
For this proof of concept, we created a new workspace connected to a Git repository containing the following basic items:
- A lakehouse with schemas enabled.
- A data pipeline that copies sample data from the Retail Data Model (Wide World Importers) into the bronze schema of the lakehouse.
- A notebook that performs transformations on the extracted data and saves the resulting tables in the gold schema of the lakehouse.
Dev Workspace Overview
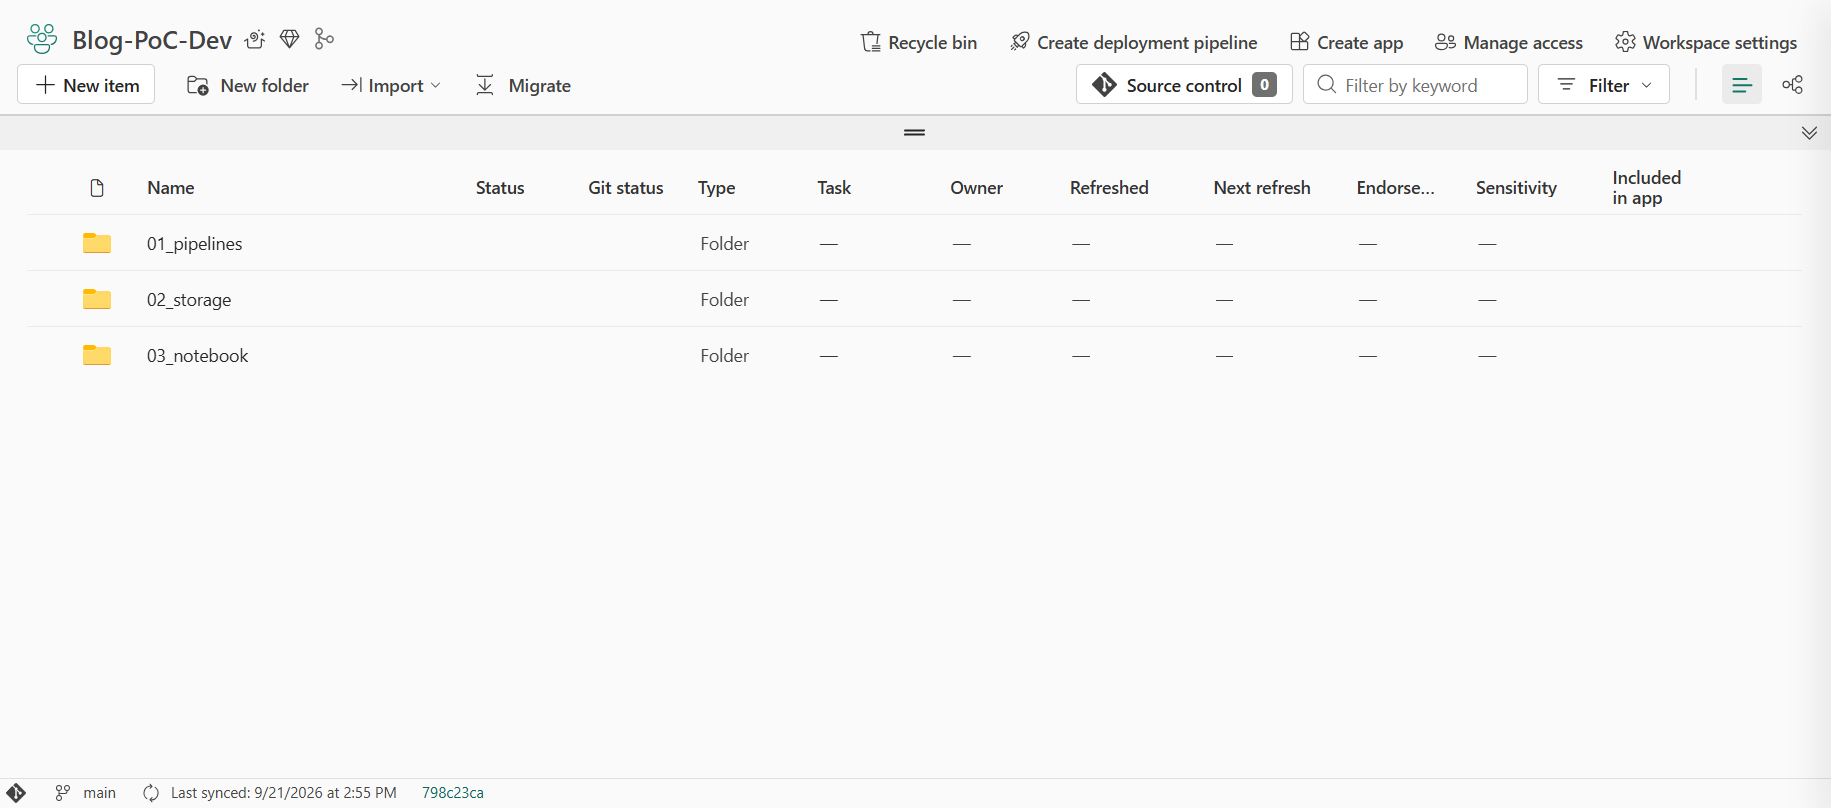
Figure 2: Dev workspace
Lakehouse Content
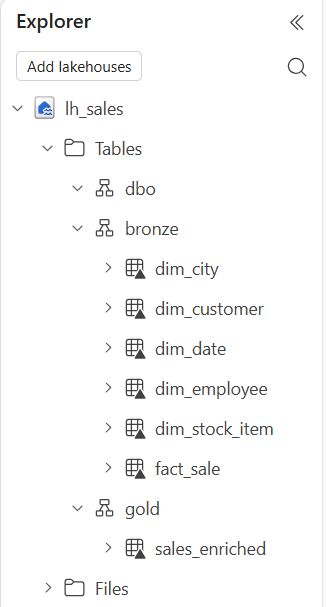
Figure 3: lh_sales content
Notebook Code
The notebook reads the data from the bronze schema, applies a few simple transformations (adding year and month columns, a high-value flag, and a profit margin), and writes the result to the gold schema:
# Fabric Notebook - Bronze to Gold transformation
# Lakehouse attached as the default lakehouse
import pyspark.sql.functions as F
# =====================================================
# 1. Read from Bronze
# =====================================================
df_sales = spark.read.table("bronze.fact_sale")
df_customer = spark.read.table("bronze.dim_customer")
# =====================================================
# 2. Transform
# =====================================================
sales_enriched = (
    df_sales.alias("sales")
    .join(
        df_customer.alias("customer"),
        F.col("sales.CustomerKey") == F.col("customer.CustomerKey"),
        "left"
    )
      .select(
          F.col("SaleKey").alias("sale_key"),
          F.col("Customer").alias("customer_name"),
          F.col("BuyingGroup").alias("buying_group"),
          F.col("InvoiceDateKey").alias("invoice_date"),
          F.col("Quantity").alias("quantity"),
          F.col("TotalExcludingTax").alias("total_amount"),
          F.col("Profit").alias("profit")
      )
      .withColumn("year", F.year("invoice_date"))
      .withColumn("month", F.month("invoice_date"))
      .withColumn("is_high_value", F.when(F.col("total_amount") > 1000, True).otherwise(False))
      .withColumn("profit_margin", F.round(F.col("profit") / F.col("total_amount") * 100, 2))
      .filter(F.col("quantity") > 0)
)
# =====================================================
# 3. Write to Gold
# =====================================================
sales_enriched.write.format("delta").mode("overwrite").option("overwriteSchema", "true").saveAsTable("gold.sales_enriched")
Important Notebook Configuration
One important notebook configuration is the Git binding option for the lakehouse.
By default, a notebook retains a reference to the lakehouse in the source (Dev) workspace. With the Git binding option enabled, Fabric automatically rebinds the notebook to the new lakehouse created in the feature workspace during the Branch Out process, ensuring that the notebook works correctly in isolation instead of still pointing to the original lakehouse. To learn more about how auto-binding between workspaces works, please refer to the official documentation.
For this PoC, we selected the Lakehouse in new workspace option. As the lakehouse data is not copied when branching out, we’ll rerun the pipeline once the Branch Out process has been completed:
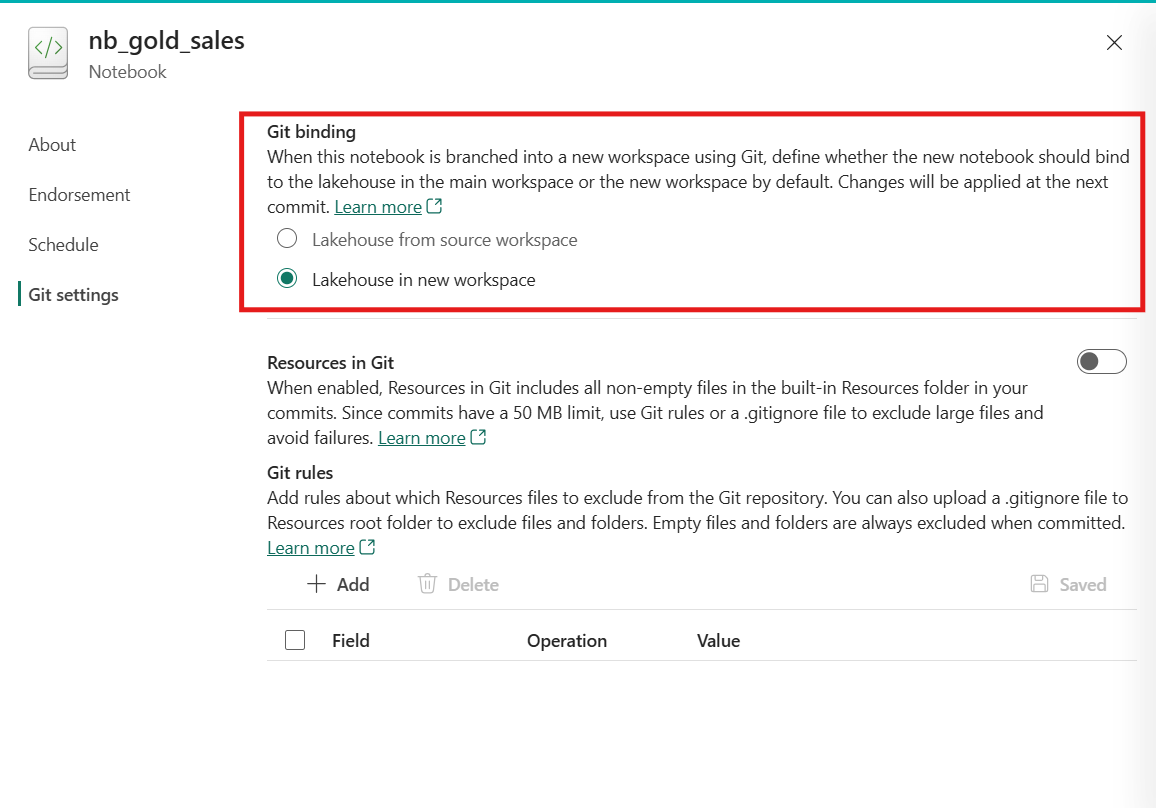
Figure 4: Git setting in the notebook settings
All the items described above have already been committed to the main branch, so the Dev workspace is fully in sync with the Git repository.
Branch Out
Now that the baseline items are ready and committed to the main branch, the next step is to create an isolated environment using the Branch Out feature. To do so, you need sufficient permissions, as Fabric performs several privileged actions behind the scenes: creating a new workspace, assigning it to a capacity, connecting it to the Git repository, and adding members to the new workspace.
However, Fabric provides a Branch workspace admin profile (currently in Preview), which can be configured by a workspace admin. Once set up, other users can use it during the Branch Out process if they do not have the required permissions:
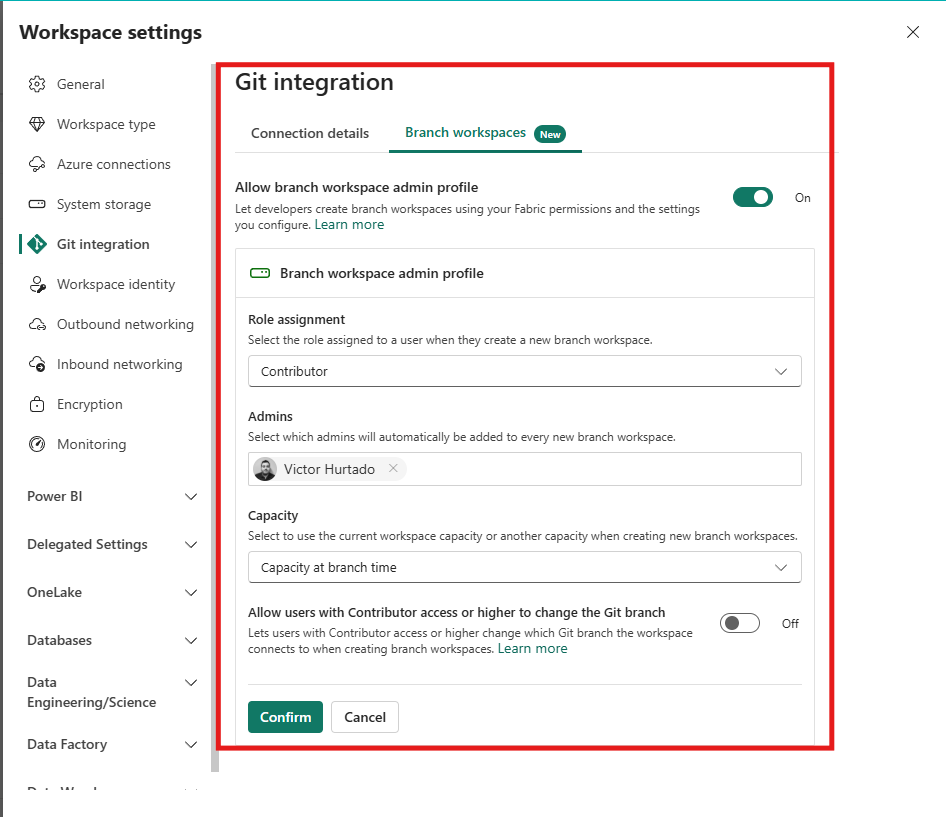
Figure 5: Branch workspace admin profile setting
In the Branch Out dialog, when creating a new workspace, you’ll see the Branch workspace admin profile option. If a profile has been configured, this option can be enabled so that the operation runs under the admin profile instead of the current user’s permissions.
Let’s start the process:
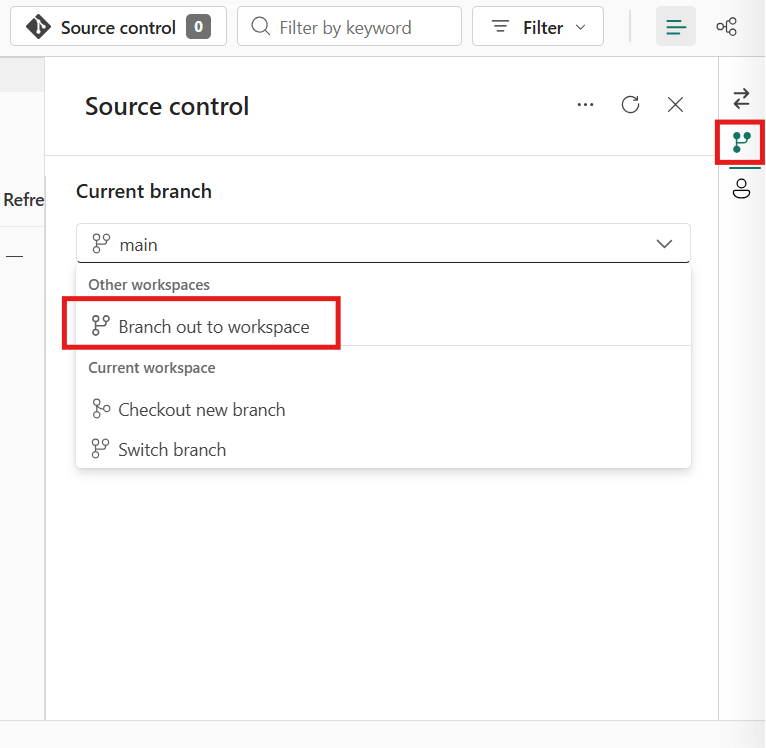
Figure 6: Branch out to workspace
- Open the Source control pane in the Dev workspace.
- Click on Branch out.
- Choose to create a new workspace.
- Name the feature workspace and branch. For this PoC we used:
- Workspace: Feature-EnhanceNotebook
- Branch: feature/EnhanceNotebook
- Specify whether to use a Branch workspace admin profile (in this example we didn’t, as we already have the Admin role in the source workspace).
Select the items to include; we included all three items (lakehouse, pipeline, and notebook) and didn’t use selective branching. If you choose to select items individually, Fabric will warn you when an item has dependencies that also need to be included (for example, a lakehouse that is attached to a notebook).
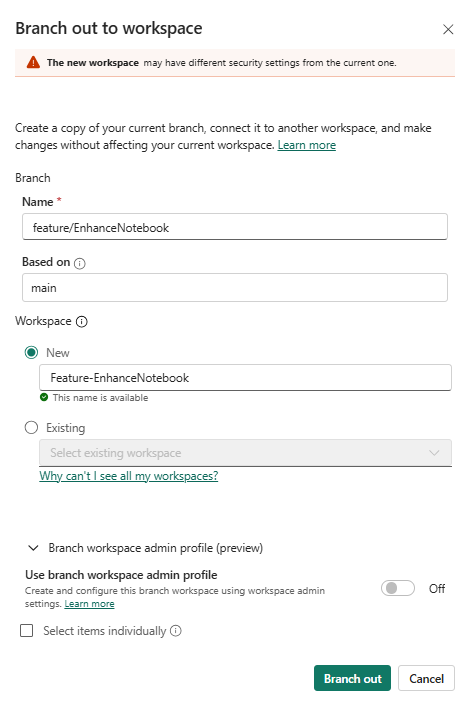
Figure 7: Branch out to workspace settings
Once the process is complete, the new workspace has been created and synchronised with the feature branch.
Because no data is copied during Branch Out, we reran the pipeline once in the feature workspace to load the sample data. Fabric automatically bound the destination lakehouse in the Copy activity to the lakehouse in the feature workspace.
Note: Some settings are not carried over to the new workspace. For instance, the main development workspace was using Spark Runtime 2.0, but the feature workspace was created with the default Runtime 1.3. Check and reapply any custom settings that need to be preserved.
You can also verify the relationship between the workspaces in the UI:

Figure 8: Relationship between the main and feature workspaces
Making changes in the feature workspace
We made two small changes to the notebook:
- Changed the is_high_value threshold from 1000 to 1500.
- Added a new column called update_time using current_timestamp().
After making the changes, we committed them using the Source control pane:
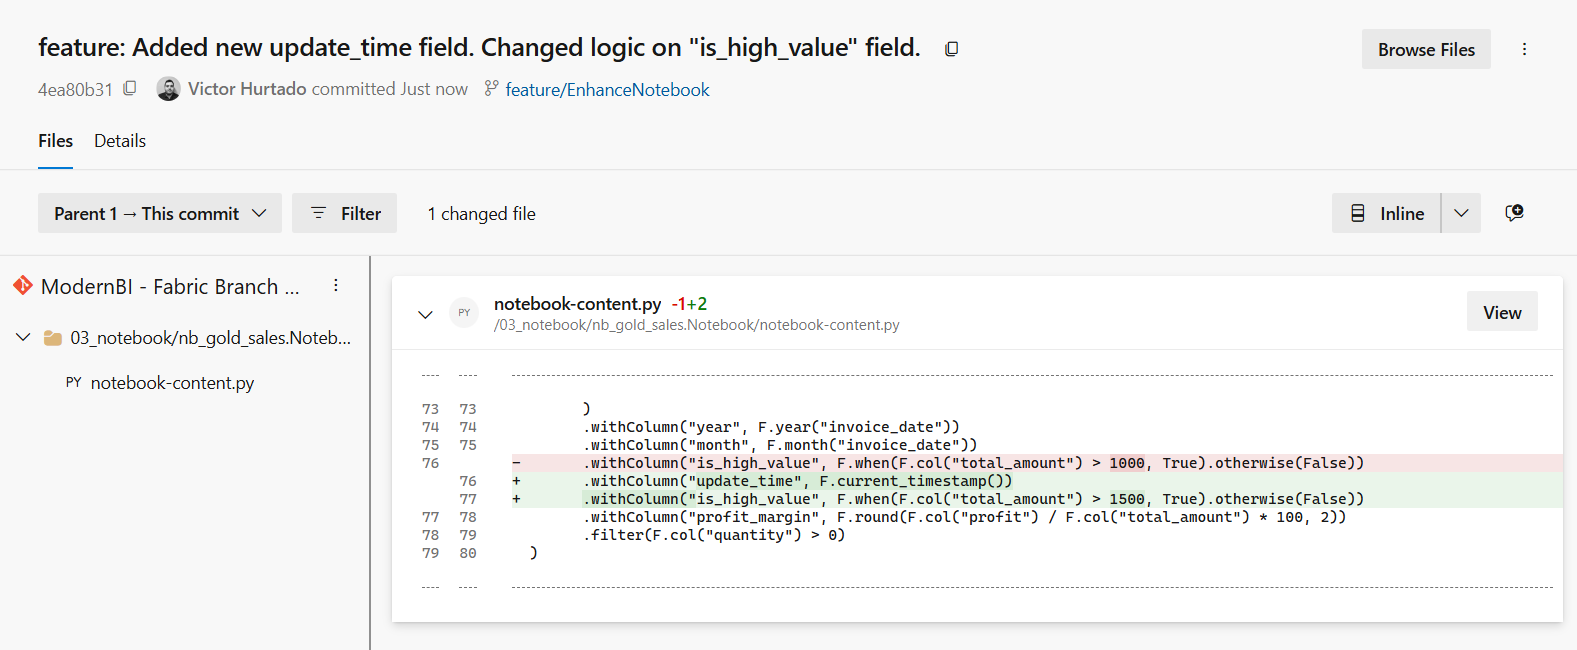
Figure 9: Commit in Azure DevOps
Creating the Pull Request in Azure DevOps
Once the changes have been committed to the feature branch, the next step is to create a PR to merge them into the main branch:
- Go to the Azure DevOps project and open the repository.
- Go to Pull requests and click on New pull request.
- Set the following:
- Source branch: feature/EnhanceNotebook
- Target branch: main
- Add a title, such as “Update high-value threshold and add update_time column”, and a description.
- Add reviewers if needed.
- Create the PR.
After the PR has been created, you (or a reviewer) can review it. In this example the changes are simple, so we can go ahead and complete the PR.
Once the PR has been merged, the changes are part of the main branch in Azure DevOps:
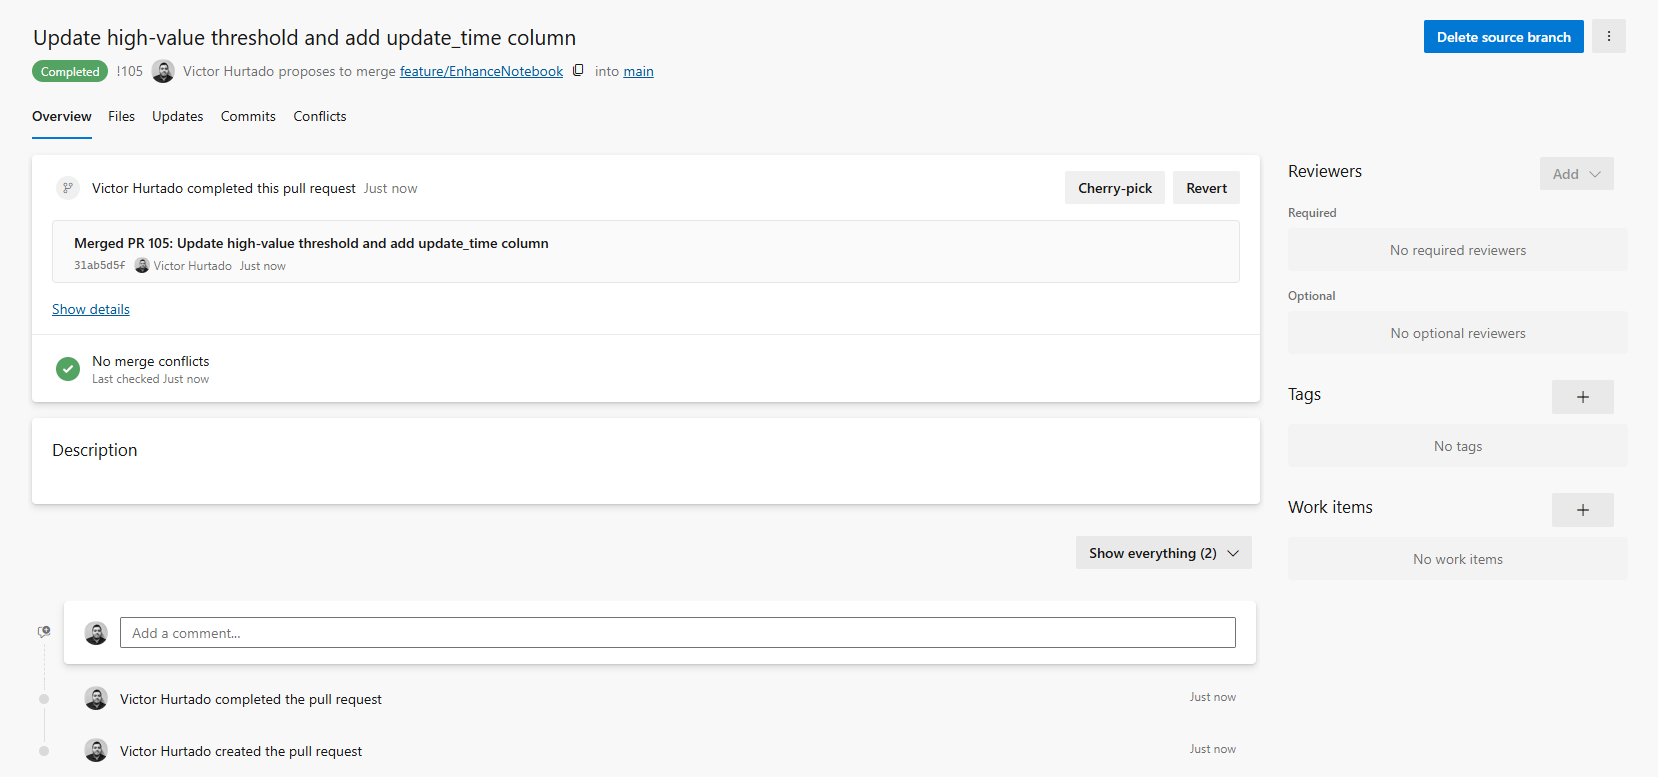
Figure 10: Completed pull request
Updating the Dev Workspace in Fabric
After the PR has been merged into the main branch, the Dev workspace must be updated with the latest changes:
- Go back to the original Dev workspace in Fabric.
- Open the Source control
- The pane shows that there are incoming updates from the main branch.
- Click on Update.
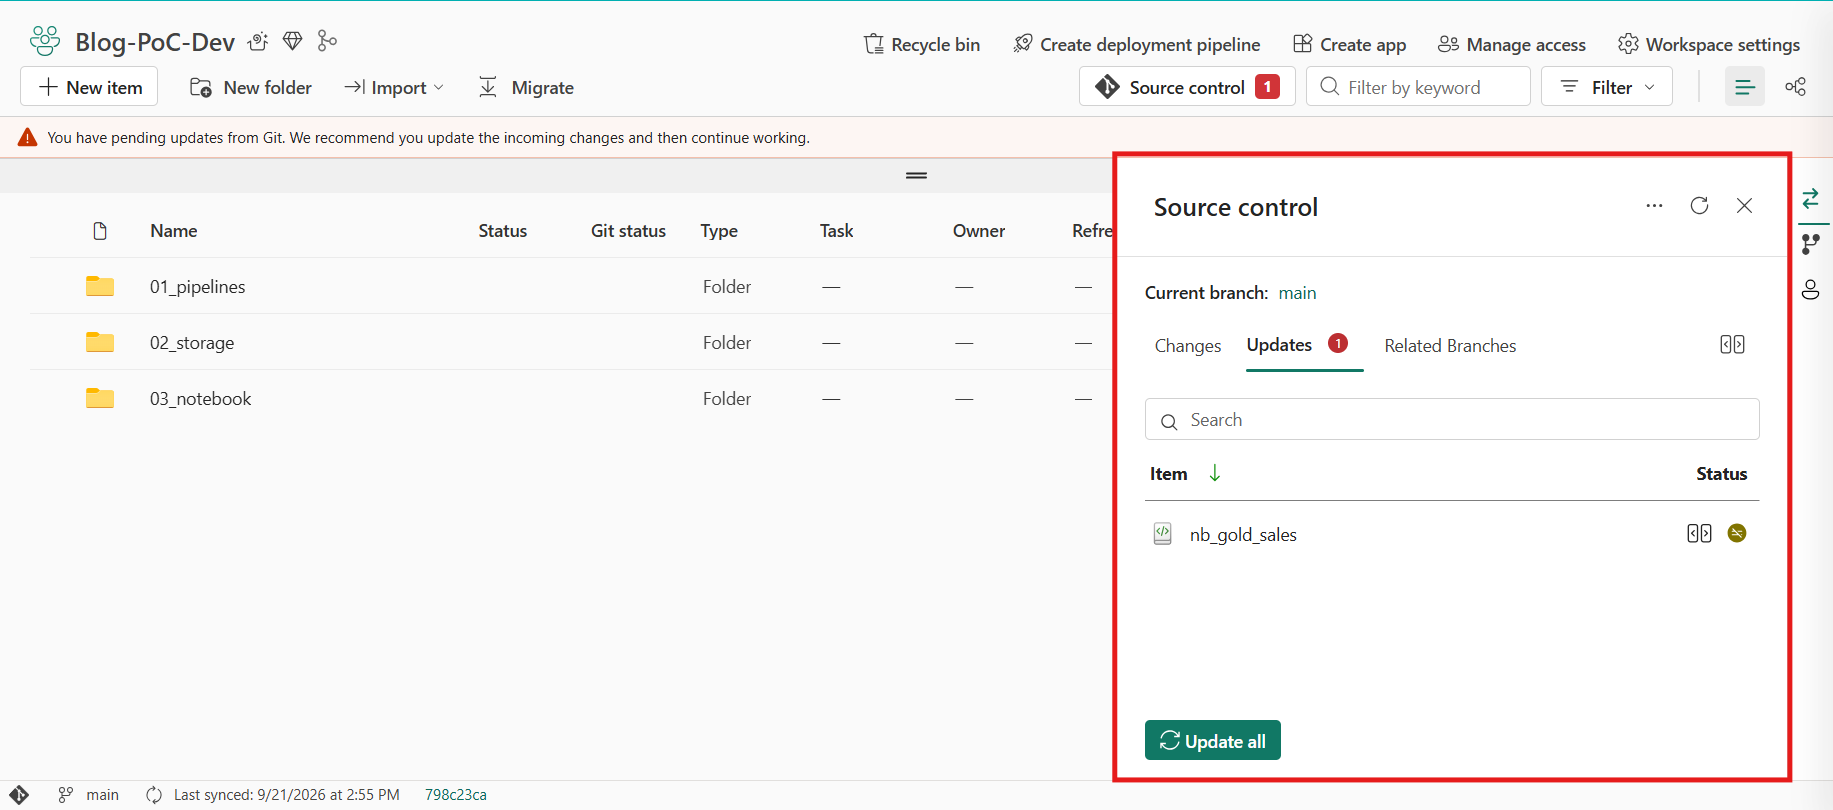
Figure 11: Source control detects that there are incoming updates from the main branch
Once the update is complete, we can open the notebook and verify that the two changes are now present.
At this point, the full cycle is complete:
Dev workspace (main) → Branch Out → Feature workspace → Commit → PR → Merge → Update Dev workspace
Conclusion
Branch Out is a powerful feature that brings established Git-based development practices into Microsoft Fabric.
By creating isolated feature workspaces, developers can safely experiment and make changes without affecting the shared Dev environment. Combined with pull requests in Azure DevOps, this approach provides a clear and controlled promotion path for changes.
Whilst some details (such as data not being copied and certain workspace settings not being inherited) require attention, the overall workflow is straightforward and works well for collaborative development.
Whether you’re taking your first steps in Microsoft Fabric or refining your CI/CD pipelines, ClearPeaks is here to guide your team. Reach out to our experts to learn how we can help to establish solid engineering practices, optimise your Fabric architecture, and ensure fast, reliable analytics delivery.