21 Aug 2014 Tableau – Salesforce Integration
In this blog post, Tableau – Salesforce Integration, we will see how we can connect a Tableau workbook to our Salesforce environment in order to retrieve real time data from our hosted database. Note that this connector is going to work both for standard or custom cloud-based solutions using the Force.com platform. The process steps to follow are:
1 Select the Salesforce connector
2 Enter the connection details
3 Choose and define the connection type to extract data
3.1 Standard
3.2 Single Table
3.3 Multiple Tables
4 Name the connection
Let’s see the above steps in more detail.
1. Select the Salesforce connector
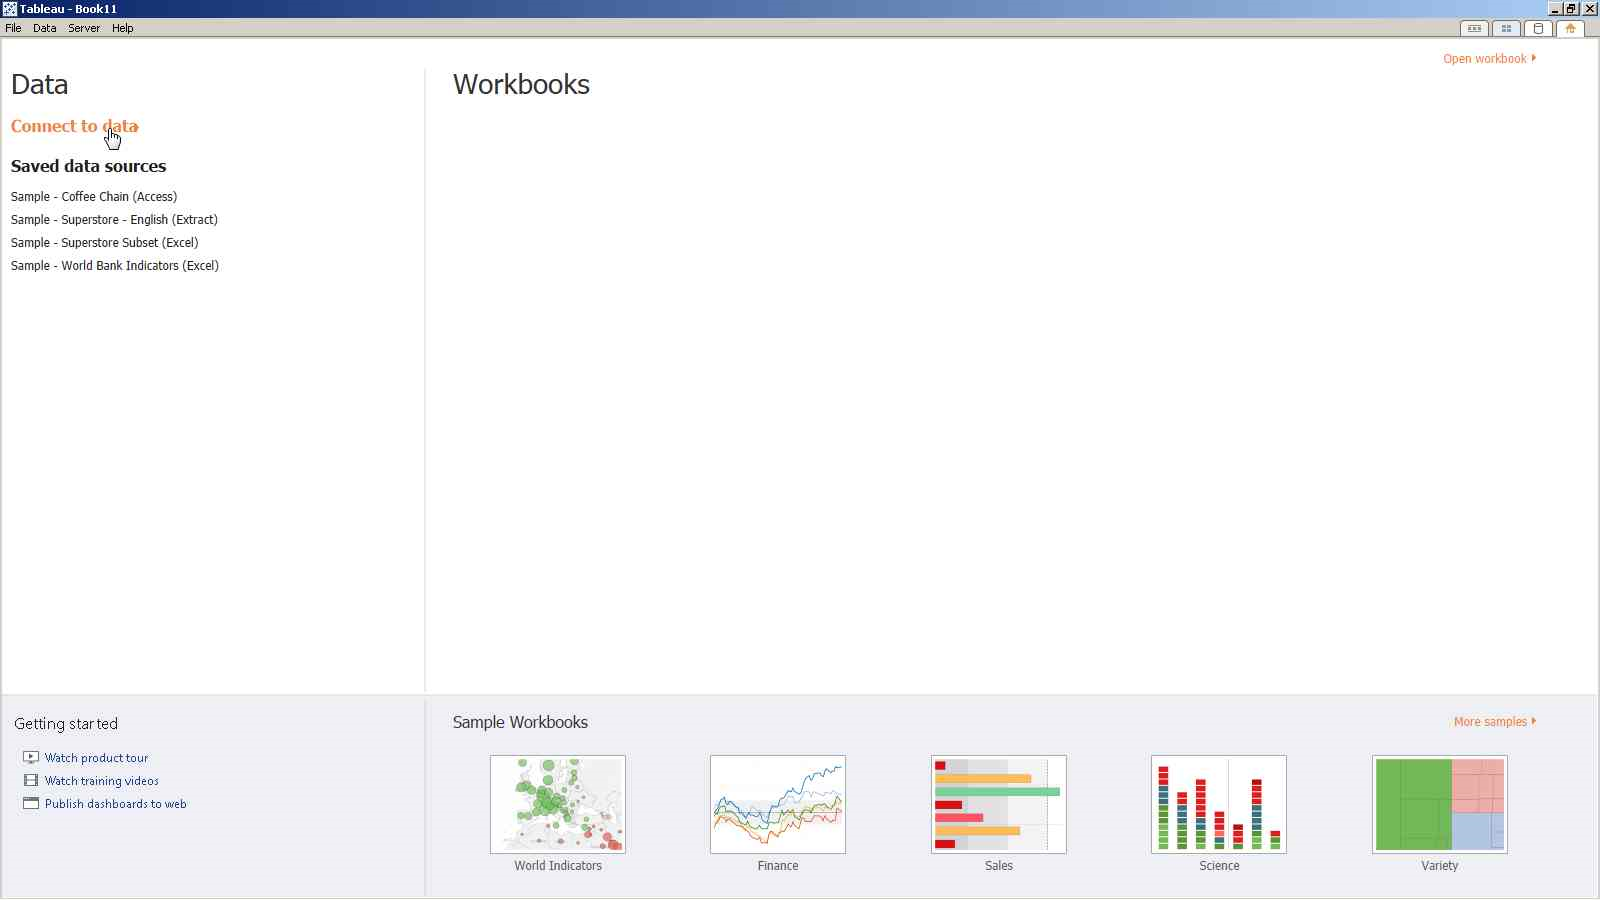
The connection to Salesforce is done using a data connector available in Tableau. So there is no need to install any third party tool or driver. To select the Salesforce connector, from the initial Tableau screen, click on “Connect to data”.
Then, on the left pane, under “Connect” “On a server”, click on “Salesforce”.
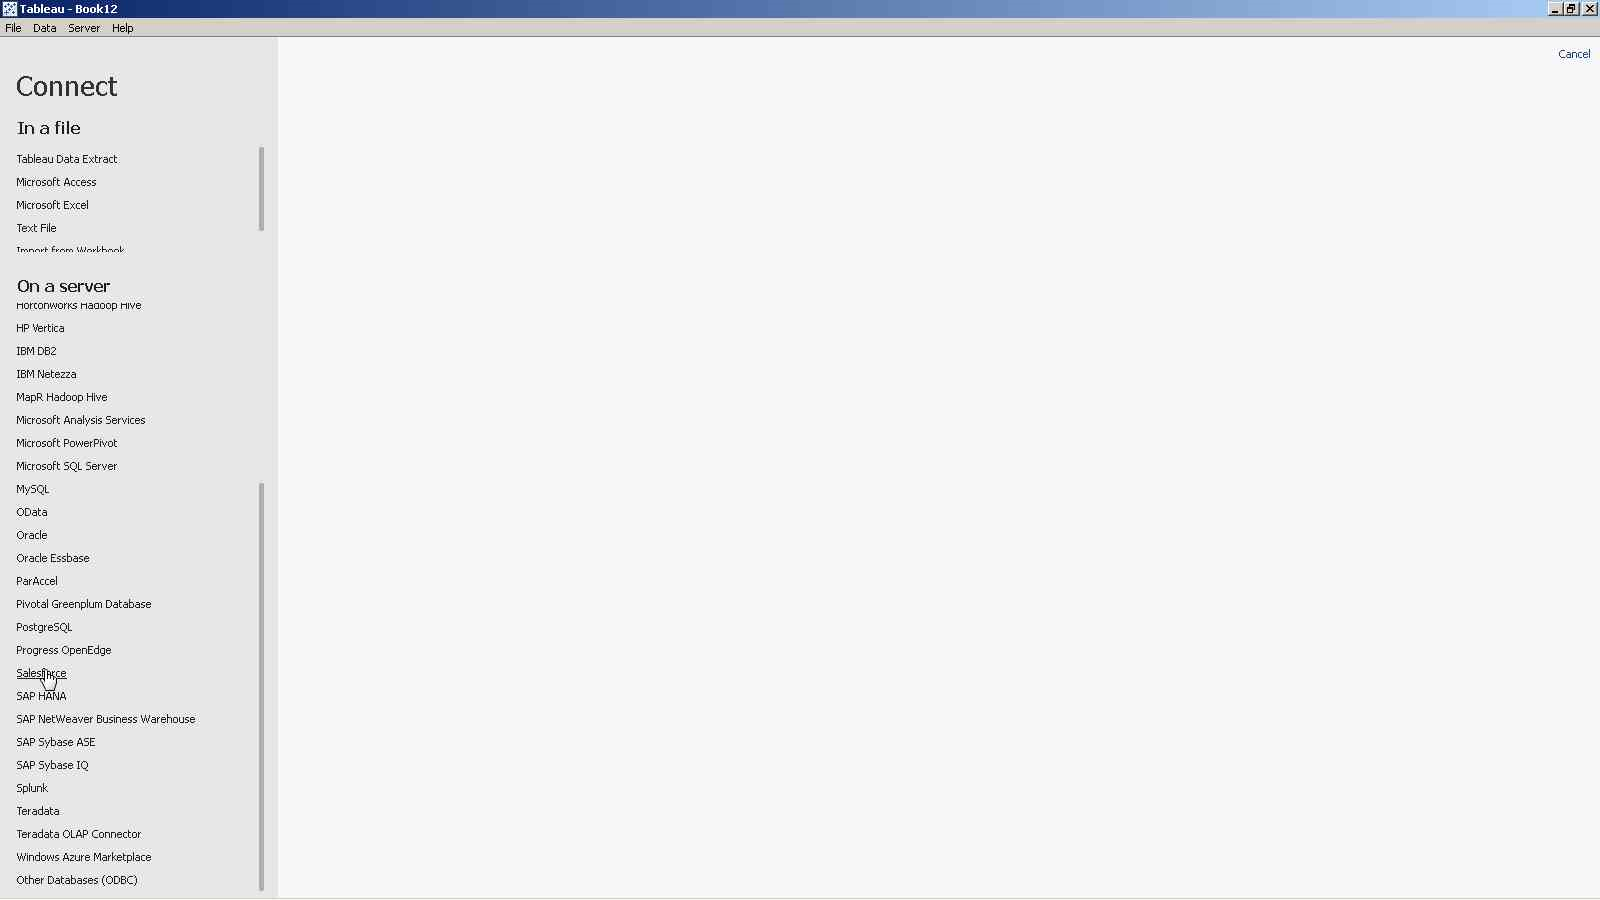
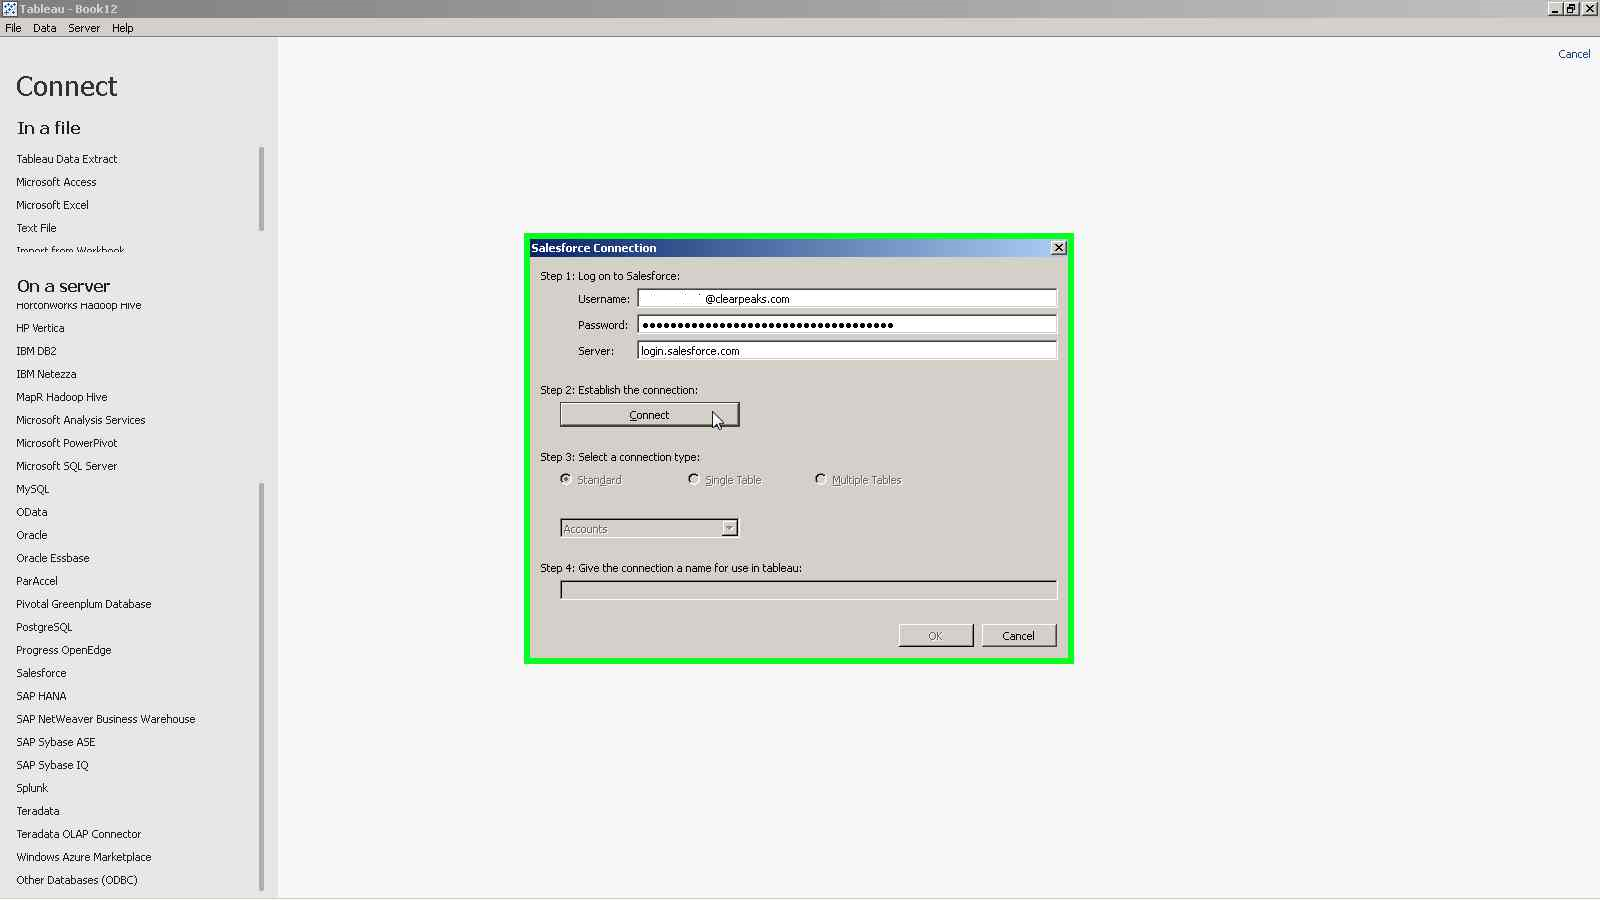
This will pop up the “Salesforce Connection” dialog.
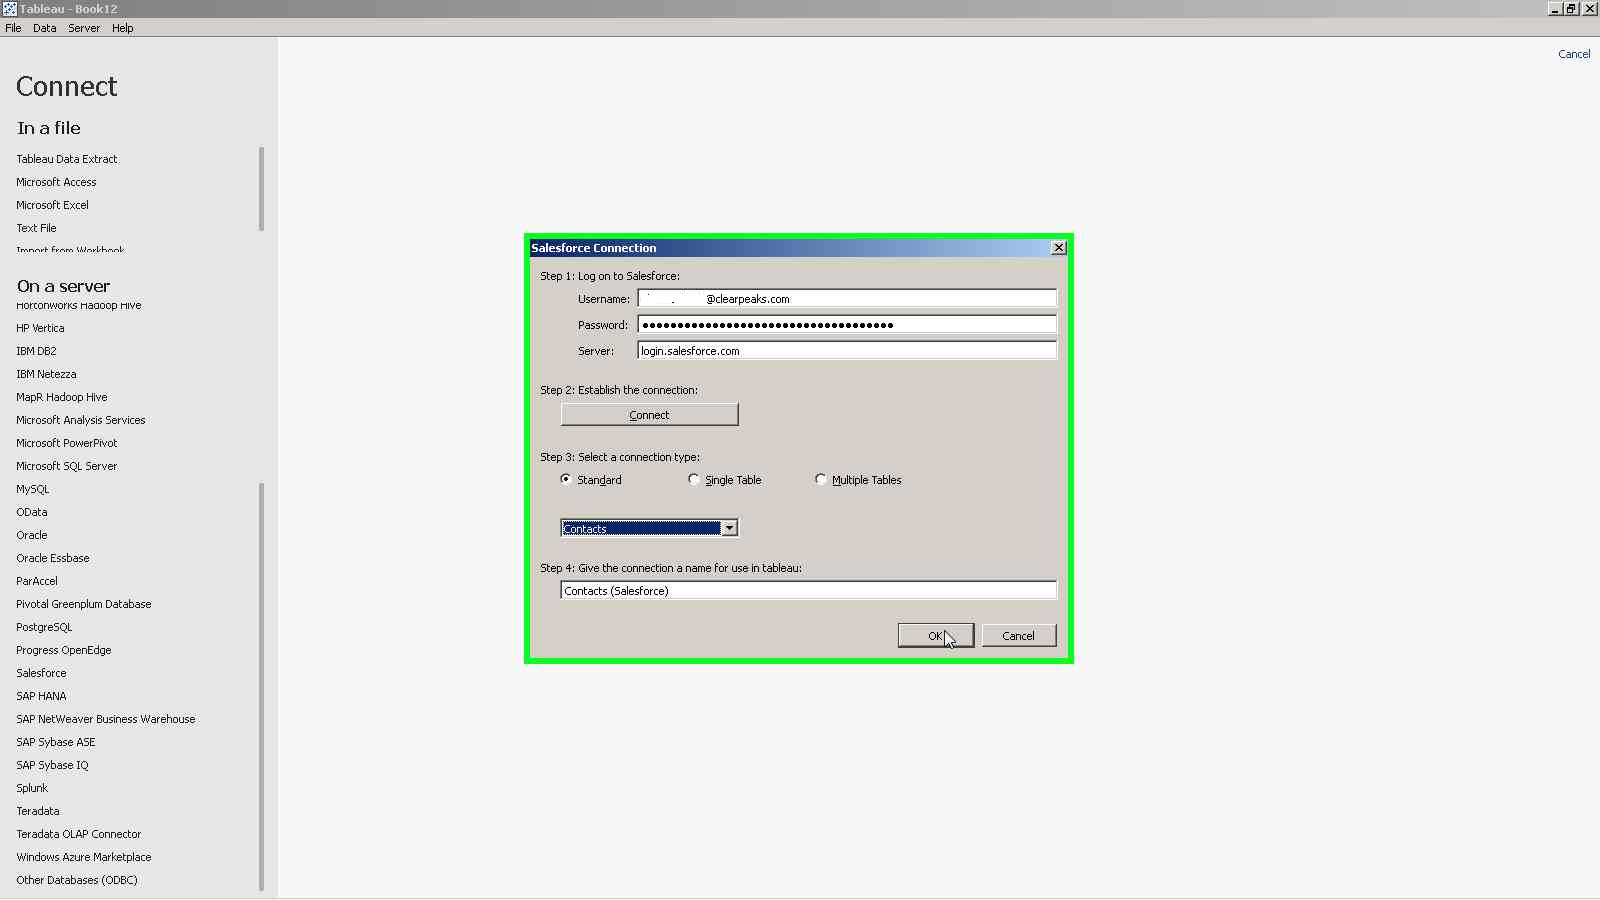
2. Enter the connection details
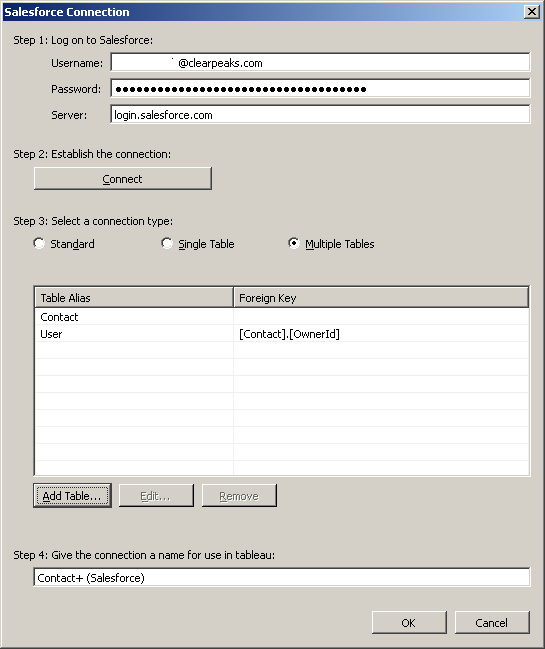
In the “Salesforce Connection” dialog we need to fill in the connection details to our Salesforce.com environment as follows:
- Username: Our Salesforce.com username.
- Password: Our Salesforce.com password concatenated to our Salesforce.com security token*. For example, if your password is “1234567890” and your security token is “5XEBsSpC8LcnrDaTTqUnOcikc”, you should type in “12345678905XEBsSpC8LCnrDaTTqUnOcikc”.
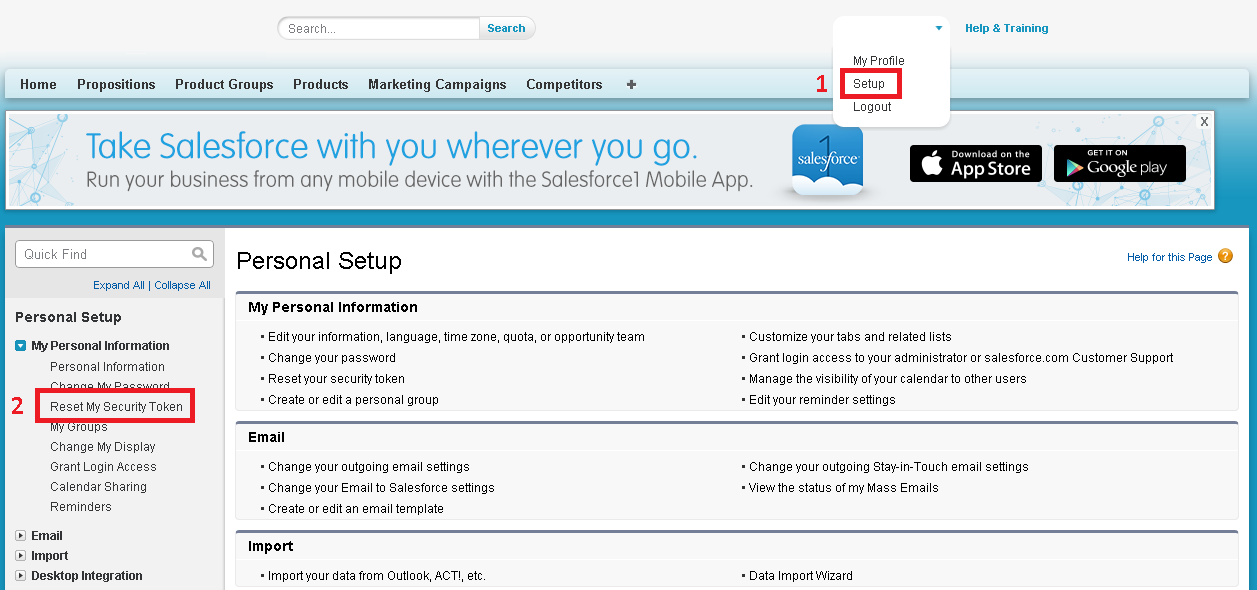
*: In order to obtain your Salesforce.com security token, from Salesforce you need to:
1 Click on the “Setup” option in the drop down next to your username.
2 Click on “Reset My Security Token” in the “Personal Setup” page, “My Personal Information” section.
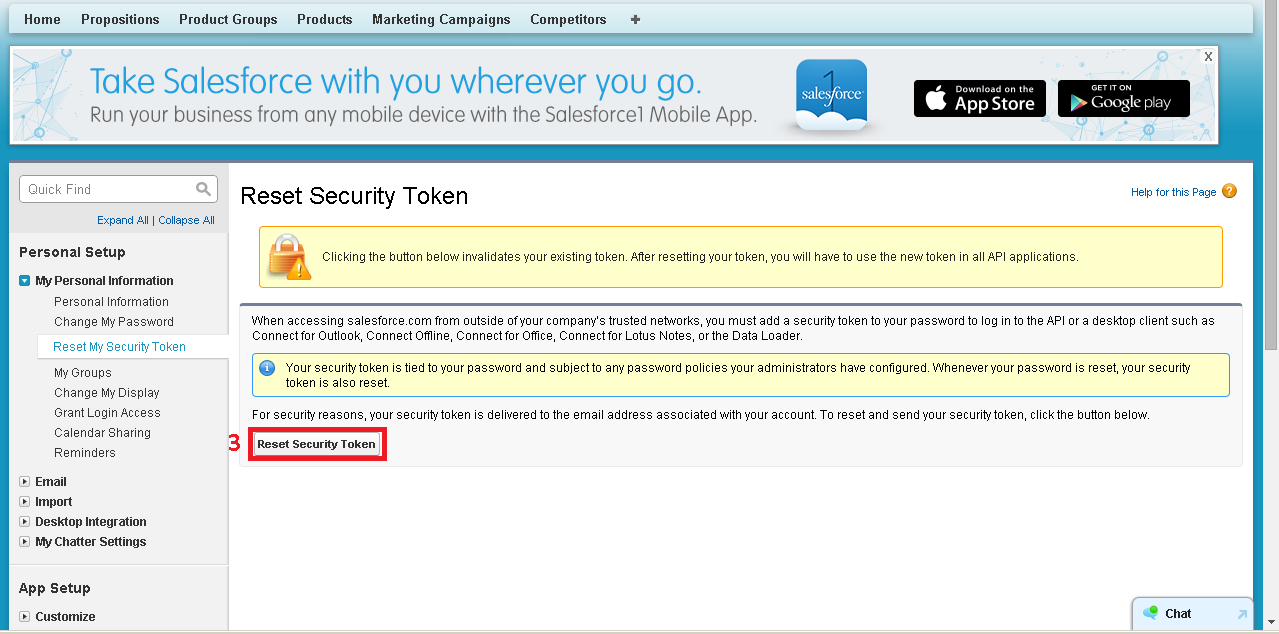
3 Click on the “Reset Security Token” button.
When you have filled in the details, click on the “Connect” button.
3. Choose and define the connection type to extract data
Once connected, you will need to choose how you want to extract the data from the Salesforce.com database. The three available options are:
- Standard
- Single Table
- Multiple Tables
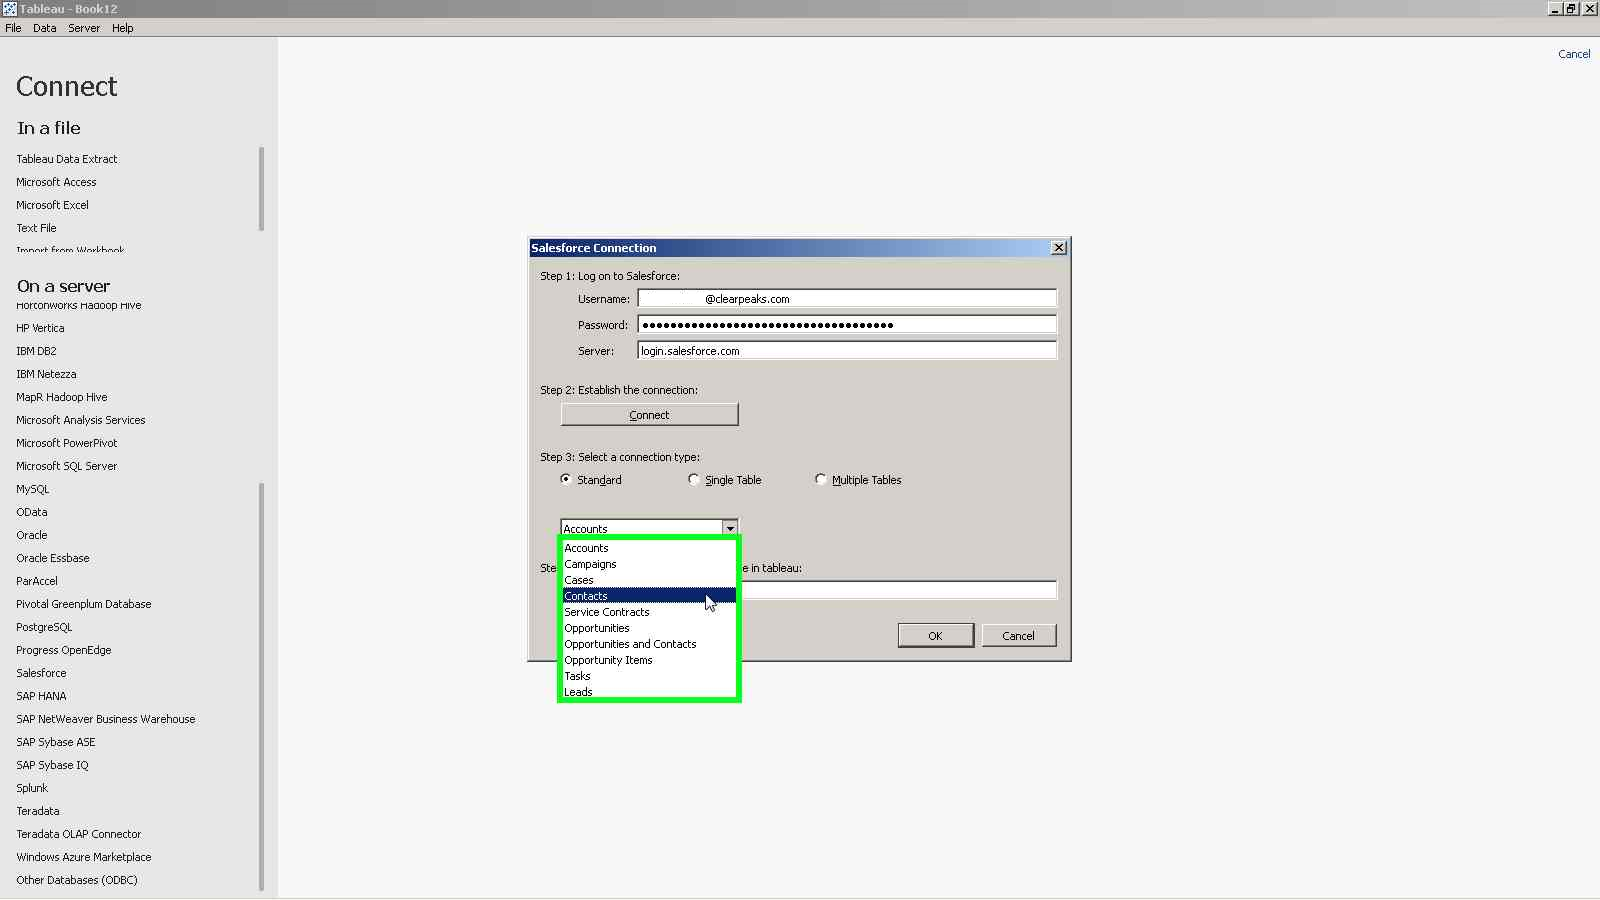
3.1. Standard
The standard connection type is used to simplify the connection to the data. It includes multiple predefined business areas with preconfigured joins. The main benefit of this connection type is that the user doesn’t need to know the data model supporting the data. Tableau comes with the following standard connections:
- Accounts
- Campaigns
- Cases
- Contacts
- Service Contracts
- Opportunities
- Opportunities and Contacts
- Opportunity Items
- Tasks
- Leads
In order to select a standard connection, just select the Standard option in the Connection Type radio button and select a connection. For instance, “Contacts”.
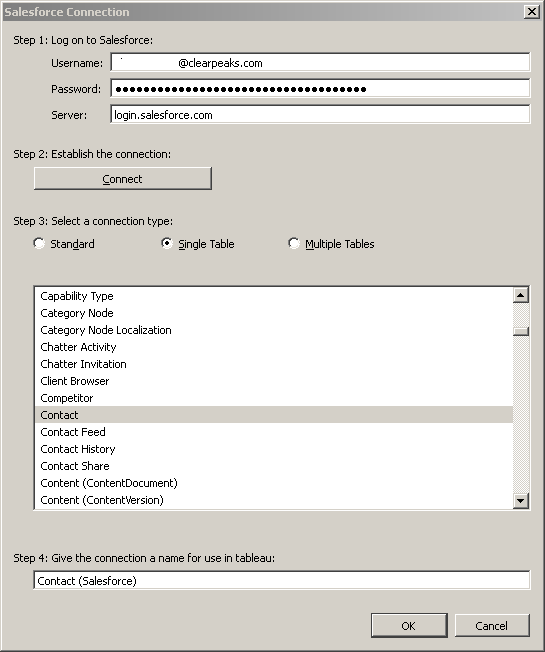
3.2. Single Table
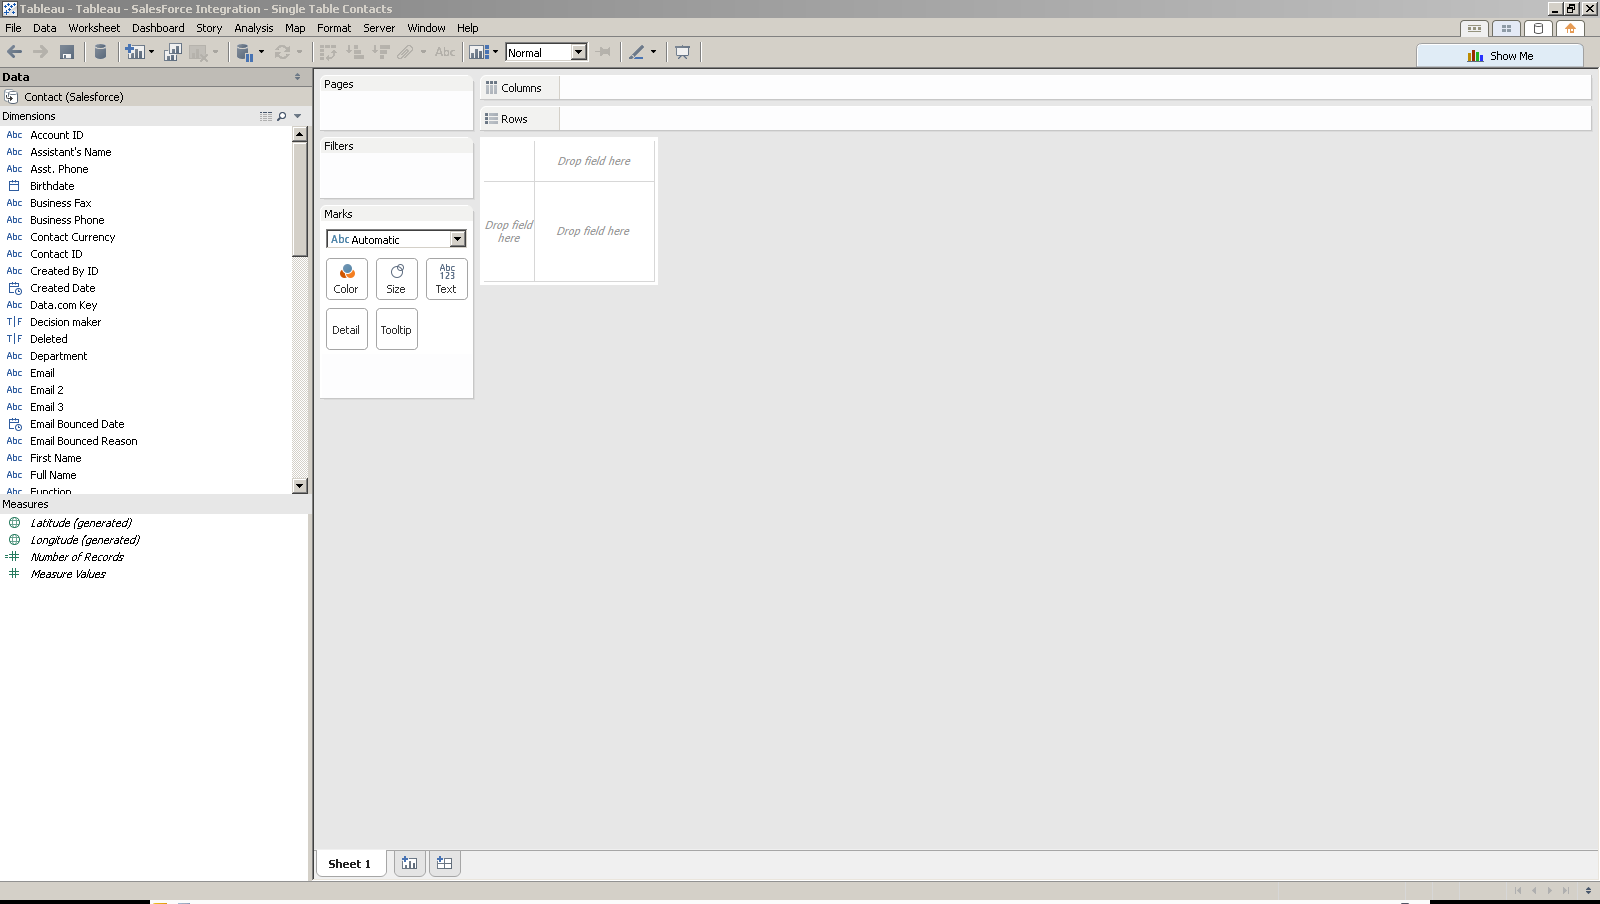
The single table connection type is used to retrieve data from one single table from the Salesforce.com database. This connection type does not allow to join tables so it brings simplicity and good performance on one side but also some limitations in terms of the data extracted. In the example below, we are extracting data from the “Contact” table.
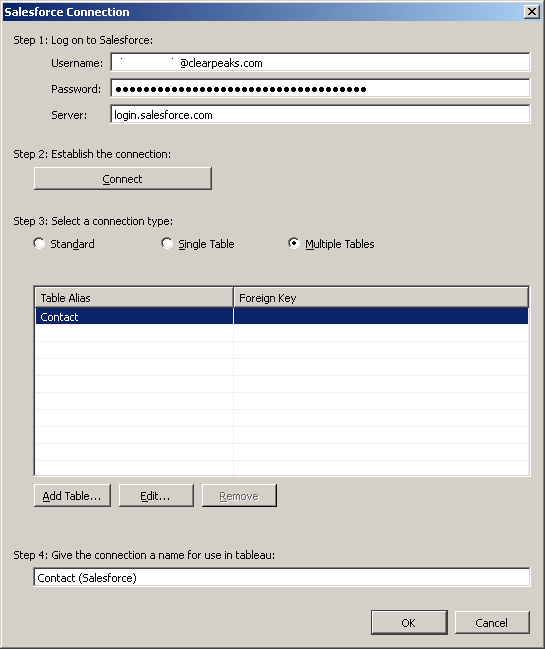
3.3. Multiple Tables
The multiple table connection type is used to retrieve data from multiple tables from the Salesforce.com database. This connection type needs the joins between the selected tables to be defined. This prevents non-technical users from using this connection type.
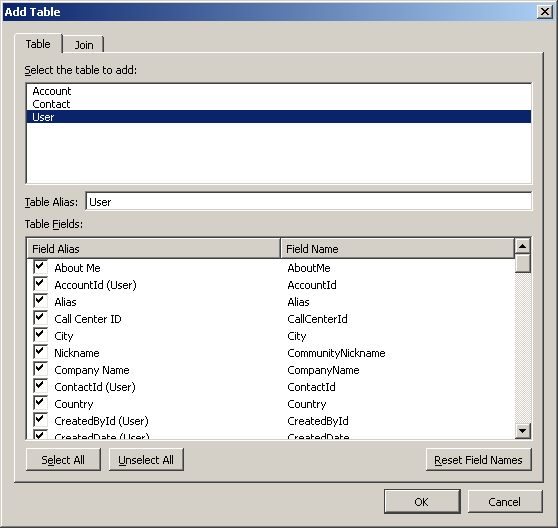
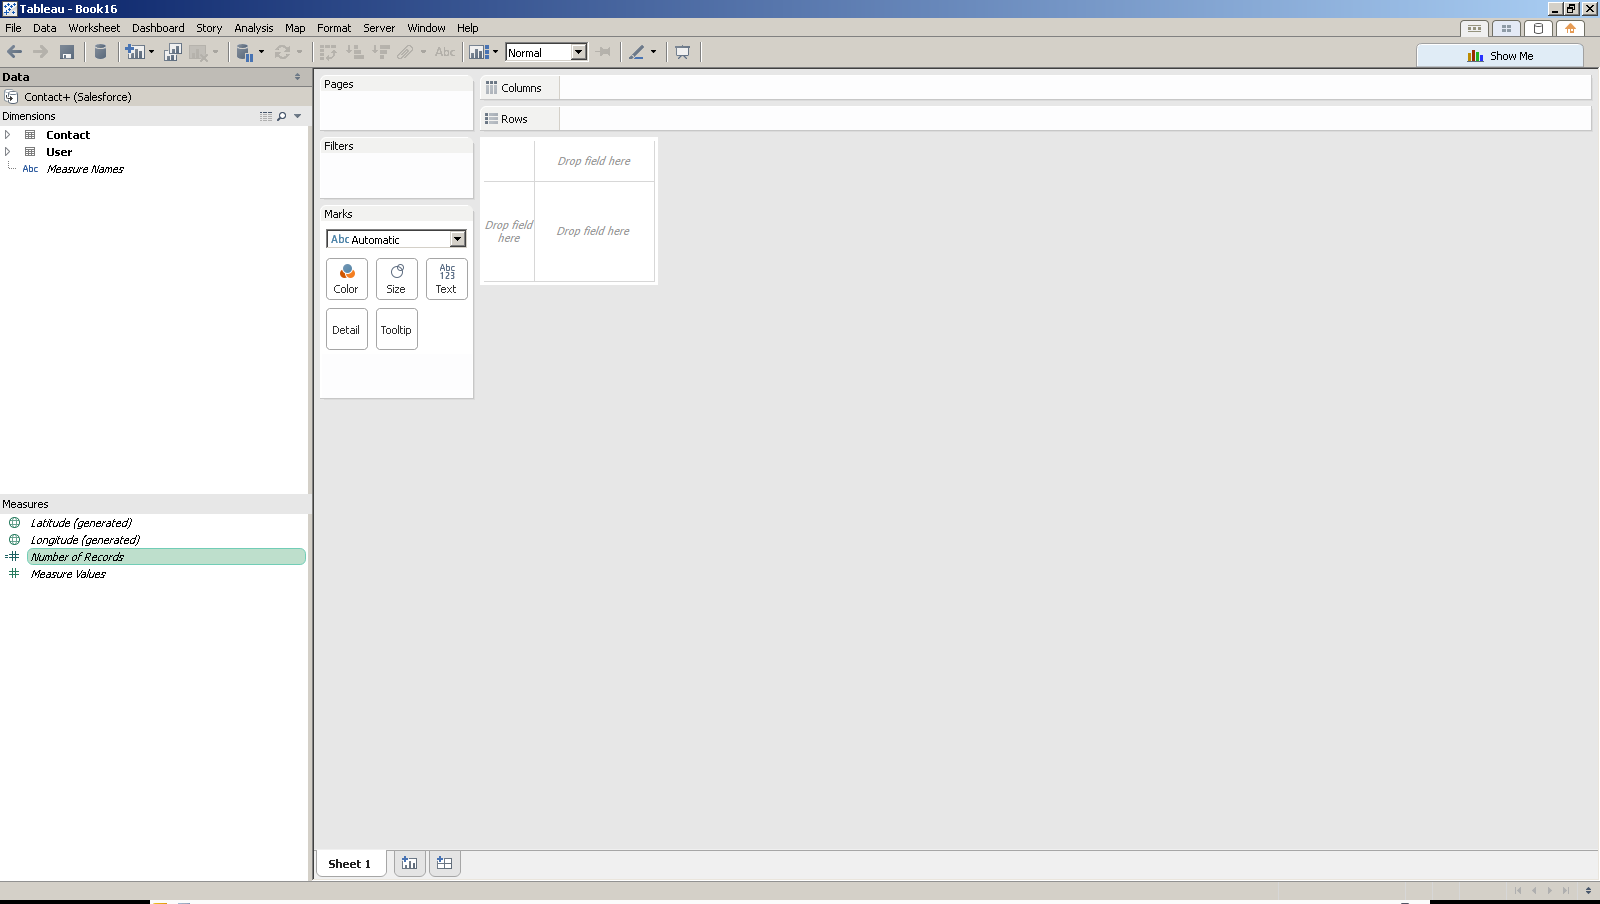
However, it provides flexibility to technical users to connect to the data. In the example below, we are extracting data from the “Contact” and “User” tables, with the latter acting as the Contact Owner. The first step is to select the initial table. In our example “Contact”. In order to do that, click on “Single Table”, select the table and then click on “Multiple Tables”. You will then see the following screen:
Click on “Add Table”. In the pop up dialog showing up, you will find the tables that can be joined to the selected table as per the joins defined in Salesforce. Select “User”. Then click on the tab “Join”.
You will then find the possible joins based on the different roles that the “User” table can have when joining to the “Contact” table.
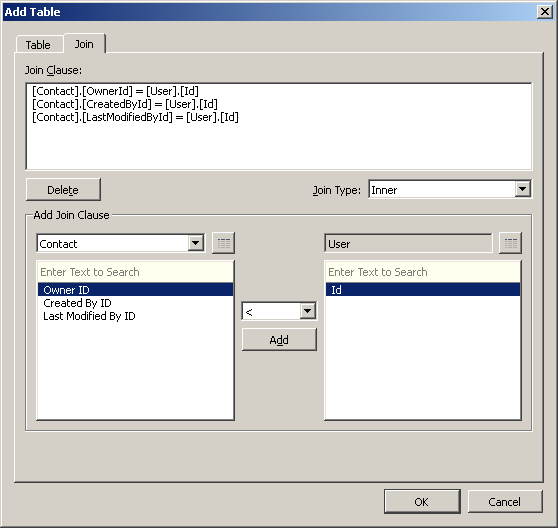
In our example, we will select the “CreatedById” and “LastModifiedById” join clauses and will click on the “Delete” button. This needs to be done individually for each join. The remaining join is defining the join between “Contact” and “User” acting as the contact owner.
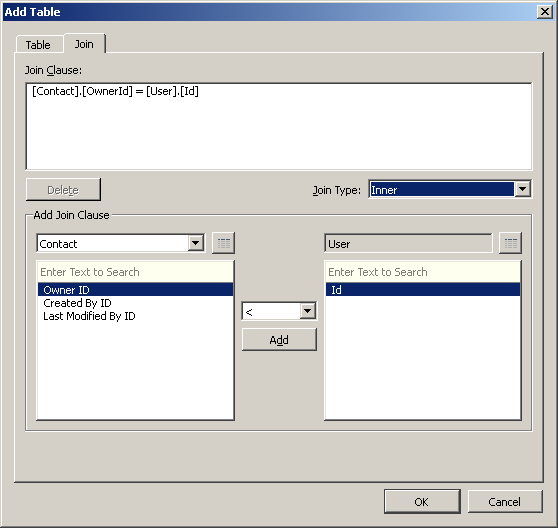
Click on the “OK” button. Then you will see the “Contact” and “User” tables selected with the join condition used to join them based on the “Owned By” relationship.
4.Name the connection
Finally, you just need to optionally modify the connection name to be shown in the Tableau workbook. Note that this name is filled in by default depending on the connection type and its content.
Then click on the “OK” button.
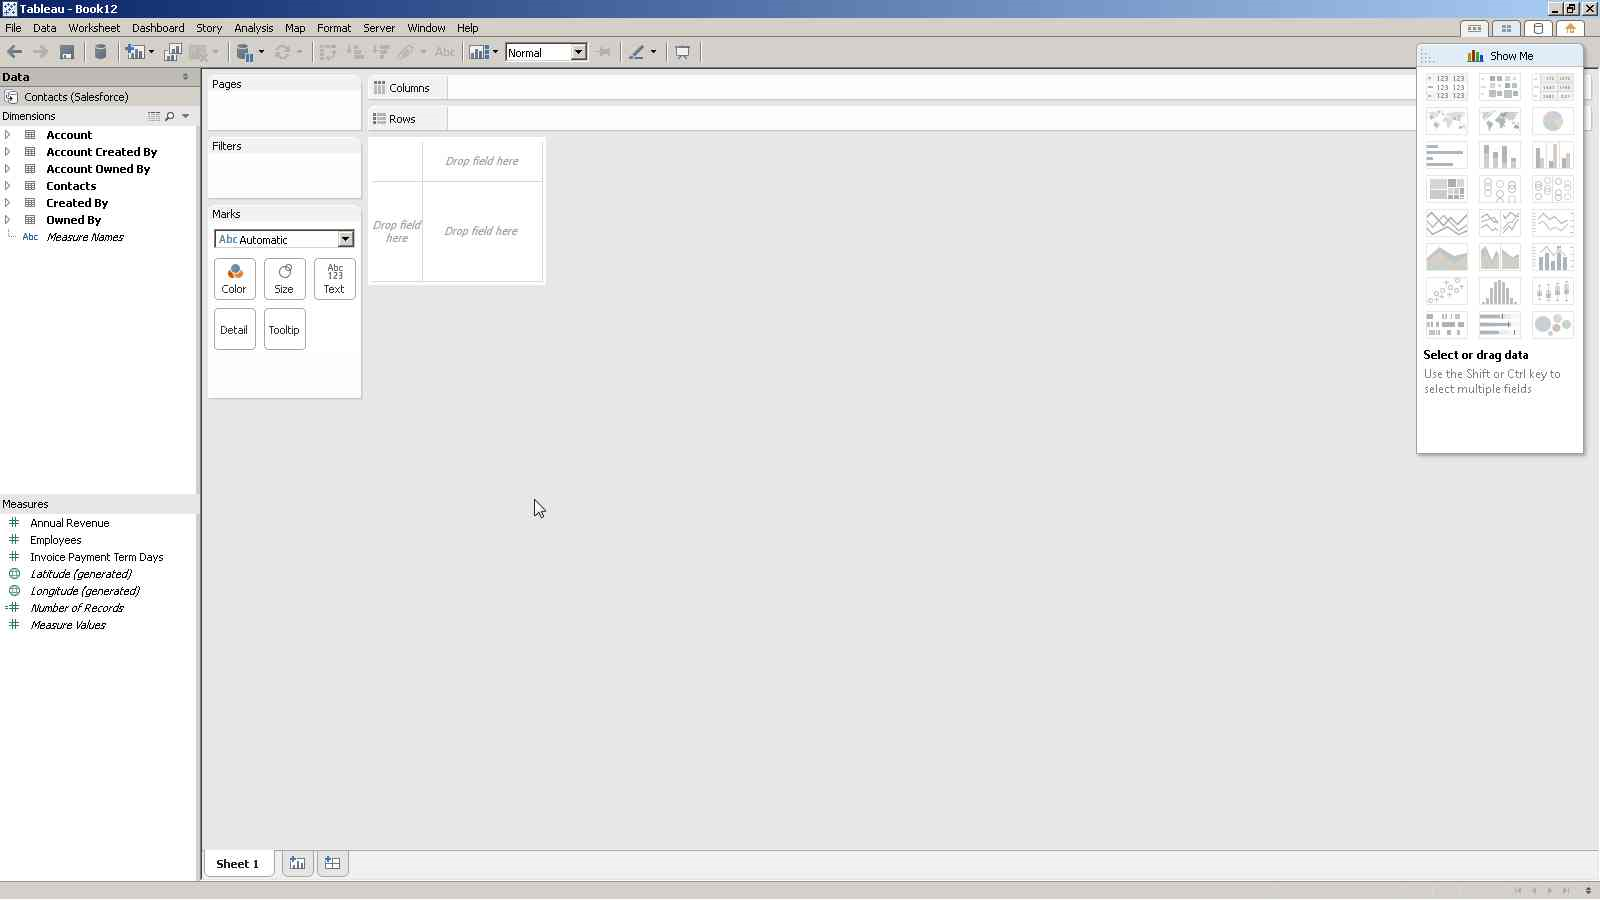
After connecting to the cloud-based Salesforce.com database, you will see the workbook workspace showing the content associated to the connection you defined. Results Below you can find the results based on the three connections previously defined.
4.1. Standard
Dimension tables included in the “Contacts” standard connection:
- Account
- Account Created By
- Account Owned By
- Contacts
- Created By
- Owned By
4.2. Single Table
Dimension tables included in the “Contacts” single table connection:
- Contact
4.3. Multiple Tables
Dimension tables included in the “Contacts +” multiple table connection:
- Contact
- User (Owned By)
Conclusion
Connecting to our Salesforce.com environment is now a very simple task. Even non-technical users can define the connection to the data and start exploring it. On the other side, technical users will be able to define their own complex queries by joining non-standard tables in a customised environment. After you’ve done that, you will get the benefits of having real time Salesforce.com data in Tableau, giving you the ability to do data discovery in this cloud-based environment. Have you connected Salesforce to Tableau or any other BI tool? Leave us a comment and tell us about your experience with Salesforce and the benefits you had from connecting it to a BI system.