18 Oct 2023 IoT Framework for Data Simulation and Analytics with Azure and Cloudera: Part 1 – Data Simulation
In our digital age, the Internet of Things (IoT) is reshaping industries, from manufacturing to healthcare, and even agriculture. Beyond the buzz, IoT’s real power lies in harnessing data from diverse sources and converting it into actionable insights. While there might be initial scepticism about implementing IoT at scale, its tangible benefits, such as heightened efficiency, cost reductions, and data-driven decision-making, are undeniable.
In this two-part blog series, we will introduce an IoT framework specifically designed to address the unique needs of businesses in any industry, and demonstrate how IoT technology can be used to transform the way they operate and drive growth. In this blog post we will introduce our IoT framework solution and provide an in-depth explanation of the data generation process.
In the next blog post, we will delve deeper into the framework itself, exploring the technologies and techniques used to extract valuable insights from the data. Taken together, we’ll be unveiling an IoT framework designed for enterprises across industries, showcasing the transformative potential of IoT technology.
Introduction to the IoT Framework
We’ve crafted a solution tailored for the ingestion, processing, and analytics of IoT data. What’s more, our framework supports the simulation of data sensors, empowering organisations to trial the platform according to their specific requirements. Basically, our data simulation component utilises Python code to emulate sensors, subsequently sending the simulated data downstream to our analytical platform, to undergo a series of processes to extract valuable insights. A standout feature of our framework is that it effortlessly and automatically harnesses both recent and historical data, presenting it transparently to the user.
The framework was built from scratch, leveraging Azure’s serverless functions for simulated data generation and Cloudera Data Platform (CDP) for analytics. Thanks to Cloudera’s versatility, this solution can be built in either a public or private cloud environment. We employ cutting-edge technologies within Cloudera: NiFi as an ETL tool to ingest data, Flink for event processing and filtering, Kudu and HDFS to store the data, and Impala to query the data from both Kudu and HDFS. To wrap it all up, we deploy Cloudera Data Visualization to plot the data into meaningful visuals – and this can be adapted to any BI tool you want!
In this blog series we’ll limit the analytical aspect to visualisations, but bear in mind that this data can easily be used for other purposes, such as Machine Learning using Cloudera Data Science Workbench or Cloudera Machine Learning within the Cloudera stack, or other AI platforms such as Azure Machine Learning.
While there are other IoT technologies out there, such as Azure IoT, AWS IoT, and Leverege (the official replacement for Google’s IoT Core), we chose to develop our framework from the ground up to offer both IoT data simulation using Azure Functions and analytics capabilities using Cloudera. This approach guarantees full control over the developmental process, ensuring our framework is impeccably aligned with a business’s specific needs.
The Use Case
To showcase the capabilities of our framework, let´s run through a use case where we collect environmental data from a city. This data includes weather information such as temperature and rain, air pollution levels of CO2, NO2, PM2.5, and drinking water quality parameters such as turbidity and pH.
All the sensors are simulated using Python code running in Azure Functions to achieve high scalability whilst simplifying deployment. This code mimics the data that would be collected from sensors placed throughout the city, measuring all the types of data mentioned above at the same time.
This simulated data is subsequently processed through our analytical platform, where we can track patterns and carry out all kinds of evaluation to identify potential issues such as flooding, heatwaves, or high pollution levels.
The objective of this use case is to provide a practical, tangible context for our IoT framework. Now let’s look at how we simulate data using Azure’s serverless functions.
Data Simulation
To generate the data, we must achieve a certain level of parallelism, enabling the simulation of numerous devices at the same time. This near-simultaneous communication is attainable with code executed in Azure Functions. We also incorporated random variations and noise to ensure that the data mirrors real-world sensor data as closely as possible.
A primary advantage of utilising Azure’s serverless functions is the ability to run code without having to provision and manage servers, allowing us to easily scale our data generation process without worrying about the underlying infrastructure. Furthermore, Azure Functions offer an array of in-built triggers, including timer-based schedules, which can be leveraged to trigger data generation at specific intervals automatically.
The specific feature we used for this simulation is Azure’s Durable Functions capability. Before delving into this paradigm and our reasons for selecting it, let’s familiarise ourselves with the fundamentals of serverless functions.
Serverless Functions
Serverless functions, often referred to as “serverless computing” or “function as a service” (FaaS), is a cloud computing model where the cloud provider manages and allocates server resources. This means the user can focus on writing and uploading their code, freeing them from concerns about the underlying infrastructure.
With serverless functions, the cloud provider automatically scales the resources based on the number of function requests. This ensures that the user only pays for the actual resources and compute time used, rather than having to provision and pay for a set amount.
The most common billing model for this service is “pay as you go”, based on the amount of memory, instances (vCPUs), executions and the time taken by the running code; increasing any of these variables will lead to higher costs.
Another important thing to consider is that time spent waiting for events, like synchronising with other functions or handling I/O requests, is often charged as compute time.
The last point to consider is that different serverless functions are unlikely to run on the same machine, which means that communication between functions might be slower due to external data sharing mechanisms.
That makes serverless-based apps generally less cost-effective for stateful code or patterns that use synchronisation, so it’s advisable to reduce communication within the functions as much as possible.
While this is the standard approach to serverless functions, we chose to use Durable Functions. Let´s take a look at why!
Azure’s Durable Functions
The key benefit of this Azure Functions extension is that it allows the writing of stateful functions in a serverless environment without synchronisation issues. These functions can be used to implement long-running, stateful workflows, such as those that permit pausing and resuming, others that maintain state across multiple steps, as well as those composed of multiple parallel steps that must be executed in a specific order.
Another advantage is the ability to implement workflows incorporating external events, such as human interactions or integrations with other systems.
These innovative features are cost-effective because we can use an orchestrator function to await other events without being charged for the time.
At its core, a Durable Function app consists of an HTTP-triggered function that initialises an orchestrator function which then runs its code. This can include calls to Activity functions, which are the app´s workers executing tasks concurrently.
IoT Framework Data Simulation – Architecture & Implementation
As we outlined before, our data generation solution comprises a starter function that sparks the orchestrator into action. This orchestrator, designed for continuous operation, can invoke multiple instances of the function that´s simulating a sensor station, aligning with the “Activities” within the Durable Functions framework.
Each sensor station boasts configurable parameters: the variety of sensors it houses, its geographical location, and specific logic attributes for value generation, such as value boundaries and a variation factor. The code is designed to be easily extensible so that more types of sensors can be added. If you want more customisation, you can incorporate a Python function, serving as the logic to generate more values.
Upon the completion of sensor readings within a station, the derived values are wrapped inside a JSON that contains the station data and the values generated for each sensor. This content is then sent to the analytical platform via an HTTP request.
In the following image you can see the structure used to simulate data:
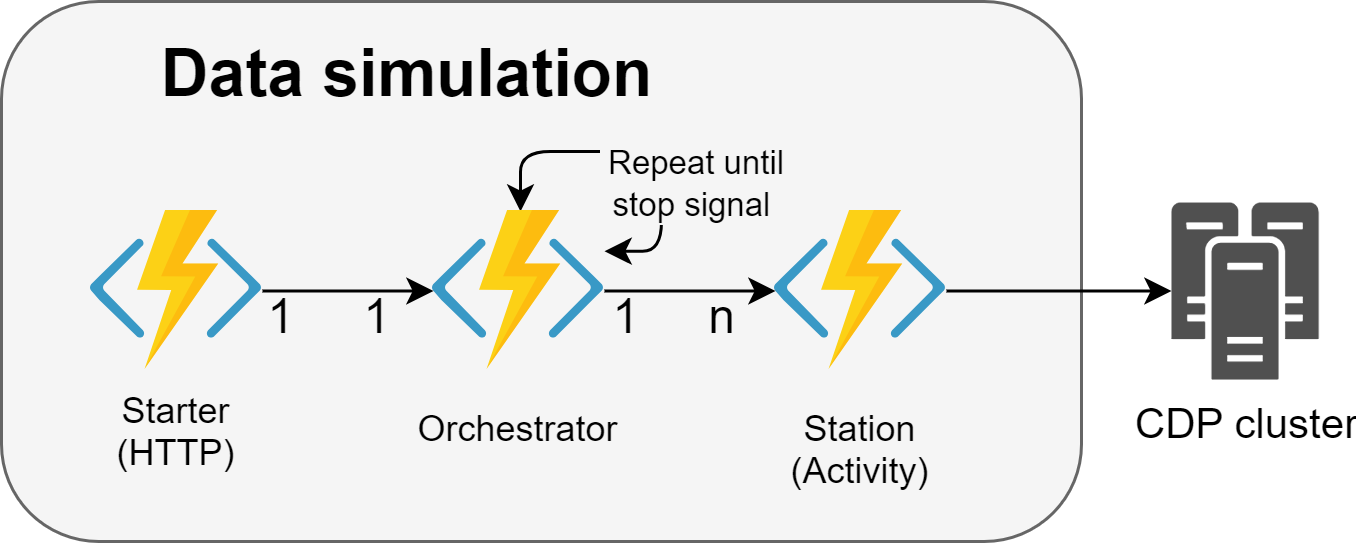
Figure 1: Architecture of the serverless Function App that generates data, with the cardinality of each code entity.
Note that the orchestrator is designed to run continuously, ensuring a consistent stream of data generation until a specific signal is received. This signal could be due to either a limit of iterations specified in the settings or an external event. For example, our method to stop the simulation involves placing a document with specific content in Cosmos DB.
Each iteration of the orchestrator calls a set of stations that carry out measurements with their sensors. To put it into perspective, if we set the system for 100 iterations, it would result in 100 individual measurements from every sensor across all the activated stations.
Leveraging the serverless architecture of Azure Functions, the implementation can automatically scale up or down depending on the number of stations being simulated.
Development
Azure users manage serverless functions through a service called Function App. Each app can contain different functions and has its own environment variables. All functions in an app share the same memory space – a piece of code with global or public visibility will be accessible across all other functions within that app.
When working with Azure Functions, there are three ways to proceed with development:
- Using Azure’s Web UI to directly deploy and code the functions.
- Staying local for testing and only deploying functions to the cloud when production-ready:
- Using Visual Studio Code (or Visual Studio, for the more daring!) which has all the required extensions to work with the Azure environment.
- Sticking with a non-Microsoft editor and configuring everything yourself (note that not all popular IDEs support Azure Functions tools as comprehensively as VS does).
We chose to develop and test locally with VS Code before jumping to the cloud (where you are billed). To develop an Azure Function App locally, it is essential to have the Azure Functions Core Tools.
You can look at the official documentation on how to start using Azure Function using VS Code. If you want to use any other languages or editors, check out Quickstarts > Create your first function, in the previous link.
Once you’re all set, you can start by creating a project locally. If you’re using VS Code, get the Azure Tools extension, which offers a complete set of extensions to work with Azure directly from the editor. Needless to say, you can just install the tools you need if you prefer.
After installation, you’ll see an additional icon, represented by Azure’s signature ‘A’, appearing in the left-hand menu of VS Code:

Figure 2: Menu of the cloud environment of Azure’s extension for Visual Studio Code.
If you click on it, you´ll get an overview of all the resources linked to your subscription. What’s more, this interface also provides a glimpse into your local environment, effectively mirroring the Azure environment:
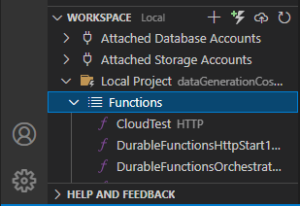
Figure 3: Menu of the local environment of the Azure extension for Visual Studio Code.
You can also create or upload functions from this menu by using the buttons in the upper-right corner of the previous image.
When it comes to deploying the functions to the cloud, you must create a Function App, the dedicated service where serverless functions are managed in Azure.
You can either create one from the Azure portal (the web UI), or directly from VS Code – we recommend the Azure portal if this is your first time, so that you can see and manage everything involved in the setup more clearly.
Creating a Function App from Azure Portal
In Azure Portal we simply search for the service we would like to use, Function App in this case:
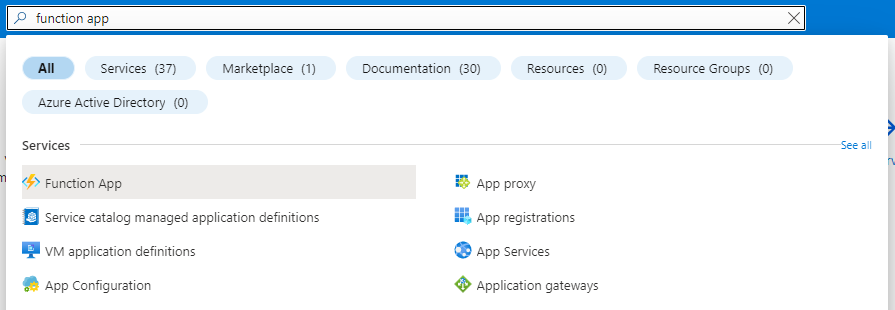
Figure 4: Search bar of Azure Portal.
Then just click on the Create button and follow these steps:

Figure 5: Header of the web UI for Azure Function App.
Note that using Python as the runtime stack is only supported on Linux, not Windows; this may lead to a different scalability.
Creating a Function App from VS Code
The way to create a Function App from VS Code is to open the Azure menu and right-click on the Function App tab, then on Create Function App in Azure:

Figure 6: Button to create a Function App from Visual Studio Code.
In order to finalise the process, you’ll need to complete the next stages – if you’re operating in advanced mode, there are 7 steps to navigate through, and only 3 in standard mode:

Figure 7: : First step to create a new Function App from Visual Studio Code.
Although this might seem faster, it offers limited configuration options within the editor, so you´ll probably need to access the Azure portal regardless.
Testing
Azure provides a robust environment for code testing, allowing for thorough debugging and detailed logging. Users can actively monitor their code’s performance, accessing real-time metrics and statistics with Application Insights.
Here´s an example with a running app´s live metrics:
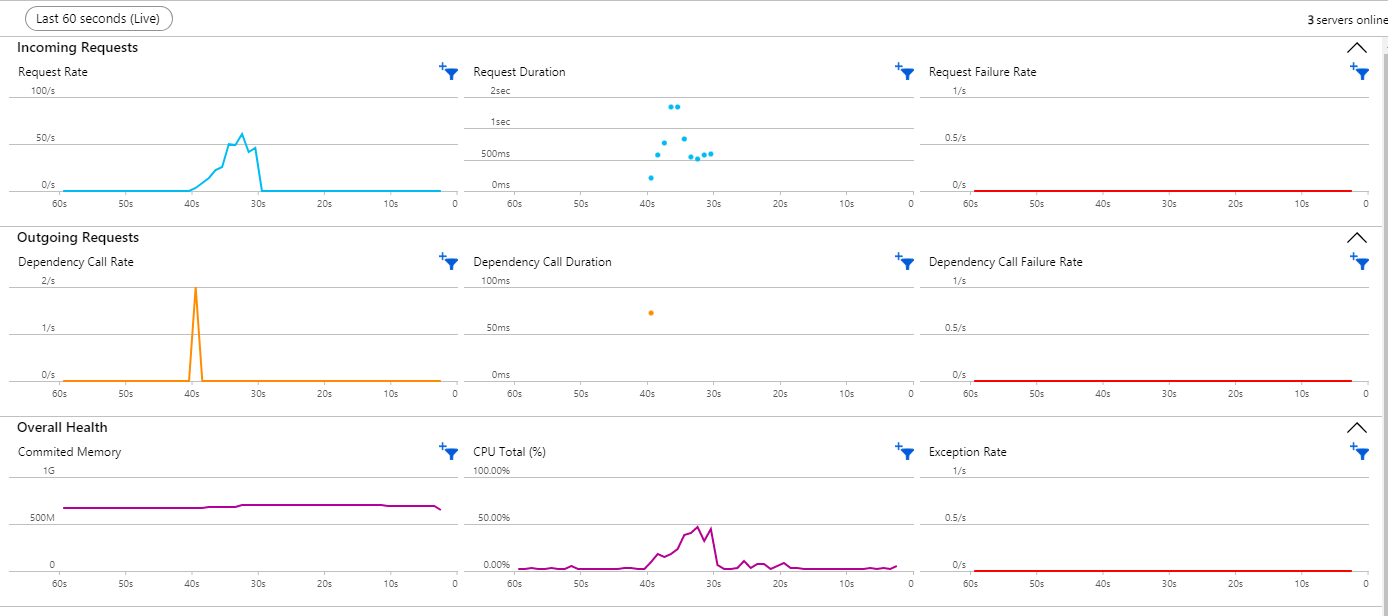
Figure 8: Live metrics available with Application Insights.
Application Insights can be very useful for performance monitoring, particularly if it’s a big project or if there are specific requirements to be met.
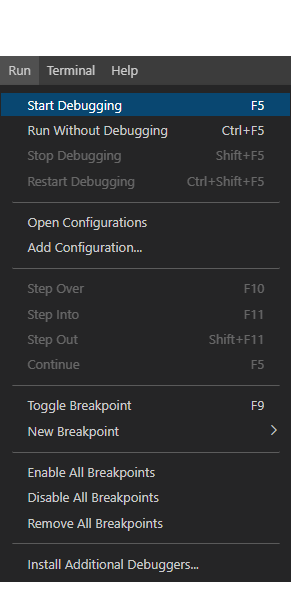
Remember that you can run functions from either Azure Portal or your editor – VS Code in our case. If you find unexpected output when testing, debugging directly from VS Code is straightforward. Here’s how to do it:
- Select breakpoints in the code.
- Execute the debugging environment by clicking on Run > Start Debugging from the top bar menu, or simply press the F5 key:

Figure 9: Start debugging from Visual Studio Code.
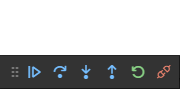
- Once you start debugging, a floating box will appear on the screen. This new toolbar is to manage the debugging session:

Figure 10: Debugging toolbox in Visual Studio Code.
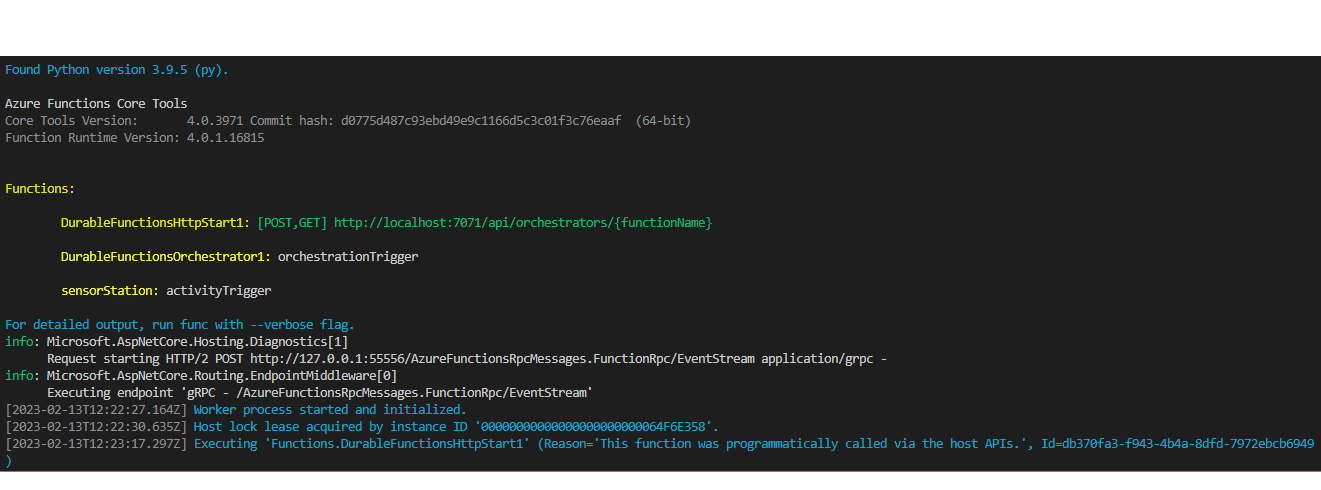
You will also see the progress of the initialisations in the terminal, as shown below:

Figure 11: Terminal with the default output after initialising Azure’s environment locally.
- Finally, you can manually trigger a function, either locally or in the cloud. When testing locally, you can view the logs in the terminal mentioned in the previous step:

Figure 12: Manually executing an Azure Function locally in Visual Studio Code.
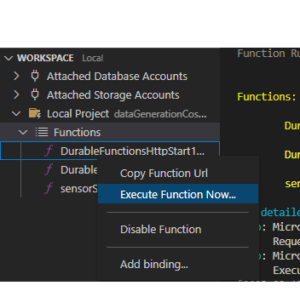
After executing the function, it will ask for an input argument if applicable.
Demo
And now, the moment you have all been waiting for – demo time!
In the use case we’ve discussed, we will simulate data for 308 sensors in what could be a smart city scenario – 28 stations, each equipped with 11 different sensors.
We want to test the ability of our environment to ingest data from multiple sources at brief time intervals, so we´re sending new data from each station approximately every 5 seconds.
To start the simulation, all we need to do is trigger the starter function, which can be done either manually or automatically by binding it to some external tool. This option might be particularly relevant depending on the specific use case. In our demo, we are going to use Postman to send an HTTP request that starts the function:
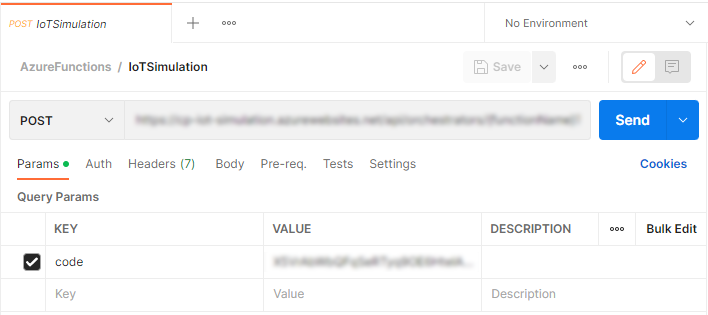
Figure 13: Invoking the starter function of our simulator with Postman.
Once we’ve sent the request, we can check the details of the resources being used and gauge the performance of our serverless app via Application Insights:
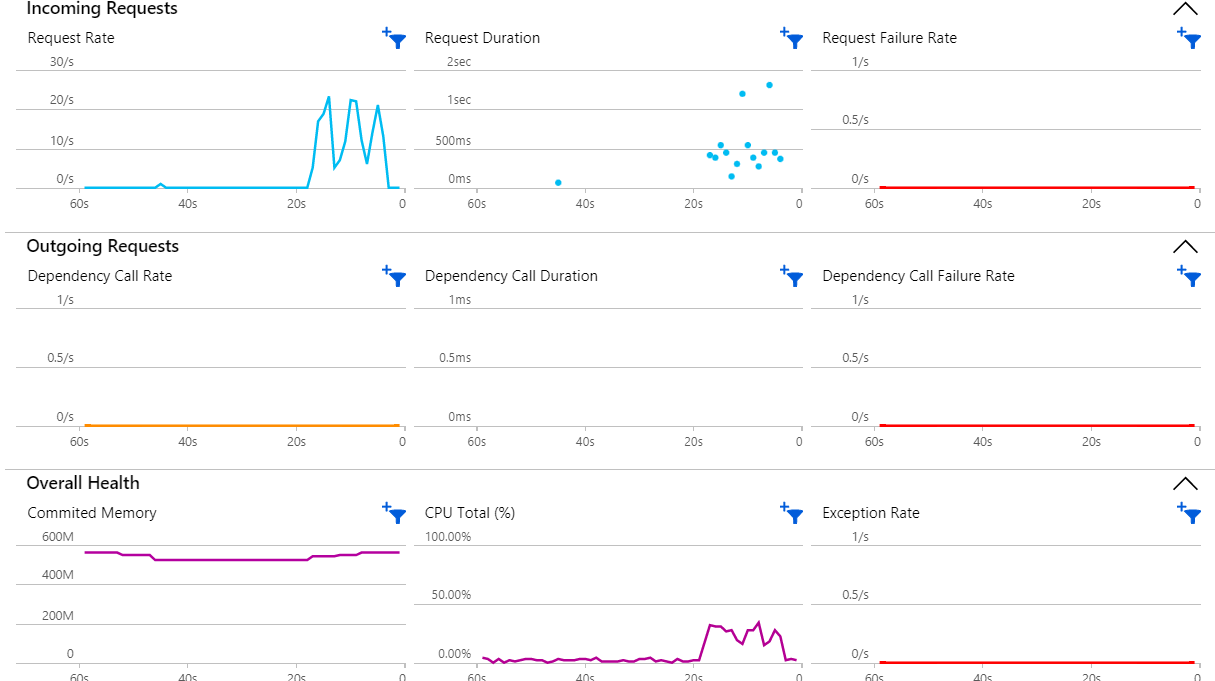
Figure 14: Charts with live stats of a Function App.
Now we know that the sensor simulation has started, we can monitor its progress and check the logs if any issues arise.
The data should be continuously relayed to our analytical platform, so let’s check that out and see exactly what files we are generating. Go to NiFi – the ETL tool that also serves us as the endpoint for data ingestion – and list the items in the queue:

Figure 15: List of JSON formatted data sent from each sensor station.
Then we inspect the item to see its content:
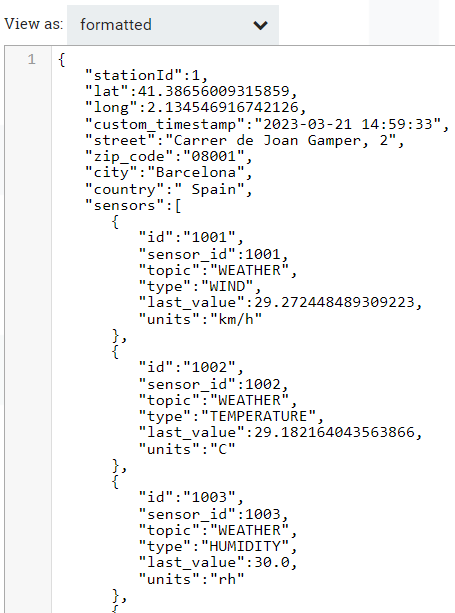
Figure 16: First lines of a JSON sent from a sensor station.
From the previous image, we can see that the station in the street “Carrer de Joan Gamper” recorded a temperature of 30ºC.
It’s worth noting that our data generator is capable of simulating multiple sensors concurrently, with the added benefit of automatic scalability, making it the perfect tool to determine the best scale of the IoT framework according to your specific requirements.
Moving forward, the data will undergo processing to ensure it’s stored in an optimal format, ready for querying and deriving valuable insights. We’ll delve deeper into these next steps in the second blog post in this series, so don’t forget to check it out!
Wrap-up
In this blog post, we’ve unveiled the intricacies of our framework, designed to streamline the management of IoT data, from its simulation to in-depth analytics. This is a solution that offers cost-effective software to guarantee your business´s success.
We´ve also covered the data generation aspect, highlighting the pivotal role of Azure Functions and serverless technology, as well as the importance of durable functions, and run through the development process and the tools needed to develop Azure Functions locally with VS Code and the Azure extension.
Coming Next
In the second part of this series, we´ll be focusing on the analytical aspect of the framework, exploring how the data is processed and analysed using Cloudera Data Platform. We´ll also share an effective design pattern that we have already implemented, ensuring transparent responses to queries irrespective of where the data is stored.
Contact us today to learn more about how our IoT framework can help you achieve your goals. At ClearPeaks, our team of experts has extensive experience in developing and deploying robust solutions in the fields of Big Data, Machine Learning and Business Intelligence. Whether you’re looking to improve efficiency, increase automation, or streamline your operations, we can help!