27 Jul 2022 Analysing Snowflake Data is Getting Easier with KNIME
An Introduction to KNIME And Snowflake
As you know, KNIME and Snowflake are two common technologies in big data analytics, focused on the different needs found in the ETL-building process.
KNIME is an easy-to-use software that allows you to implement end-to-end ETLs with pre-defined nodes; you can build simple or complex ETLs, including machine learning analyses. There are many nodes available that enable you to connect to distinct cloud-based databases as well as to the local file system, to transform the data, to build reports with the results, and to upload them to the cloud or just to save them.
Snowflake, on the other hand, is a cloud-based data warehouse that lets you store, share, and transform data. Your data could be in AWS, Google, or Azure, and you can perform lots of operations with SQL and JavaScript. It offers elastic warehousing and the storage capacity you need – the cost depends on the use.
The main difference between them is that KNIME is focused on the transformation step, where coding might be more complicated, whilst Snowflake is more focused on offering a service where your data is in storage and the transformations are computed there.
Why Do We Need A KNIME/Snowflake Integration?
Although Snowflake offers all the services you might need when building an ETL, all the transformations must be coded, and this can be problematic when dealing with a lack of expertise or the need for complex solutions.
Although KNIME is an easy-to-use service when building advanced solutions, it doesn’t offer safe data storage or a lot of computational resources, unlike Snowflake. KNIME can be used locally in your computer, or you can install KNIME Server in a server of yours, but you can only use the resources and storage your computer or your server has.
Bearing all this in mind, a KNIME/Snowflake integration gives us all the services Snowflake offers while also being able to build complex data transformations by simply concatenating pre-defined nodes from KNIME. You can also build pipelines in KNIME where the data is not taken outside Snowflake, thus guaranteeing data security.
What Can You Do with This Integration?
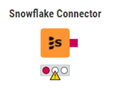 Snowflake and KNIME have been integrated for a long time, but only with KNIME using data from Snowflake and writing it back to the specified table. This can be done in KNIME with the Snowflake connector node, where you have to specify the account name, the database, and the warehouse you are going to use, along with your user credentials. The user must have read and write permissions for the database/schema they are going to use.
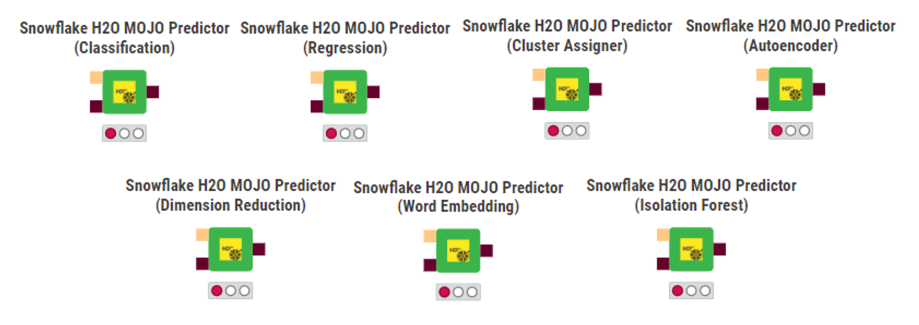
This seems to cover the data storage problem, but there is still a computational need to be covered when building complex solutions, and this is what KNIME has improved in its latest release. Now there is the option to build a machine learning solution in KNIME, using datasets from Snowflake and then running the inferences in Snowflake again, so we can leverage the computational resources there.
How Does It Work?
Uploading a KNIME pre-defined node as code to Snowflake might seem tricky, but it is really quite simple as the whole process is already implemented in the nodes presented in the picture above. This new integration works with the H2O machine learning library, offering multiple machine learning models; and once the model has been trained, it can be uploaded to Snowflake using these nodes. Before uploading, the model needs to be converted into a MOJO, a deployable version of the model.
If you are familiar with the basics of Snowflake you may already know that all the datafiles are contained in stages, and there are many types of stages. In this case, when you want to upload the inference test to Snowflake, a temporary stage is created, the code is updated as a temporary User-Defined Function, and it is executed in Snowflake using its resources. Once the execution is complete, an output file is generated in the temporary stage, and the data copied into the specified table.
Usage Example
Here is an example of how to use these integrations with a basic regression problem:
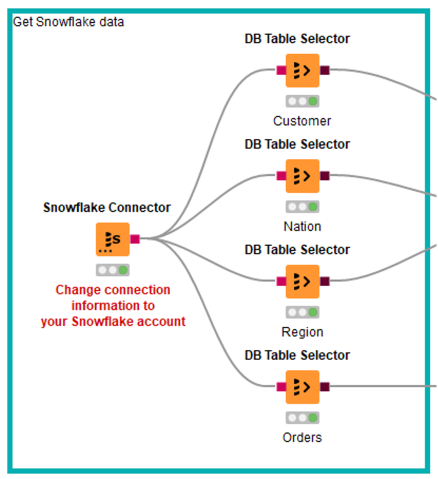
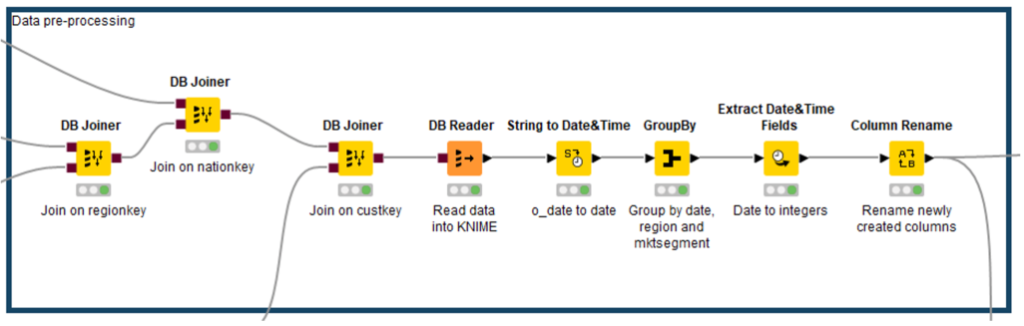
First, let’s connect to the Snowflake database we want to work with; we will be using the tables in the TPCH_SF1 sample database shared across all Snowflake accounts. As we mentioned before, we need read and write permissions, so we must replicate the tables into a database where we have these permissions, as we cannot write to a shared database. Then we can read the tables we want in KNIME:
Next we will apply some pre-processing; if you are working with extensive data, this step can be done in Snowflake, using its computing resources, before sending the data to KNIME.
*Remember that H2O does not support date columns, so you should convert them into integers or strings.2
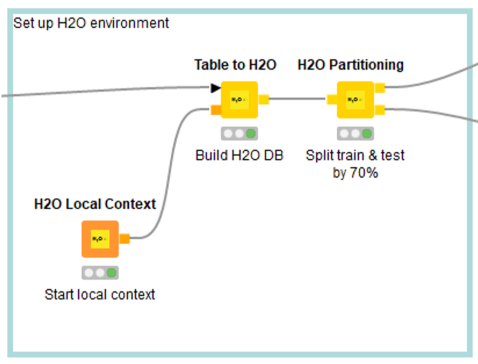
Once the data is ready, we have to convert it to an H2O frame, so that we can use it with H2O machine learning models.
Finally, we choose which H2O machine learning model we want to use according to the target result we are looking for, train it with the training partition, and once we have a model that works well, convert it into a MOJO as we explained above. We can also write the MOJO trained model to a file, so we don’t have to retrain it if the Snowflake session ends and we have to re-run everything.
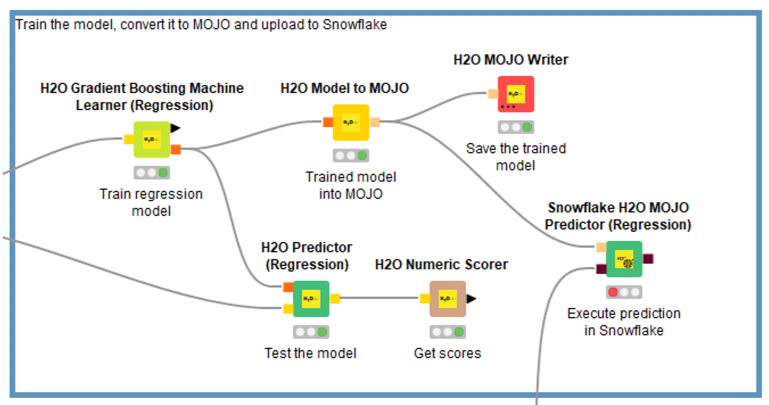
Finally, we add the Snowflake node that will execute the model inference. Note that the machine learning model type node must match the model we trained (if it is a regression model, a classification, a clustering, etc.).
With this example we can see how easy it is to use the KNIME/Snowflake integration, but don’t forget that its use is restricted to the available machine learning models in the H2O KNIME extension.
Conclusion
We have seen how this integration is of great help to Snowflake users who might not be too comfortable with advanced coding. It is also useful when working with sensitive data, when we need to keep the inferences running exclusively on Snowflake.
Nevertheless, there are some limitations, and this integration might not cover everybody’s needs. First of all, only the inference test is uploaded to Snowflake, so model training is still happening in our local computer, and this is the step that requires the most compute power when building a machine learning model process. And secondly, we can only use the models available in the H2O KNIME extension, so if we wanted to use a model that is not available, we would have to think about taking the data out of Snowflake and using KNIME nodes or coding the model in Snowflake.
In conclusion, this integration is a good starting point as each tool covers different steps of the ETL process, and now we can use the best of both – but there is still some room for improvement.
For more information on how you can leverage KNIME or Snowflake to get deeper insights into your data easily, don’t hesitate to contact us!