15 Dec 2021 Data Lake Querying in AWS – Snowflake
This is the fourth article in the ‘Data Lake Querying in AWS’ blog series, in which we introduce different technologies to query data lakes in AWS, i.e. in S3. In the first article of this series, we discussed how to optimise data lakes by using proper file formats (Apache Parquet) and other optimisation mechanisms (partitioning); we also introduced the concept of the data lakehouse. We presented an example of how to convert raw data (most data landing in data lakes is in a raw format such as CSV) into partitioned Parquet files with Athena and Glue in AWS. In that example, we used a dataset from the popular TPC-H benchmark, and generated three versions of the dataset:
- Raw (CSV): 100 GB, the largest tables are lineitem with 76GB and orders with 16GB, split into 80 files.
- Parquets without partitions: 31.5 GB, the largest tables are lineitem with 21GB and orders with 4.5GB, also split into 80 files.
- Partitioned Parquets: 32.5 GB, the largest tables, which are partitioned, are lineitem with 21.5GB and orders with 5GB, with one partition per day; each partition has one file and there around 2,000 partitions for each table. The rest of the tables are left unpartitioned.
In the second article we ran queries (also defined by the TPC-H benchmark) with Athena and compared the performance we got depending on the dataset characteristics; as expected, the best performance was observed with Parquet files. However, we found out that for some situations, a pure data lake querying engine like Athena may not be the best choice, so in our third and latest blog article we introduced Redshift as an alternative for situations in which Athena is not recommended.
As we discussed in that blog post, Amazon Redshift is a highly scalable AWS data warehouse with its own data structure that optimises queries, and additionally offers Spectrum to query external data. We also mentioned that the combination of S3, Athena and Redshift is the basis of the data lakehouse architecture proposed by AWS.
In this article, we will look at Snowflake, another cloud data warehouse technology that is widely used and that can also be deployed to build a lakehouse. We have already mentioned Snowflake in previous articles like Big Data Analytics in Amazon Web Services and Real-time Analytics with AWS, in which we demonstrated batch and real-time data platforms on AWS with Snowflake as the data warehouse technology. We are not going to make a thorough comparison between Snowflake and Redshift; nonetheless, if you are interested in discovering more about the benefits of both, you should check out our blog post describing how we migrated from Redshift to Snowflake.
In this article, we will demonstrate how to use Snowflake to query the three different versions of the TPC-H dataset using external tables. We will also see how to import data into the Snowflake cluster and how to query this internal data in order to – spoiler alert! – get the best performance. We will also delve into some technical aspects like its configuration and how it connects to Tableau, concluding with an overview of Snowflake’s capabilities.
Introducing Snowflake
Snowflake is a fully managed cloud data warehouse that offers a cloud-based data storage and analytics service. It goes beyond data warehousing, as Snowflake is also positioned as a data lakehouse.
Snowflake is built on top of Amazon Web Services, Microsoft Azure, or Google Cloud Platform. It combines the best of a PaaS and a SaaS service: there is no hardware or software to select, install, configure, or manage. In addition, it is designed to be simple and user-friendly.
However, what makes Snowflake different is its ground-breaking architecture, separating storage and compute, which allows you to adapt and scale these two parts independently. Customers pay for storage and computation separately. For instance, if we want to load data faster, or to run a high volume of queries, one can scale up the compute part to take advantage of extra computing resources, and scale it down afterwards and only pay for the time used.
To sum up, Snowflake gives the performance, flexibility, and near-infinite scalability that any business or technology professional needs to easily load, integrate, analyse, and securely share their data.
Snowflake Configuration
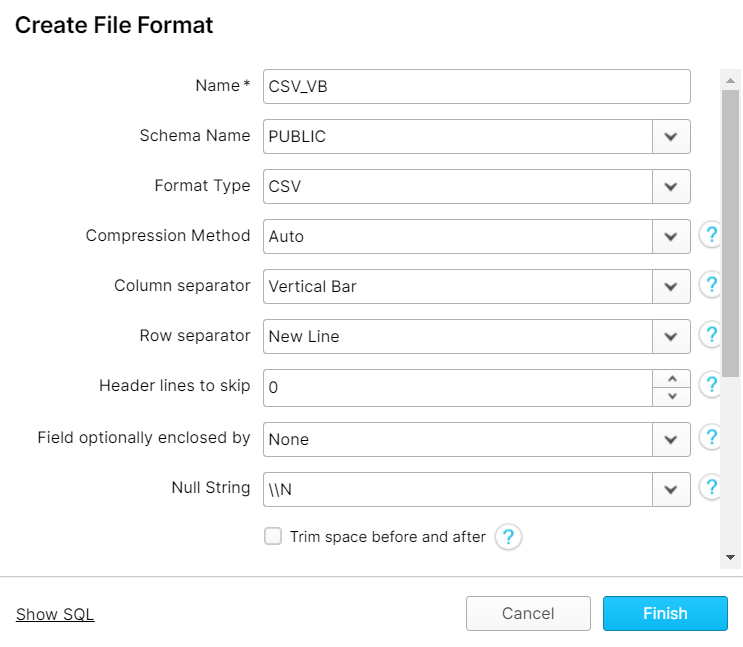
Before loading and querying data, a virtual warehouse needs to be created. Essentially, virtual warehouses are the compute part of Snowflake; for more information on virtual warehouses, we suggest you take a look at the Snowflake documentation. Snowflake offers a wide range of virtual warehouses, from varied sizes (and therefore, different compute powers) to multi-cluster ones. In our demonstration below, the smallest warehouse (single-cluster X-small) was used, setting the baseline from which each warehouse upgrade would perform better. Below you can see a snapshot of how to create a warehouse using the Snowflake web UI:
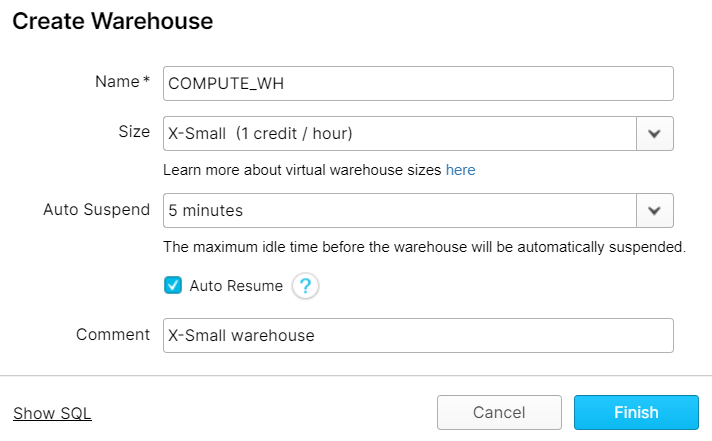
As we can see, Snowflake warehouses can be set to automatically suspend after an idle time, to save unnecessary costs, as well as to automatically resume when needed.
When configurations are performed through the user UI, Snowflake allows the user to see the specific SQL code. Alternatively, this SQL code can be run inside the worksheets area, where queries are executed, and the effect will be the same as using the UI.
Additionally, in Snowflake Enterprise Edition or higher (see this link for more information on the available editions), multi-cluster warehouses are available, automatically allocating additional clusters to increase the amount of compute resources when all the clusters within that warehouse are busy. This allows for automatic adaptation to variant work volumes, in addition to helping reduce costs, as only the minimum number of clusters will be running when underloaded.
Hands-on Snowflake
Now that we know a bit about Snowflake, let’s get our hands dirty! As we did in our previous Redshift blog, we will use Snowflake to query data in S3, specifically the three versions of the TPC-H dataset we generated in our first blog post, and we will also load and query the dataset internally in Snowflake.
First, the tables need to be created. The process will vary slightly depending on where we want to locate them, either externally where they already are in S3, or internally as a copy inside Snowflake.
External Tables
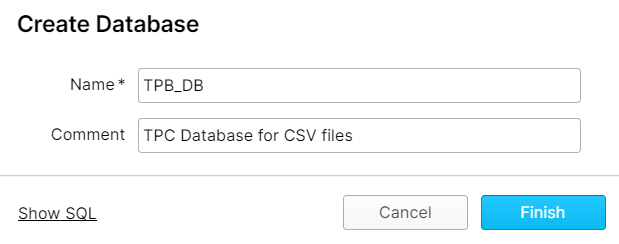
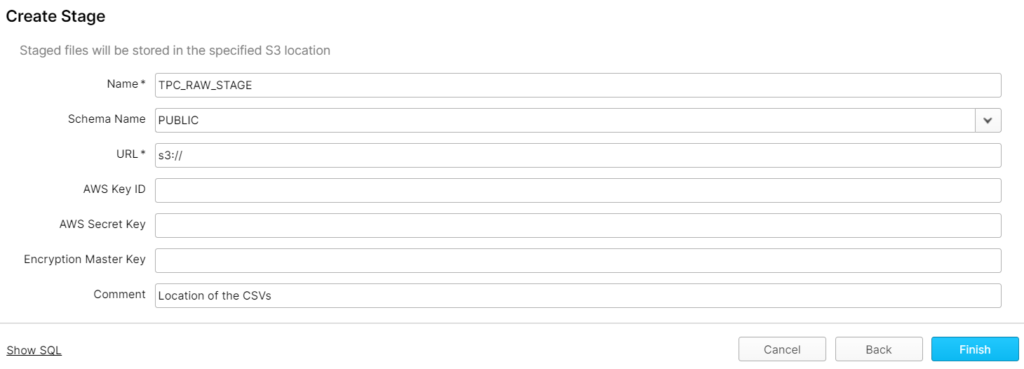
For the external tables, as we want to use several versions of the dataset (CSV, Parquets without partitions and Parquets with the two largest tables partitioned), we created a database for each version, then a stage in each, pointing to the respective location of the files in the S3 bucket. In Snowflake, stages are used to reference data files stored in an external location.
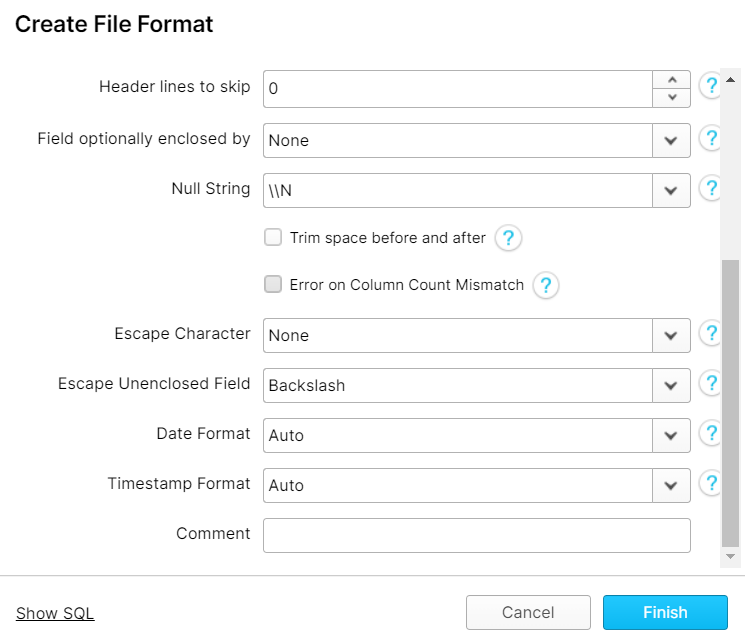
To simplify table creation, all the necessary information about the files (format type, compression, column separator, row separator, header lines, etc.) was grouped in what Snowflake calls File Formats, so that when creating the tables only the name of the File Format will be requested.
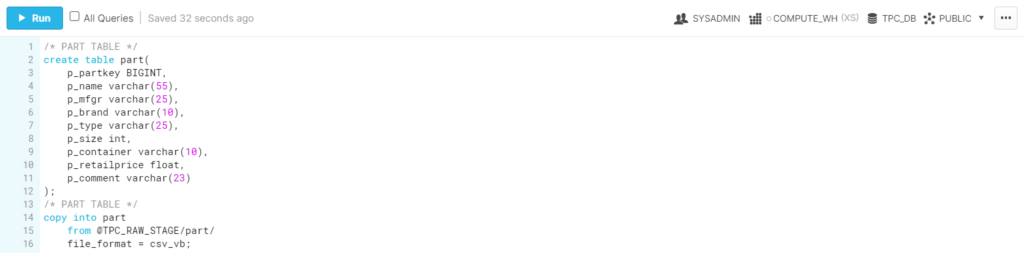
Finally, with some knowledge of the record format of the files, the external tables were created with each of their attributes pointing to a specific column of the files:
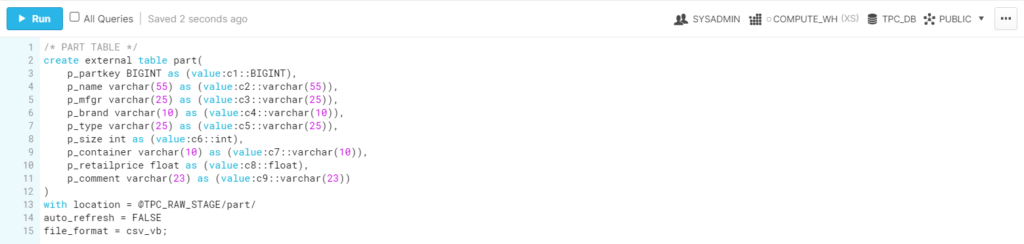
In the previous example, the creation of an external table from a CSV file located in an external stage was shown. From the specific SQL code, the fact that Snowflake requests the user to explicitly specify the origin column and its datatype in order to create each column of the external table stands out.
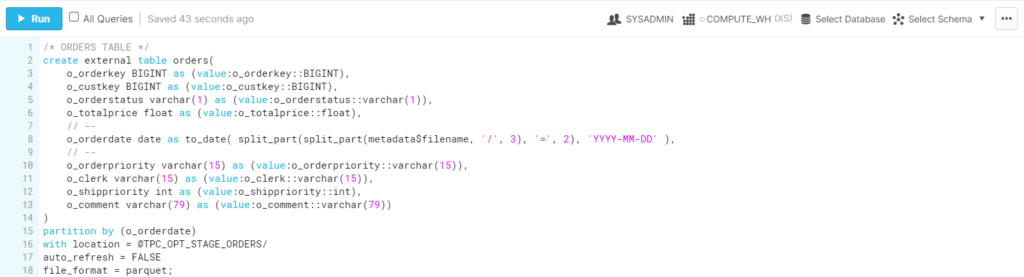
When the source file format was Parquet, instead of identifying each column with a number, the column name was used; however, the datatype and the destination column were still requested.
Furthermore, when the Parquet file was partitioned, in addition to mentioning the partitioning column, the data of that column was explicitly extracted from the name of the folders as shown in the example below, where the “order date” field is populated by splitting the name of the folder:
In the same examples, we can see in the upper right corner a set of options to select where and how the code will be executed:
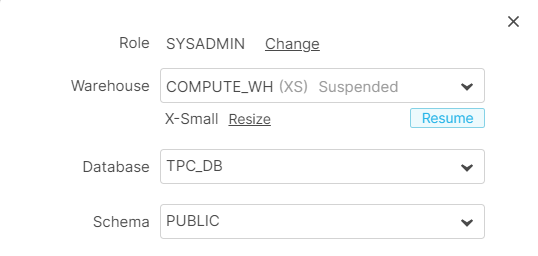
As we can see, even from the worksheets area, the warehouse can be resized. This allows the user to adapt the compute resources to specific needs. For instance, if we were about to import a large set of data we needed to query as soon as possible, we could upsize the warehouse to load the data (and take advantage of higher compute resources, and therefore faster execution), and take it back to its normal size afterwards, thus only paying for the time used.
Additionally, warehouse resizing can also be done programmatically, editing the warehouse within the worksheets area without the need of the UI.
Once everything was set, we executed our ten queries for each data format. It is important to remember that querying external data in Snowflake does not imply any additional cost besides the cluster compute cost while it is running, plus the inherent external storage cost.
As said before, you can also import the data internally to the Snowflake cluster as local tables, where queries can be optimised by leveraging its data structure.
Local Tables
Local tables also need a stage pointing to the location of the raw files in S3, as well as their respective File Format. For the local tables, the CSV files were used as Snowflake natively recognized the distinct columns. If Parquet was used, Snowflake would produce one and only one column. Specifically, to load data from a Parquet file, Snowflake would need to query the external Parquet file and use the results as the source of the copying function.
Because of the specific file layout, an additional empty column could be identified, resulting in a mismatch in the column count between the origin and the destination table. However, the File Format, which Snowflake uses to store all the necessary information about a file type, can be set to conveniently ignore these specific errors, and thus solve the issue.
To copy the data into local tables, we first need these tables, so they were created with their respective attributes as empty tables, lacking only the copy function itself that would read the external files from the stage and place the data into these recently created tables.
Once all the data had been copied, we ran our ten queries.
In the following section we will explain what we discovered about performing queries on local tables and external tables.
Results Analysis
When using external tables, we found out that, as expected, CSV files were significantly slower than Parquet. In some cases, partitioned Parquet files reduced the query time significantly, while in other cases performance was comparable or even slower than normal Parquets, depending on whether the query took advantage of the partition or not.
However, when talking about performance, internal tables were by far the fastest, so they are highly recommended unless the data cannot or does not want to be located inside Snowflake.
Tableau Connection
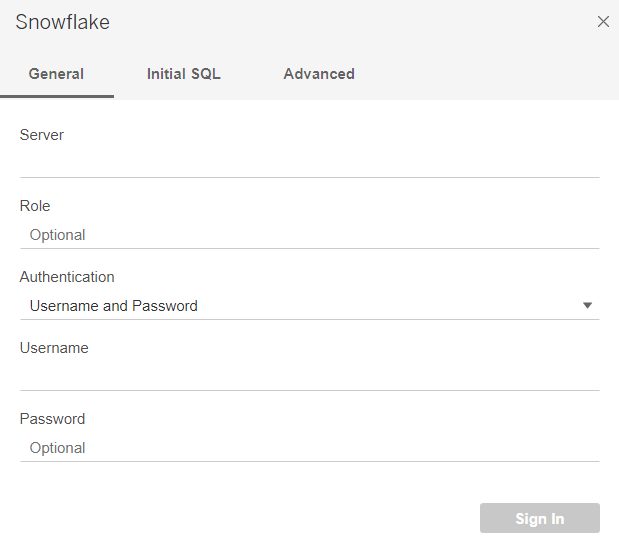
Connecting Tableau to Snowflake is simple: Snowflake will appear in the Connect to a Server list, and after installing the Snowflake ODBC driver it will be ready to connect.
When doing so, it will ask for the server (that can be identified as the URL from which the Snowflake console is used), and the user and password to enter the account. Optionally, a role could be provided to limit the databases and warehouses accessible to Tableau.
After signing in and selecting a warehouse, the tables are to be found inside every database, and the rest of Tableau works as usual.
Unlike Redshift, querying external data with Snowflake does not imply additional cost for data scanned, so there are no concerns about unexpected costs. Having said that, even though you can query external data with a cost similar to Snowflake internal tables, it is always recommendable to import external data into the Snowflake cluster to leverage its data structure and centralise the data if possible. In fact, this is the ambitious goal of Snowflake, to combine the elements of a data warehouse with those of a data lake.
This lakehouse concept has gained popularity recently, with its architectural approach to managing all types of data (structured, semi-structured, or unstructured) and supporting all data workloads (data warehouse, BI, AI/ML, and streaming).
Conclusion
Snowflake proved to be an excellent data lakehouse solution as it natively supports both internal and external tables. It is simple and easy to use; however, it also comes with some drawbacks, such as the difficulty of importing data from Parquet files, or the different table creation and partition syntax.
The major benefits we saw in Snowflake are:
- Highly, easily, and independently scalable compute and storage.
- Intuitive and simple user interface.
- All in one platform: a lakehouse, both a data lake and a data warehouse.
- Support for most structured and semi-structured data formats.
- Support for both internal and external tables.
- Pay-per-use mechanism.
While the drawbacks we encountered are:
- No information about the warehouse is provided, such as simple hardware specifications.
- Difficult to import data from Parquet files.
- Unique SQL syntax for table creation and partitions.
We can conclude that Snowflake is a great data warehouse solution with minimal drawbacks, which can save costs while optimising resources, assigning more compute to heavy workloads.
In our next blog post, we are going to look at another data lakehouse approach with Databricks, a Spark-based analytical platform. Stay tuned to discover how Databricks works and how it can suit your business.
For more information on how to get the most out of Snowflake, do not hesitate to contact us! We will be happy to help and guide you into taking the best decision for your business.
The blog series continues here.
