
04 Jan 2023 Glue Interactive Sessions for Developing AWS Glue Jobs
An Introduction to AWS Glue
When deploying a Data Platform in AWS, Glue is the go-to service for building ETL scripts. Glue is a serverless data integration service that enables users to process their data for analytics, machine learning, or application development. This data integration usually involves the discovery and extraction of data from different sources, as well as curating the data and loading it into databases, data warehouses, and data lakes. Glue provides visual and code-based interfaces for ETL developers to create, run, and monitor workflows, and you can find more information about this service on their official page.
In order to develop and test Glue jobs, rather than using the AWS Glue Console, it is recommended to work with Glue interactive sessions, the latest addition to the AWS development environment services. In the next sections, you will find an overview of this environment and a step-by-step guide on how to start working with interactive sessions.
Why Do We Need Glue Interactive Sessions for AWS Glue Job Development?
Glue interactive sessions provide a programmatic and visual interface for developing and testing ETL scripts that will be executed as Spark Glue jobs. These interactive sessions are serverless and provide on-demand access to a remote Apache Spark runtime environment managed by Glue. Thanks to the flexibility of this service, we can author code in any of the following environments that will run on the interactive session backend: Jupyter-compatible notebooks and IDEs such as PyCharm, IntelliJ and VS Code. For our projects, we chose Jupyter Notebooks.
AWS Glue development endpoints used to be the preferred option for developing Glue jobs but have recently been surpassed by interactive sessions. After provisioning the endpoint, we connect to it from a notebook server such as Zeppelin or SageMaker, or configure an IDE. The AWS Glue development endpoint has to be created via AWS Console or CLI (command line interface), and it does not have an automatic shutdown setting.
Why Should We Use Glue Interactive Sessions Instead of Glue Development Endpoints?
One of the main advantages of interactive sessions is that a developer can spin up a session without interacting with the AWS Console or the CLI, simply by running some Jupyter magic commands. In addition, the developers themselves can update the imported libraries and modules, as well as the types and sizes of the workers.
Another significant benefit is the provision time of the instance: the Glue development endpoint takes around 15 minutes to get ready, while a Glue interactive session only takes a couple of minutes, especially useful when we need to modify the libraries we are importing.
Moreover, they have a configurable idle timeout, ensuring automatic shutdown if not in use.
In terms of pricing, a Glue interactive session with 2 workers of G1.X type will cost approximately $0.88 per hour while available.
Hands-on
In this section you will find the necessary steps to start setting up the development environment in your local development machine, to spin up a Glue interactive session, and to develop in Jupyter Notebooks.
Initial Installation
For this setup, we need to install the following packages: jupyter, boto3, and aws-glue-sessions.
Next, we need to find the location of the aws-glue-sessions and use it when installing the Jupyter kernels. For more details on how to do this, follow this link to the official documentation (the Installing Jupyter and AWS Glue interactive sessions Jupyter kernels section).
Spin Up a Glue Interactive Session
- Generate your AWS access keys and set them up in your local environment. You can do this via the AWS Command Line Interface (link) or by manually configuring the config and credentials files.
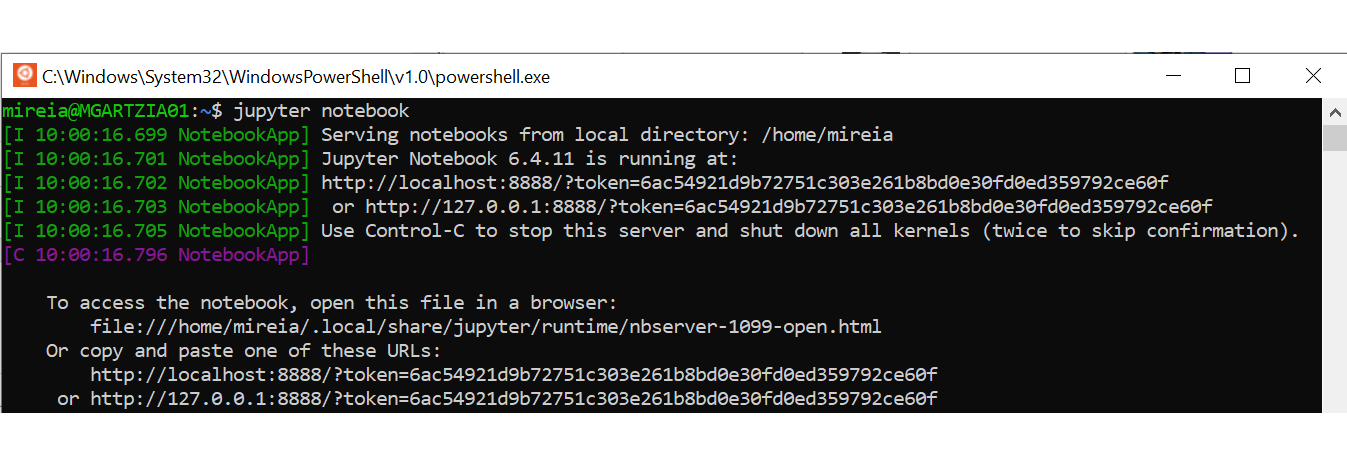
- Start a Jupyter Notebooks local server by executing this command from the home directory of your terminal:
jupyter notebook

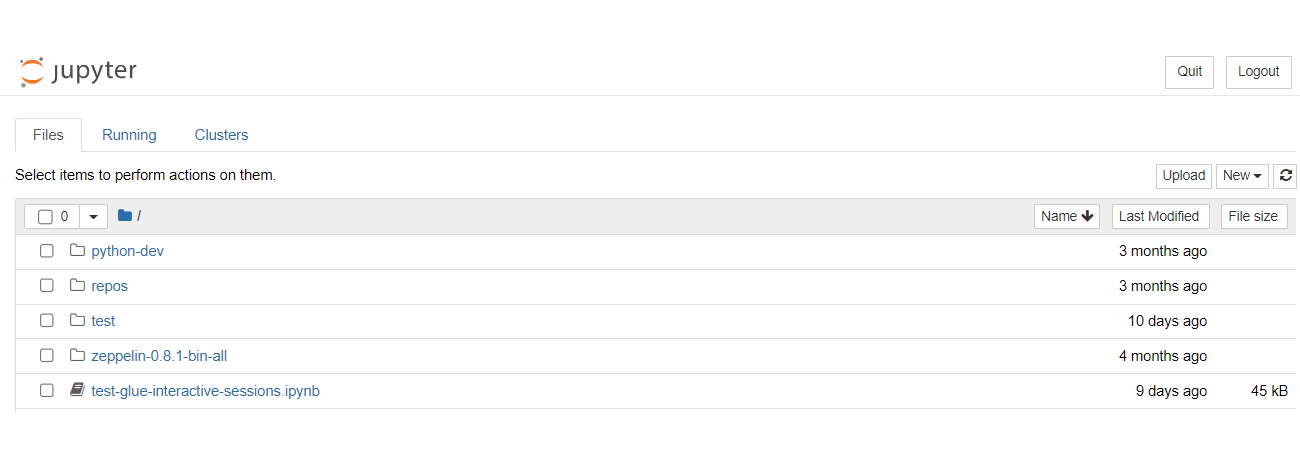
- Open Jupyter Notebooks by copying and pasting one of the provided links in your browser:

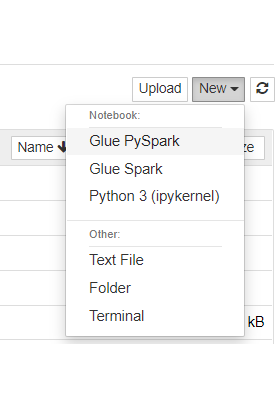
- Create a new notebook by clicking on New, then Glue PySpark to ensure the selected kernel is PySpark:

- Configure the Spark Glue job that we want to spin up. To do so, we will add several line magics (Jupyter Magics) supported by the Glue interactive sessions in the first cell, and we will execute it only once. If you have any concerns regarding the commands available, you can use the %help instruction:

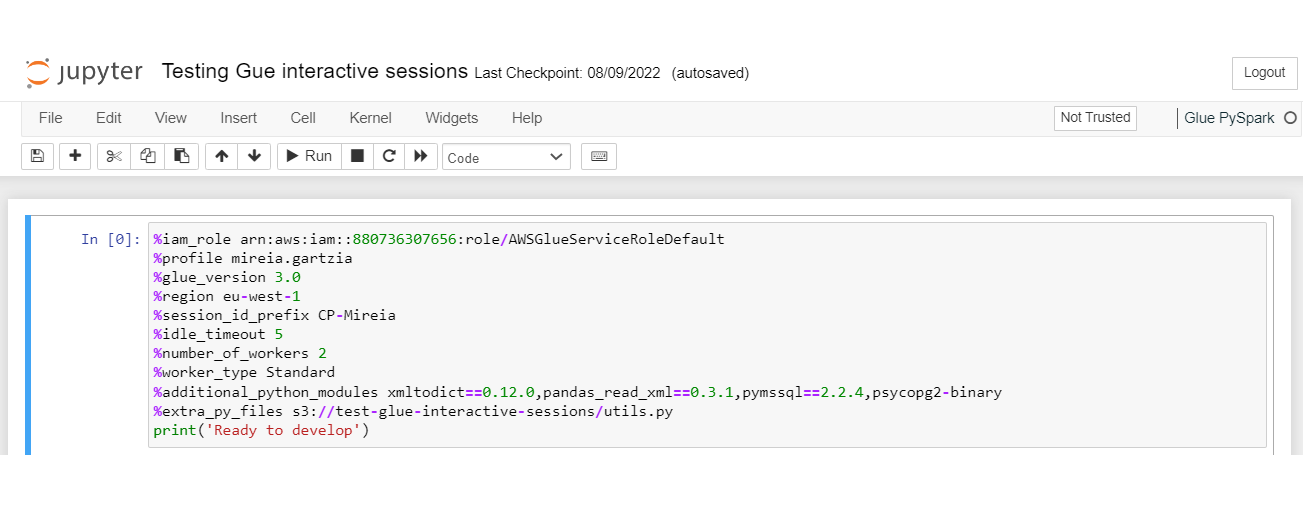
Here’s a summary of the Jupyter magic commands we have configured:
Jupyter magic | Description | |
|---|---|---|
%iam_role | Define IAM role ARN for the session. | |
%profile | AWS profile to use as the credential provider. | |
%region | AWS region to initialise the session. | |
%session_id_prefix | String prefix as an identifier to track your sessions. | |
%glue_version | Glue version to use: valid options are 2.0 and 3.0. | |
%idle_timeout | Define a proper idle timeout (in minutes) to avoid leaving a session running for a long time: the default timeout is 2 days. | |
%number_of_workers | Keep it small (the default value is 5). | |
%worker_type | Decide the worker type: Standard, G.1X, G2.X. | |
%additional_python_modules | Comma-separated list of public Python modules (available in PyPI) or custom packages (.whl, .zip); these packages will be installed using pip. | |
%extra_py_files | Comma-separated list of Python files stored in S3. | |
%connections (optional) | You can specify a list of connections to use in the session, separated by commas. |
Troubleshooting
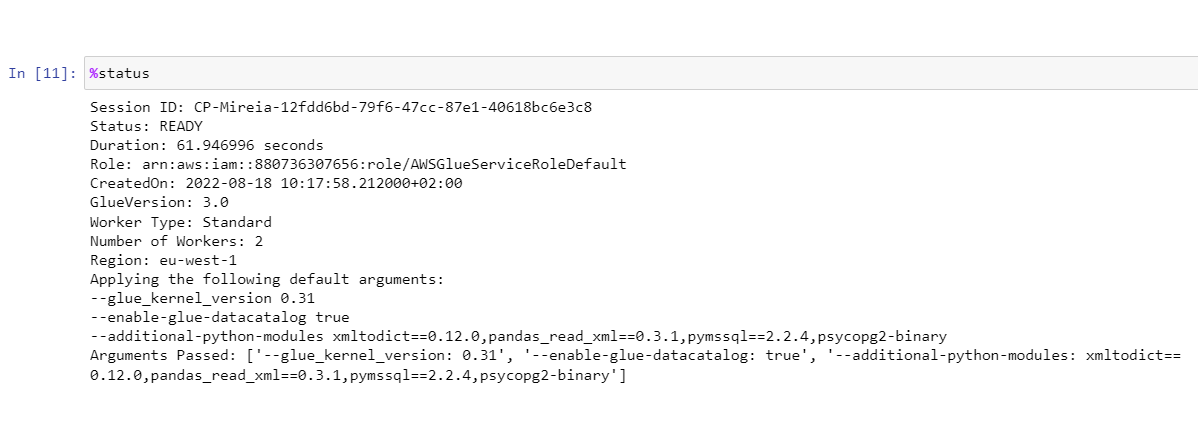
After executing the first cell, we can perform some initial checks by calling %session_id magic to know the running session ID or the %status command for general information about the session:
Note that in order to import modules or custom libraries into our environment, we have specified:
- %additional_python_modules: A list of public Python modules is expected soon (available in PyPI) as well as comma-separated custom packages (.whl or .zip files stored S3). These modules will be installed.
- %extra_py_files: A list of custom Python files stored in S3 can be imported, separated by commas. They will be unpacked into the ./tmp directory, where your code is being executed.
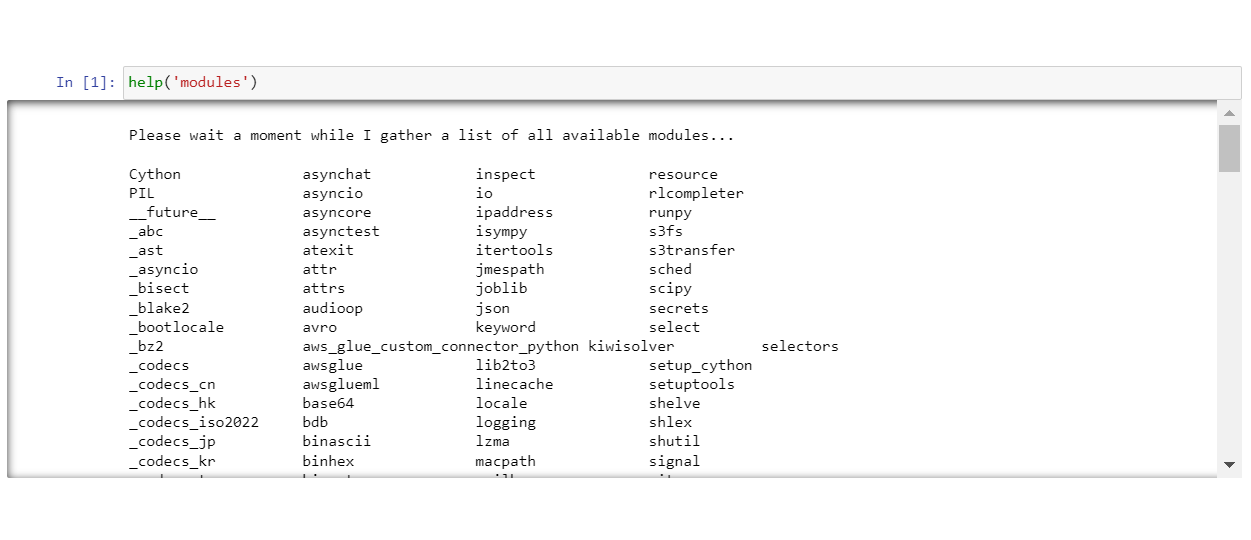
To list all the public Python modules that are available in your environment (including the ones specified in %additional_python_modules) you can use the help (‘modules’) command:
We can also make sure that the files defined in %extra_py_files have been installed correctly by running the code below:
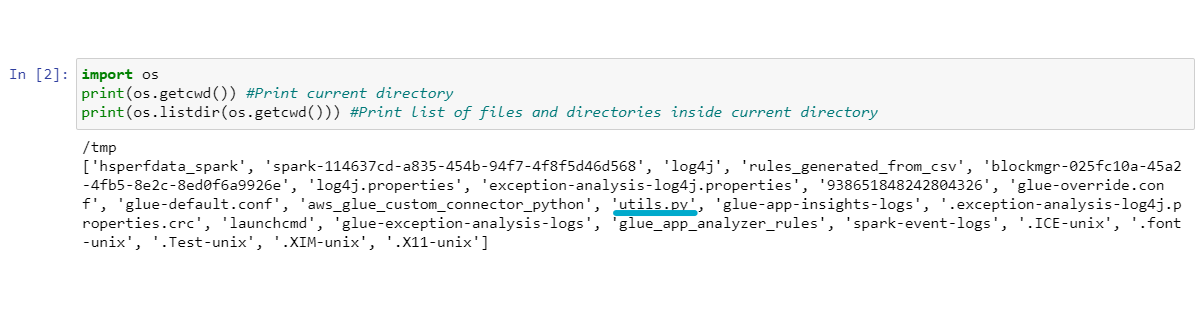
In the screenshot, we can see that our Python file (utils.py) has been stored in the cluster.
You are now ready to develop your Spark Glue job! In the subsequent cells, you will be able to add your Python code.
Additional Tips
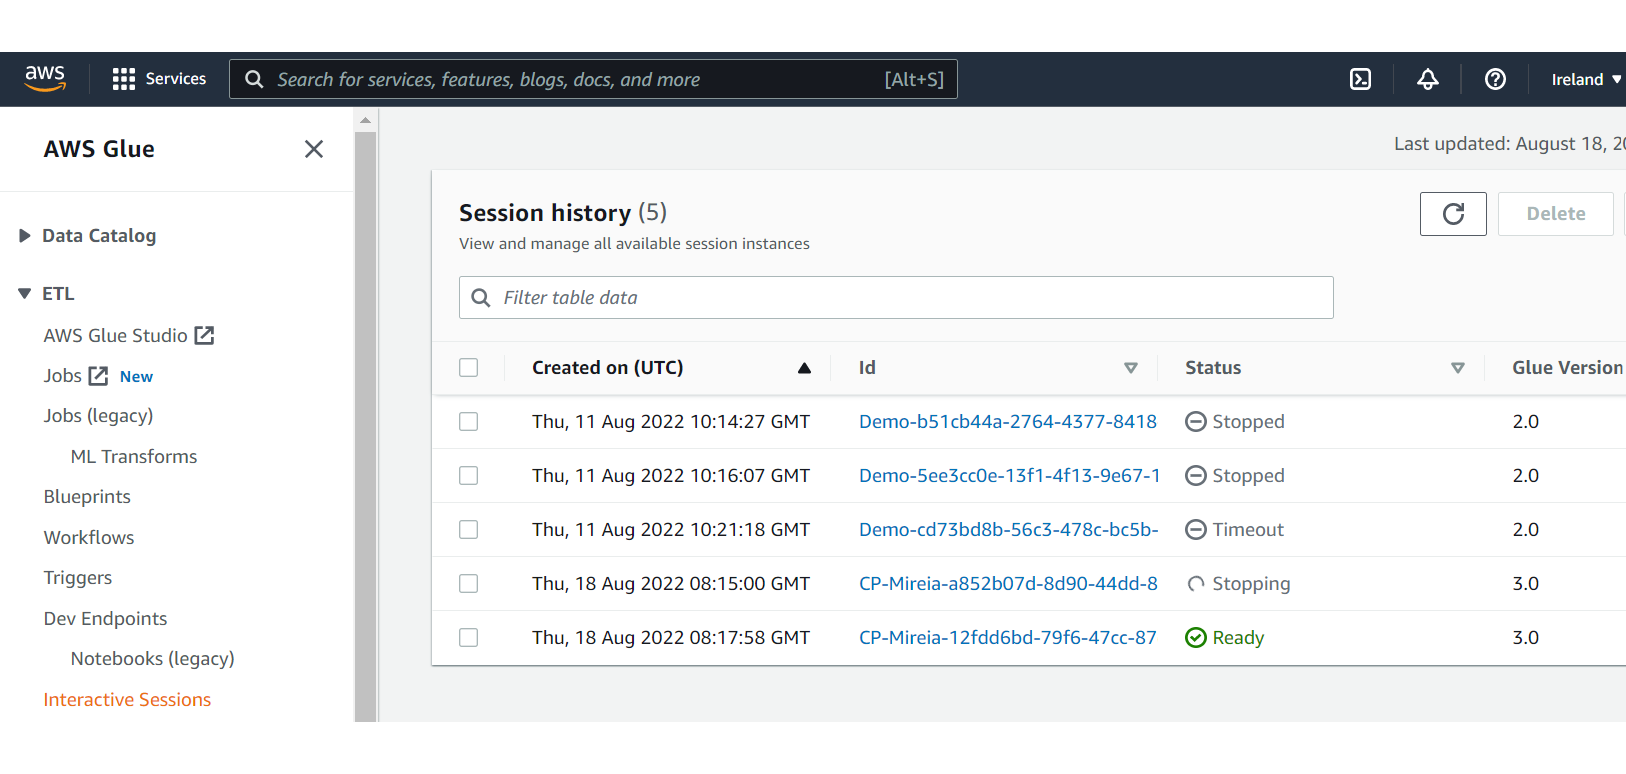
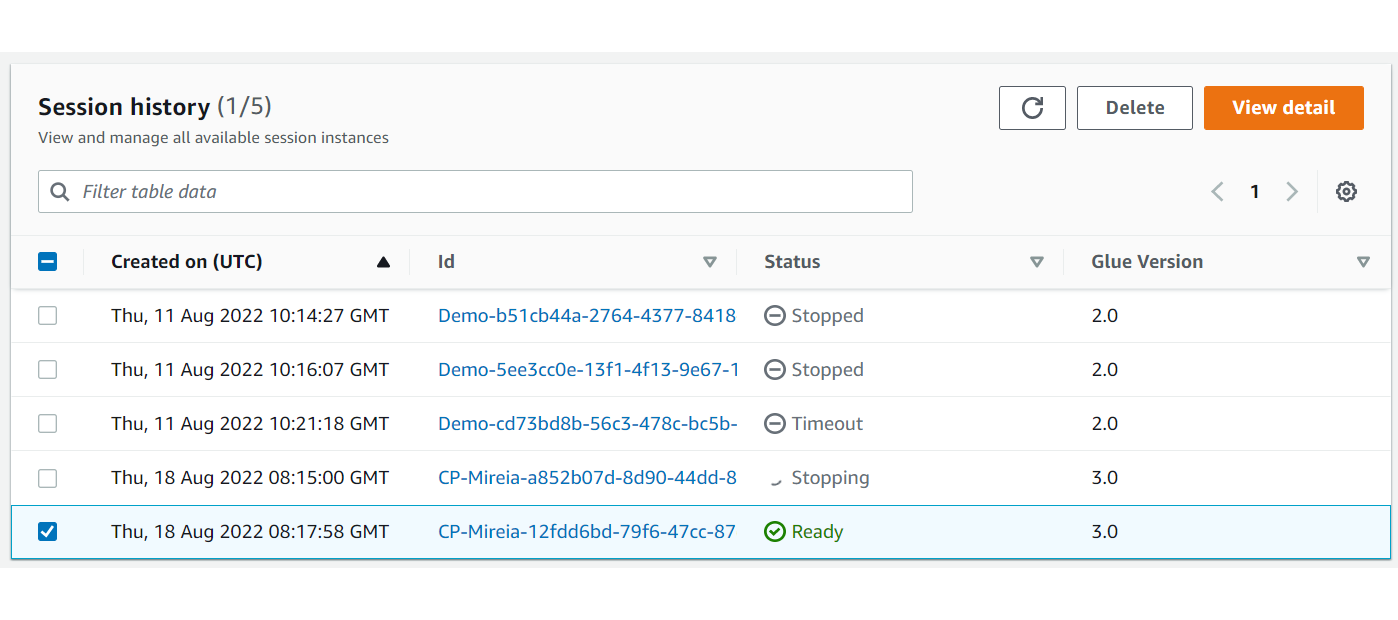
- To track the history and the status of all the sessions that have been created, go to the AWS portal, AWS Glue service, and click on Interactive Sessions under the ETL tab:

- If you need to check the logs of the Glue interactive sessions, go to CloudWatch, select Logs -> Log groups in the left menu and look for those starting with /aws-glue/sessions.
- If the AWS token expires or the session gets disconnected, we will need to provide a new token and reconnect with the kernel by executing the Kernel Reconnect option in Jupyter Notebooks.
- After finishing the development for the day, instead of waiting for the idle_timeout, we can stop or delete the Glue interactive session, by choosing one of these options:
- Execute %delete_session in a new cell in Jupyter Notebooks
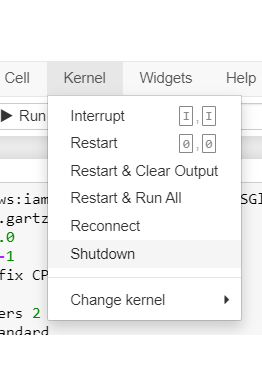
- Select the Shutdown option under the Kernel tab from the menu in Jupyter Notebooks:

- Delete the session manually from the AWS portal:

Wrapping Up
In this blog post we have introduced Glue interactive sessions as a powerful improvement for developing AWS Glue jobs; they are faster and more flexible than the other available options. We have also described the necessary steps for the initial setup and for spinning up a new session, and provided some tips to help use it.
Don’t hesitate to contact us for more information on AWS Glue, or if you want to start building your AWS Data Platform with our team of experts. We will help you to set up your environment smoothly and with cost efficiency!
