
11 Oct 2022 Informatica Intelligent Cloud Services (IICS) – Part 2: JSON & Snowflake integration
“Data! Data Data! I can’t make bricks without clay!”
– Arthur Conan Doyle, writer and physician.
What Sherlock Holmes said 150 years ago is just as true nowadays, when data is critical to business. It is also very important to note that the variety of formats in which data resides has increased, thus increasing the need for integration across different formats like structured, semi-structured, unstructured, etc.
In the first blog post of the Informatica Intelligent Cloud Services (IICS) series, we introduced the main concepts of the services offered by IICS. In this blog post, the last in the series, we will dig a little deeper into the Data Integration Service, with a use case and an example of how semi-structured data in JSON can be parsed and integrated easily into a Snowflake table.
We chose Snowflake as our database flavour because its data cloud is powered by an advanced data platform provided as Software as a Service (SaaS). Moreover, they recently entered into a partnership with Informatica, so now Snowflake connectors are easily available on IICS. For more details about Informatica’s Snowflake solution, take a look here.
Overview
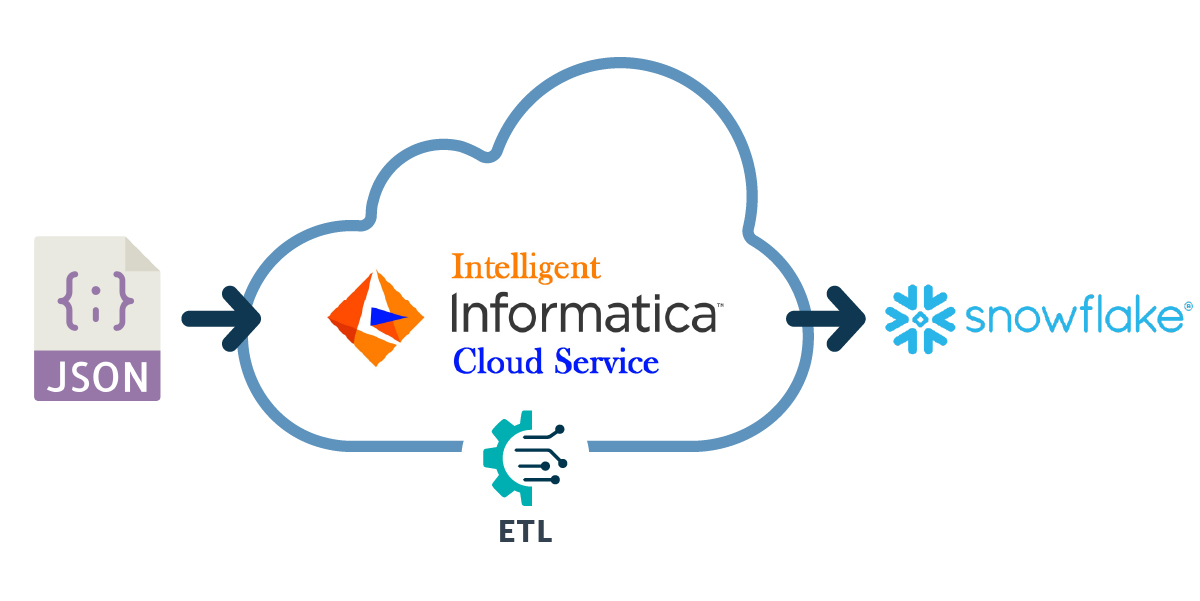
We’re going to explain the simple steps to parse the JSON data to a relational database table format – take the JSON data, parse it with IICS, and load it into Snowflake:
It is important to understand the technical components below before continuing:
JSON: JavaScript Object Notation is a text-based data format that is commonly used between servers and web applications / web-connected devices. It is text-based so it can be read by both humans and machines.
Hierarchy Parser: This very useful transformation in IICS is used to convert hierarchical input into relational output. The transformation processes XML or JSON input from the upstream transformation and provides relational output to the downstream transformation.
Hierarchical Schema: Another useful transformation available in IICS, to define the structure of the file that a Hierarchy Parser transformation converts into relational output.
Hands-on Example
Now let’s go into the details of parsing the JSON to the relational table format, for which we will need:
- JSON text as a string inside one column – we chose Snowflake as a database but IICS can deal with many database flavours and you can check all the connectivity options here.
- You also need a valid IICS account – a 30-day trial can be requested here, and a Snowflake trial can be requested here.
Step 1: View JSON Data and Save it Locally; Configure Source Connection for Snowflake
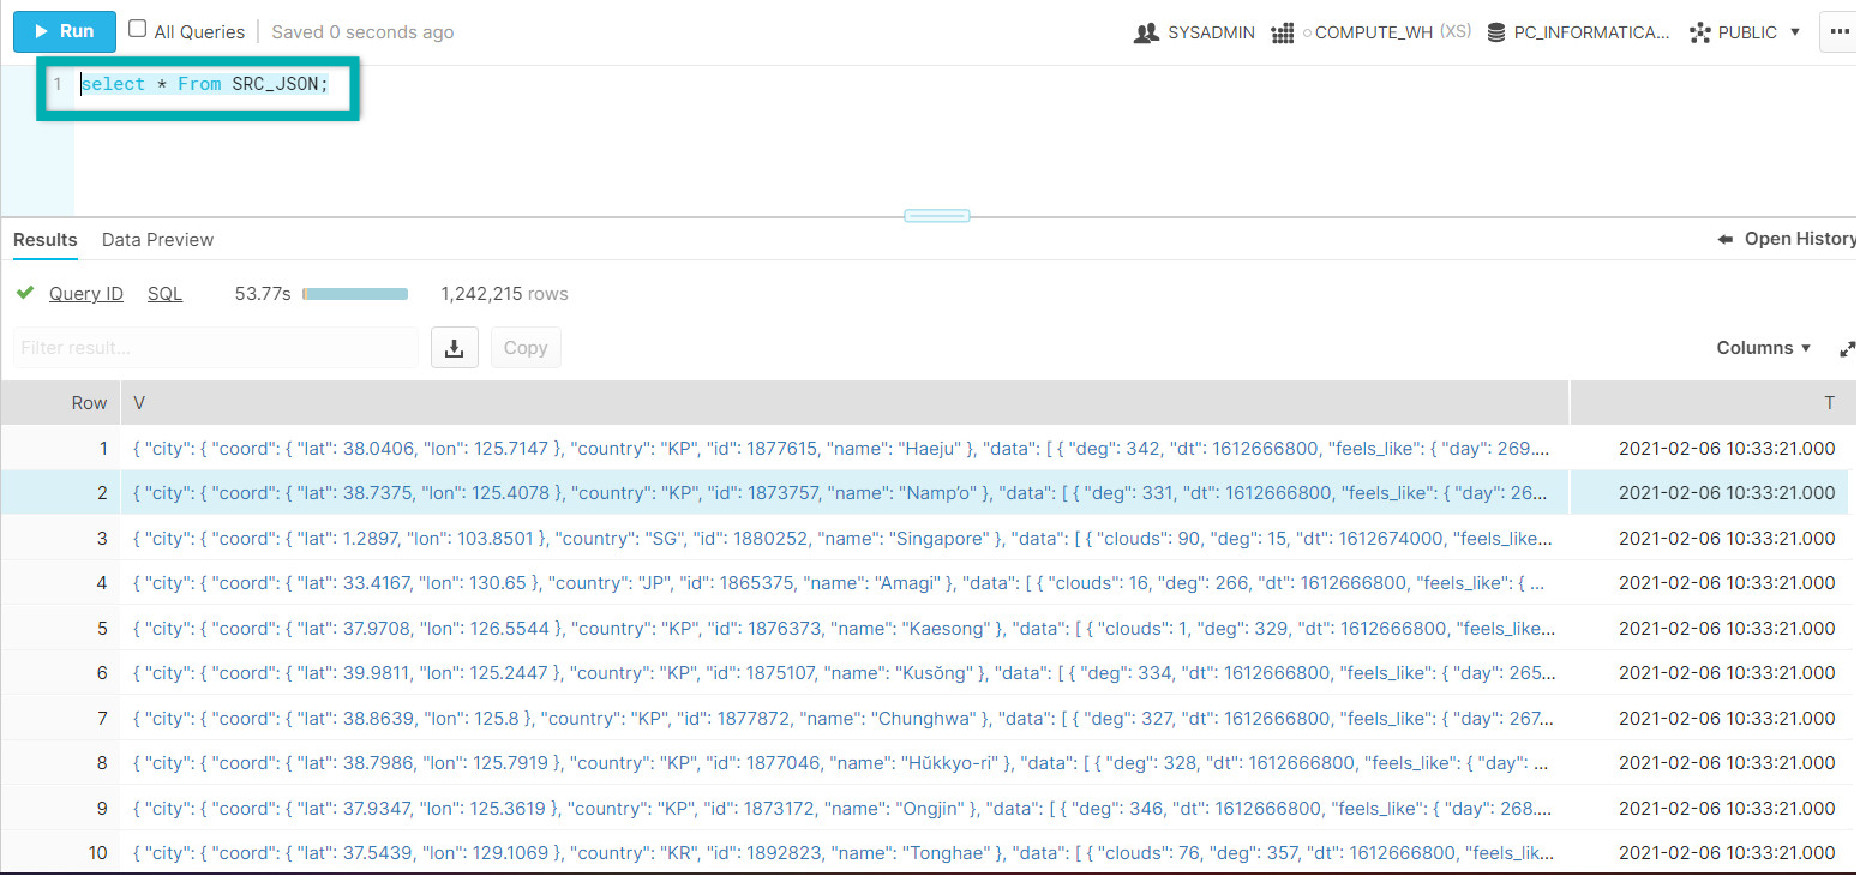
In this step we focus on our source data in JSON, and we will save one of the sample records in a .json file for later use in this hands-on demo.
- Below you can see the sample source data that will be used:

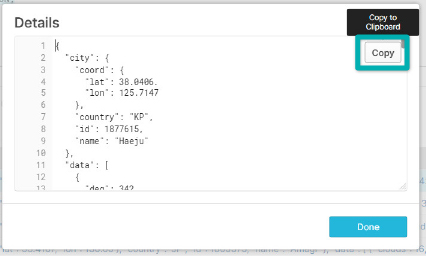
- Click on a value and then click on Copy to copy that JSON data:

- Save the copied JSON in a text file locally on your computer with a meaningful name, e.g. SAMPLE.json.
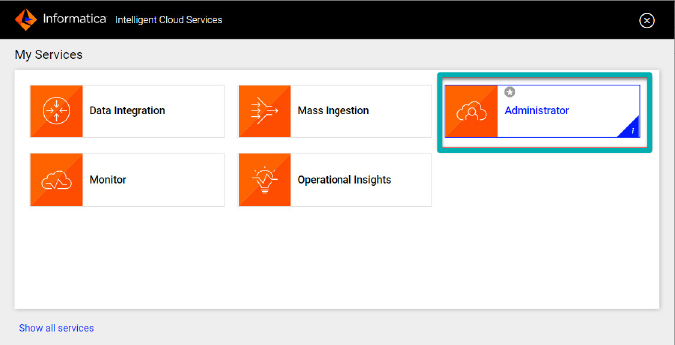
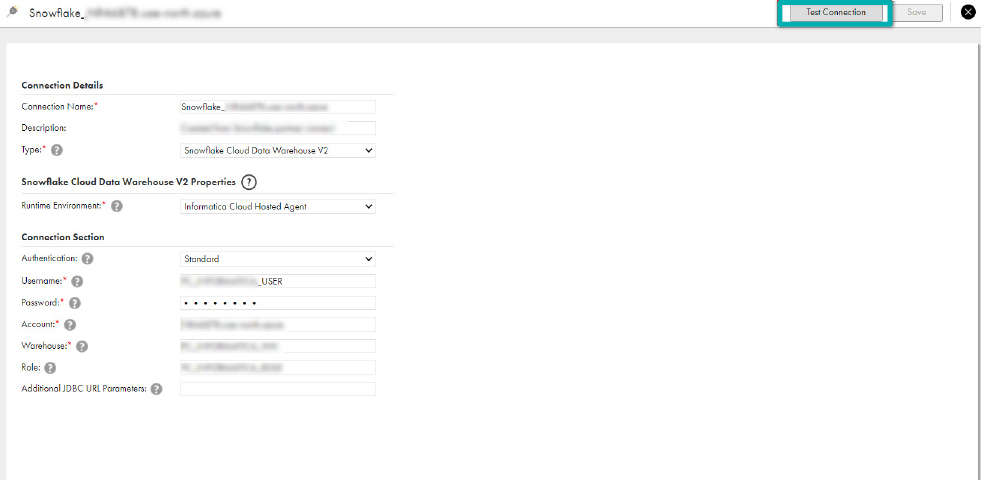
- Now go to the Administrator tab and create a connection for Snowflake:

- Click on
 on the left side of the menu options.
 - Select Snowflake Cloud Data Warehouse V2 in Connection Type and fill in the required details below:

- Press Test Connection to check whether it’s valid.
- Below you can see the sample source data that will be used:
![]()
Step 2: Create a Hierarchical Schema in IICS
To parse the JSON to a normal relational table with rows and columns, we need to use a Hierarchical Schema which will help us to identify the JSON format and the relationship of each child node with its parent.
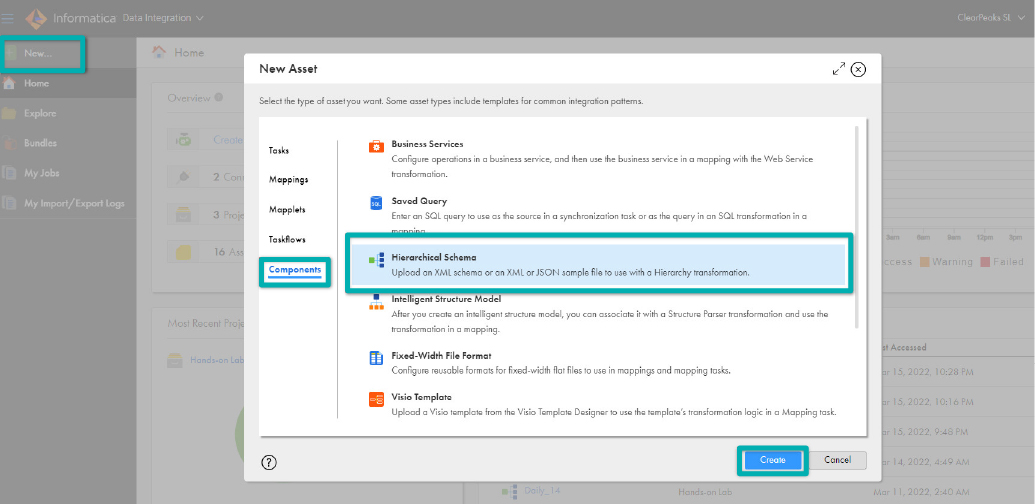
- In IICS, click on New and then Components.
- Select Hierarchical Schema and click on Create:

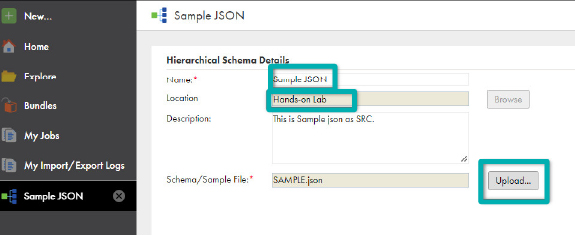
- Enter the sample JSON in the Name field.
- Select the Location to save this then click on Upload. For this demo we will use Hands-on Lab:

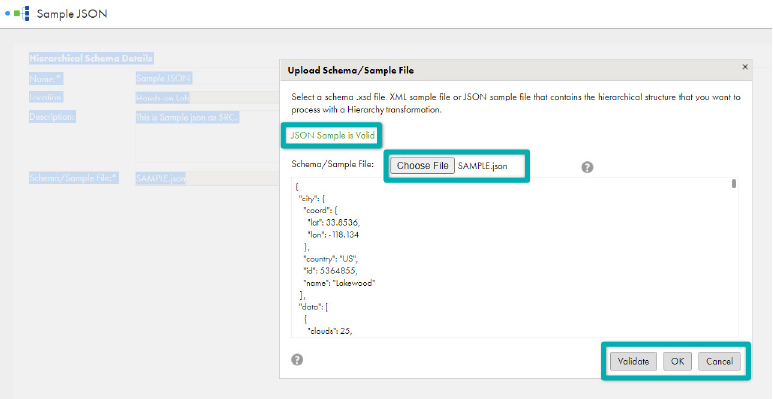
- Click on Choose File and select the JSON file you saved above.
- Click on Validate. A message will be displayed confirming whether the file is valid or not.
- Once the file has been validated, confirm by clicking on OK and save.

Step 3: Create a Mapping and Configure Your Source in IICS
Now we will create a simple mapping in IICS and configure our JSON source:
- Create a new mapping: select New > Mappings > Mapping > Create.
- Under properties, enter m_JSON_to_TABLE in the Name field.
- Review the Location and adjust it if necessary.
- Click on the Source transformation on the mapping canvas to assign its properties.
- In the General tab, enter your Source Table Name in the Name field.
- In the Source tab, select your Source Connection in the Connection dropdown field.
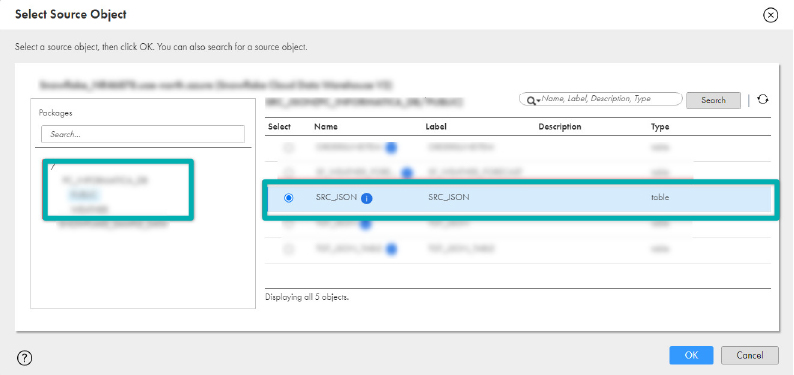
- Click on Select to select the source table/object.
- In the Select Source Object window, scroll down to find your DB and click on it; then click on your schema.
- Select your Source Table from the tables list in the right pane and click on OK. In the demo our Source Table is SRC_JSON.

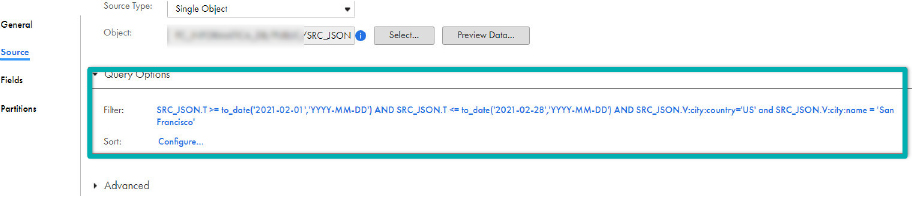
- Expand Query Options.
- Click on Configure.
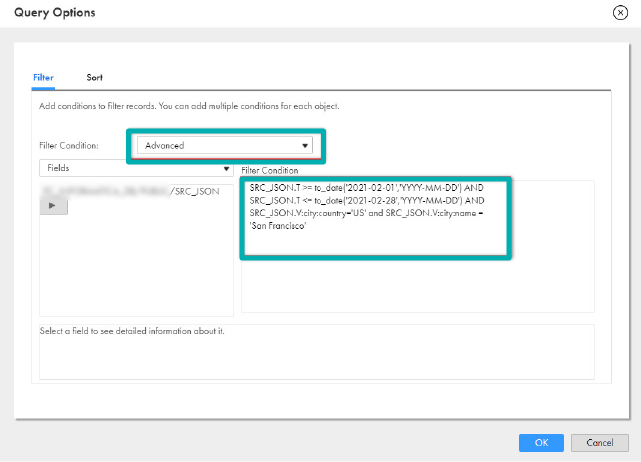
- Click on the Filter Condition dropdown and select Advanced.
- Paste the following in the filter condition:
SRC_JSON.T >= to_date('2021-02-01','YYYY-MM-DD') AND
SRC_JSON.T <= to_date('2021-02-28','YYYY-MM-DD') AND
SRC_JSON.V:city:country='US' and SRC_JSON.V:city:name ='San Francisco'
 14. Click on Save to periodically save work in progress.
 14. Click on Save to periodically save work in progress.
Step 4: Add and Configure it in IICS
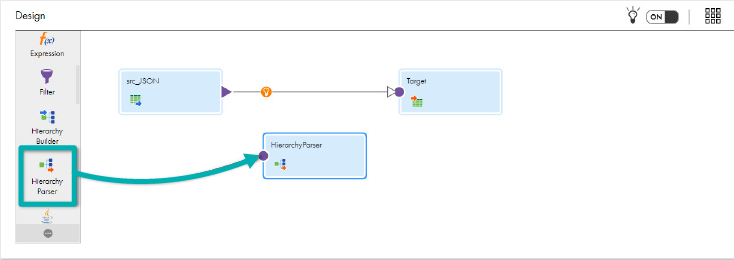
We will use the Hierarchy Parser to parse the JSON in just a few clicks. This is a very important step and these capabilities of identifying parents with their children by default is a lifesaver for any data stakeholder.
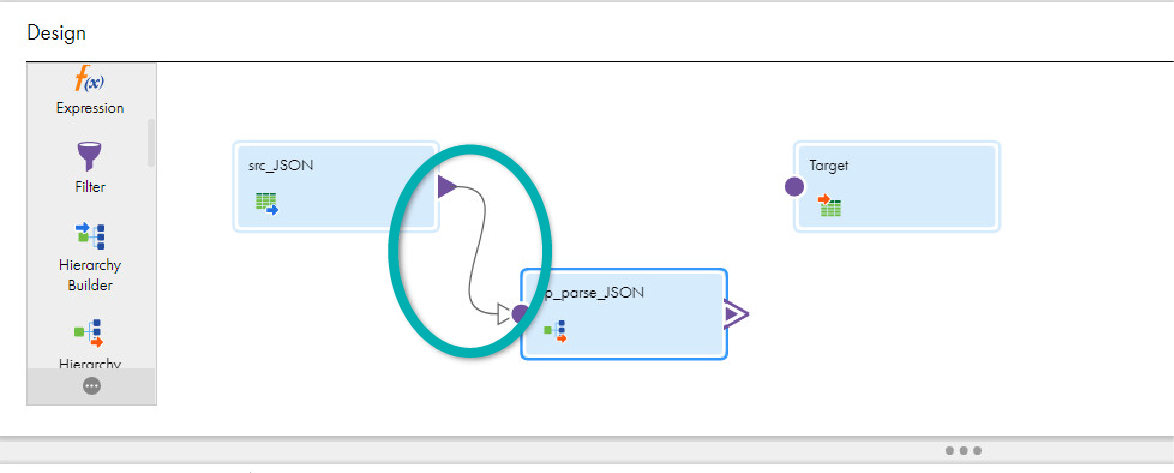
- Drag and drop the Hierarchy Parser transformation onto the canvas:

- In the General tab, enter hp_parse_JSON in the Name field.
- In the Input Settings tab, click on Select and select the SAMPLE.JSON hierarchical schema. Click on OK. This is the Sample.JSON file which was created earlier in Step#2:
- Select the line from src_JSON to Target and click on the Delete icon; then link src_JSON to hp_parse_JSON:

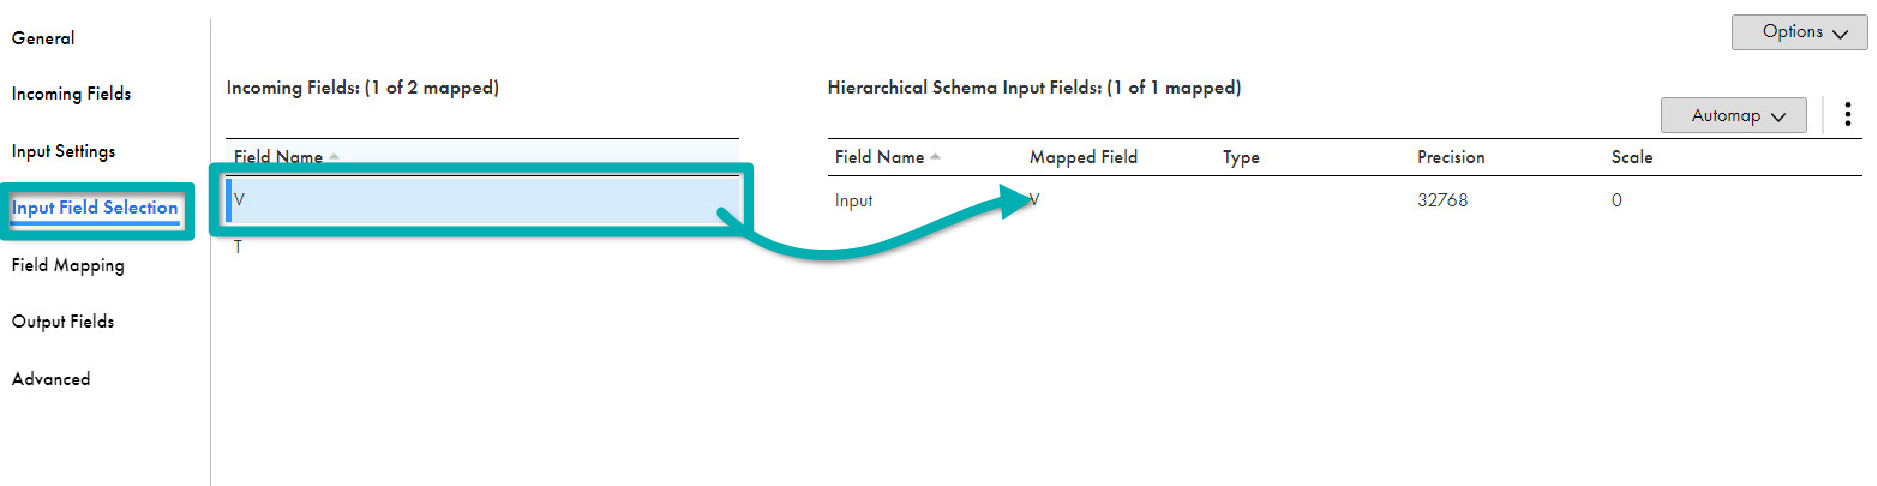
- In the Input Field Selection tab, drag and drop the V field from Incoming Fields to the Input field in Hierarchical Schema Input Fields:

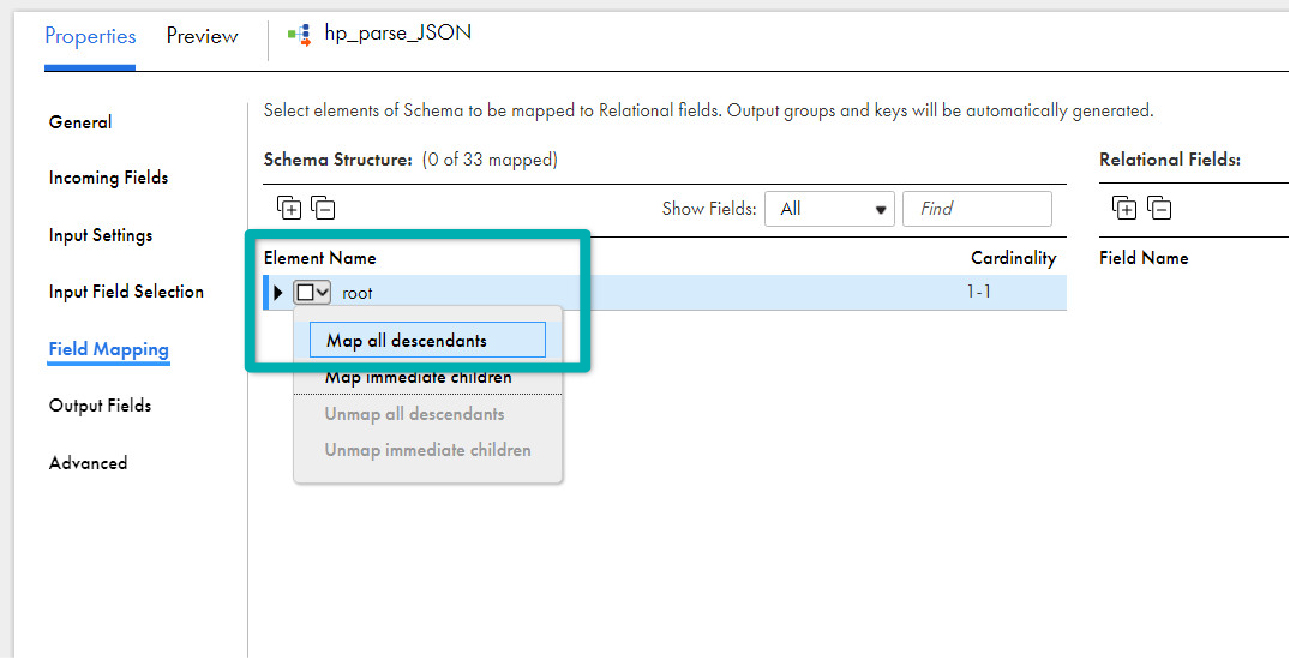
- In the Field Mapping tab, expand the root element by clicking on the triangle icon or the expand/contract icon

- Select root and choose Map all descendants. The selected fields will automatically show up in the Relational Fields on the right panel. Primary keys and foreign keys are auto-created to make the fields relational.

- Click on Save to periodically save work in progress.
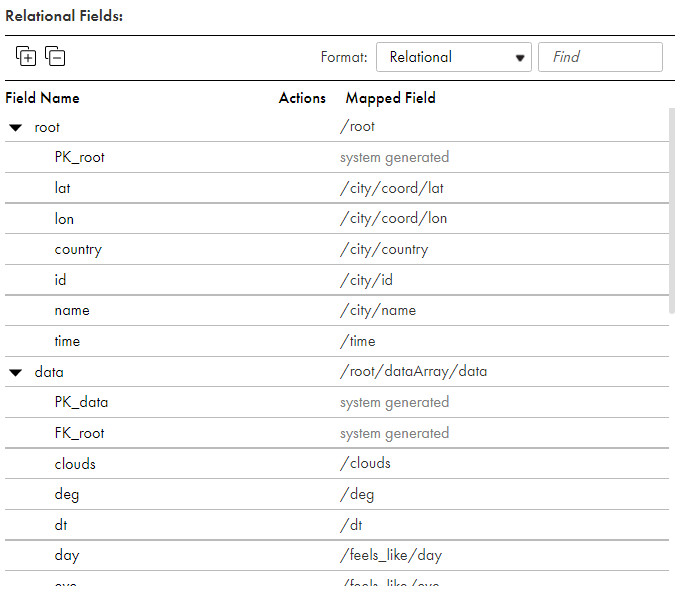
- Now you will automatically be able to see all child nodes with their root relationship in the format below thanks to the capabilities of IICS:

- Note that PK_root and FK_root are system-generated fields to map all your child data to its node, making it all very easy.
Step 5: Add and Configure a Joiner Transformation to Link Root and Data Relational Field Groups
After parsing the JSON data, we need to join the root with its data element to avoid any relationship between the child node and its parent.
- Drag and drop the Joiner transformation onto the canvas.
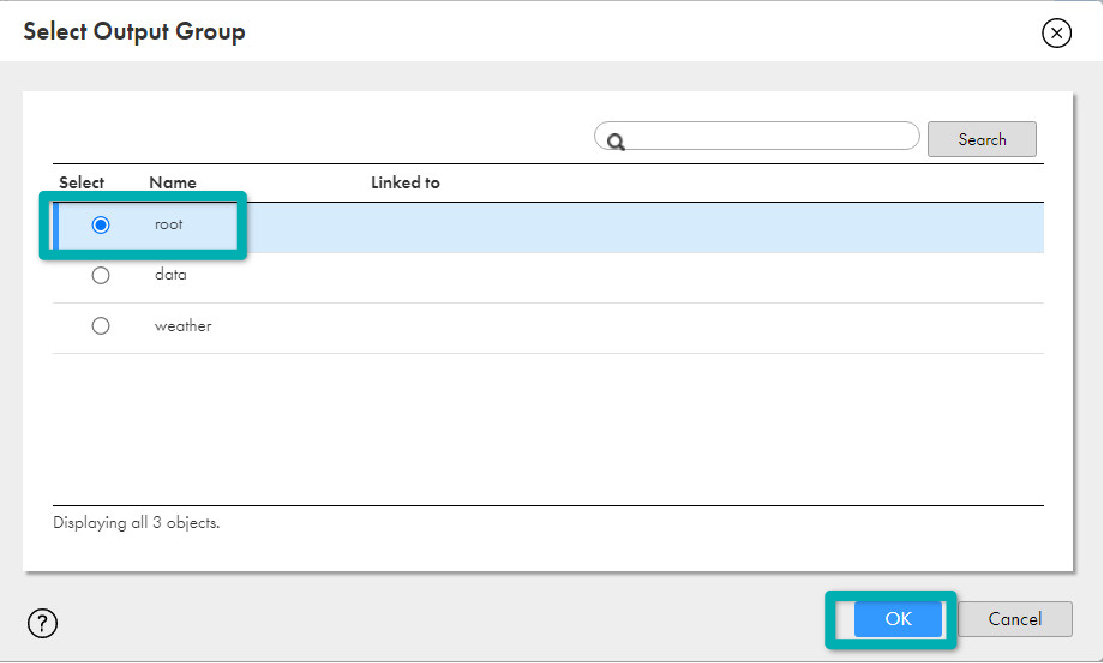
- Link hp_parse_JSON to the Master in the Joiner transformation.
- Select root and click on OK in the Select Output Group window:

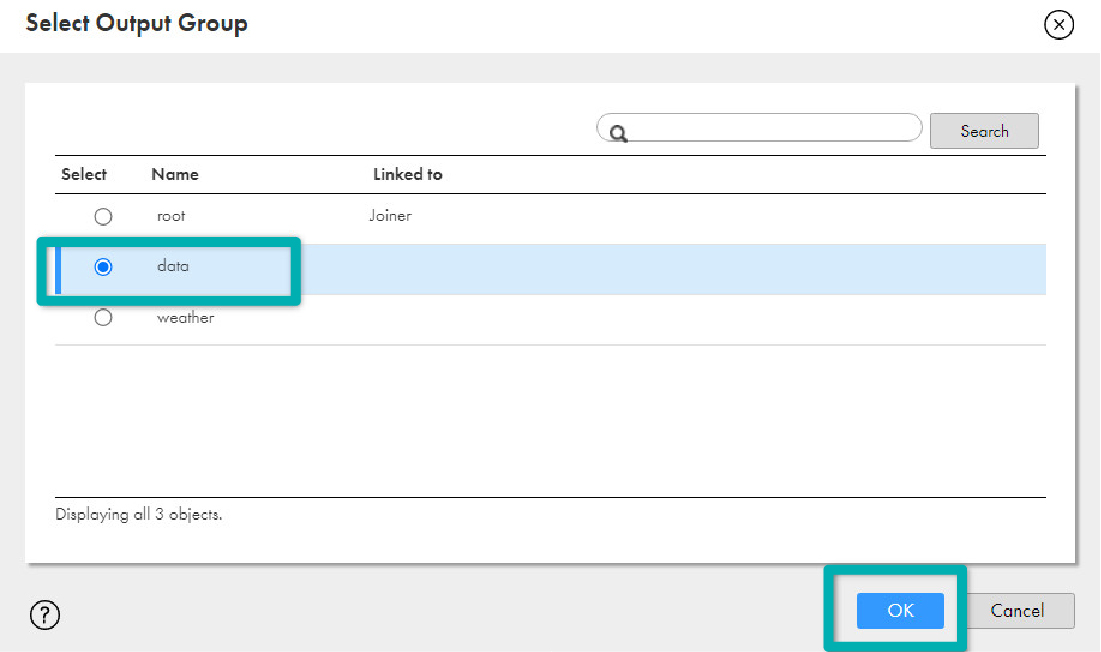
- Link hp_parse_JSON again but this time to the Detail in the Joiner transformation; select data and click on OK.

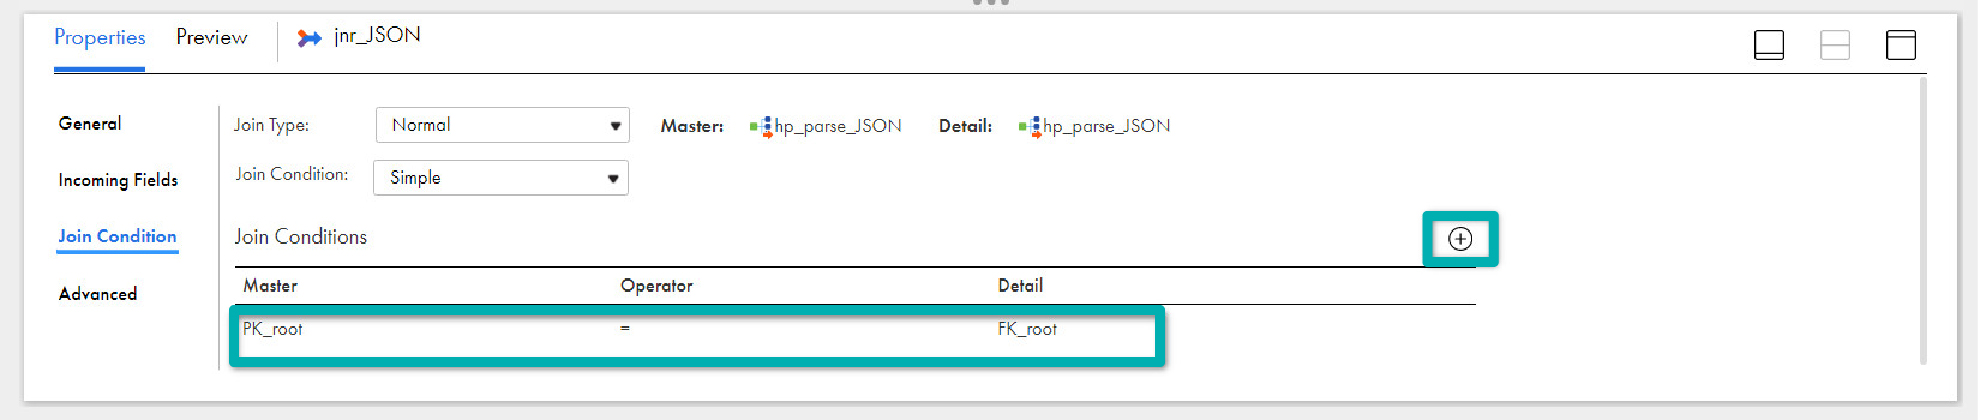
- In the General tab, enter jnr_JSON in the Name field.
- In the Join Condition tab, click on Add icon.
- Select PK_root (bigint) in the Master column and FK_root (bigint) in the Detail. This way the parent-child relationship is maintained for the data.

- In the Advanced tab, select Sorted Input. This will enhance the performance on the database side.
- Click on Save to periodically save work in progress.

Step 6: Add an Expression Transformation to Select Only Those Columns Which You Want in the Final Target Table in IICS
Bearing in mind that the goal here is to create a target table at runtime, it’s best if we select only those columns which we need for the target table.
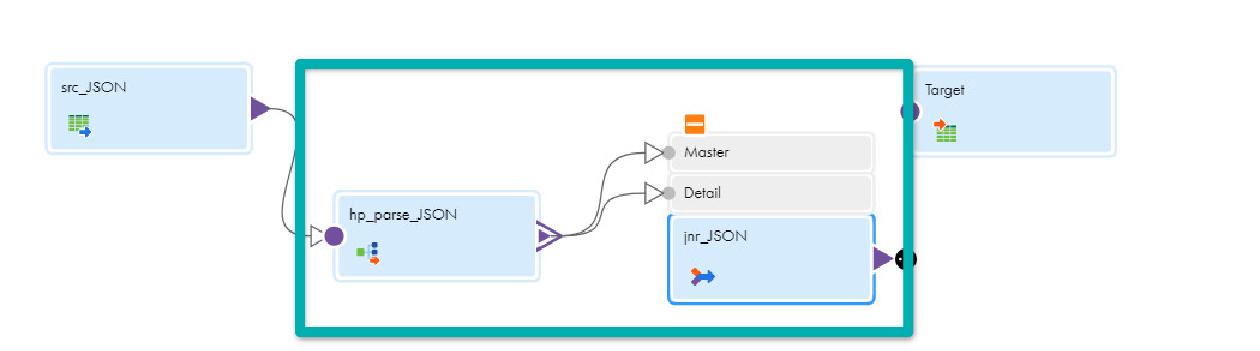
- Drag and drop the Expression transformation onto the canvas.
- Link jnr_JSON to the Expression:

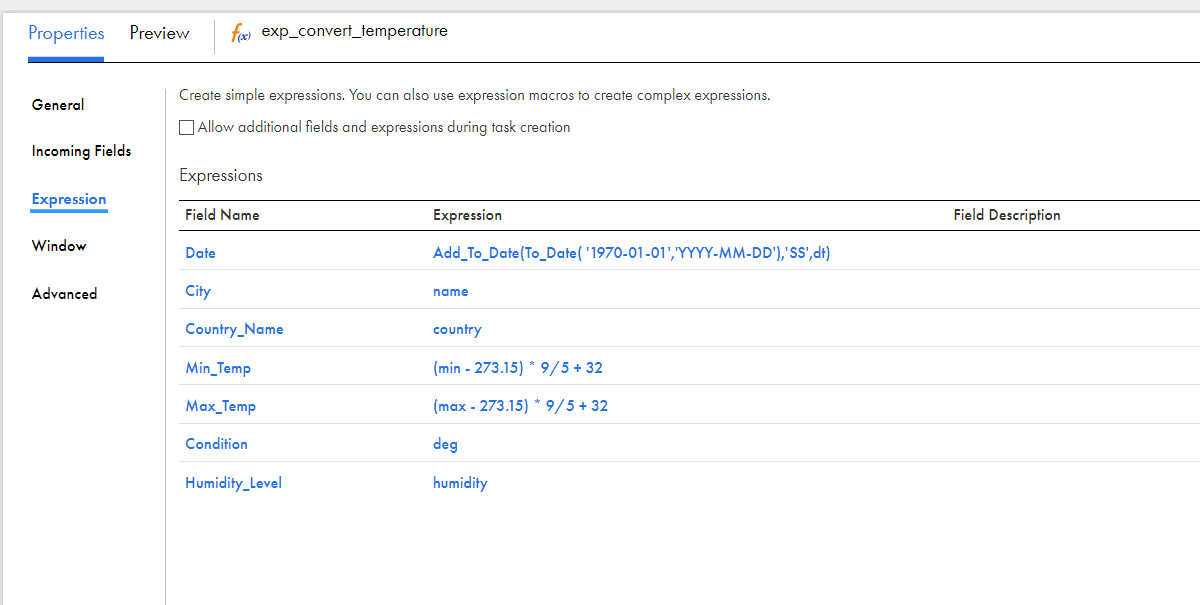
- In the General tab, enter exp_Final_Cols in the Name field.
- Go to the Expression tab and select only the columns that you want to have in your final target table. You can see our demo’s final columns in a target table and a calculated field to convert Kelvin to Fahrenheit here:

Step 7: Configure the Target
Now we will need to define what our target is and where it will load, so we need to specify database details and load them:
- Link exp_Final_Cols to Target.
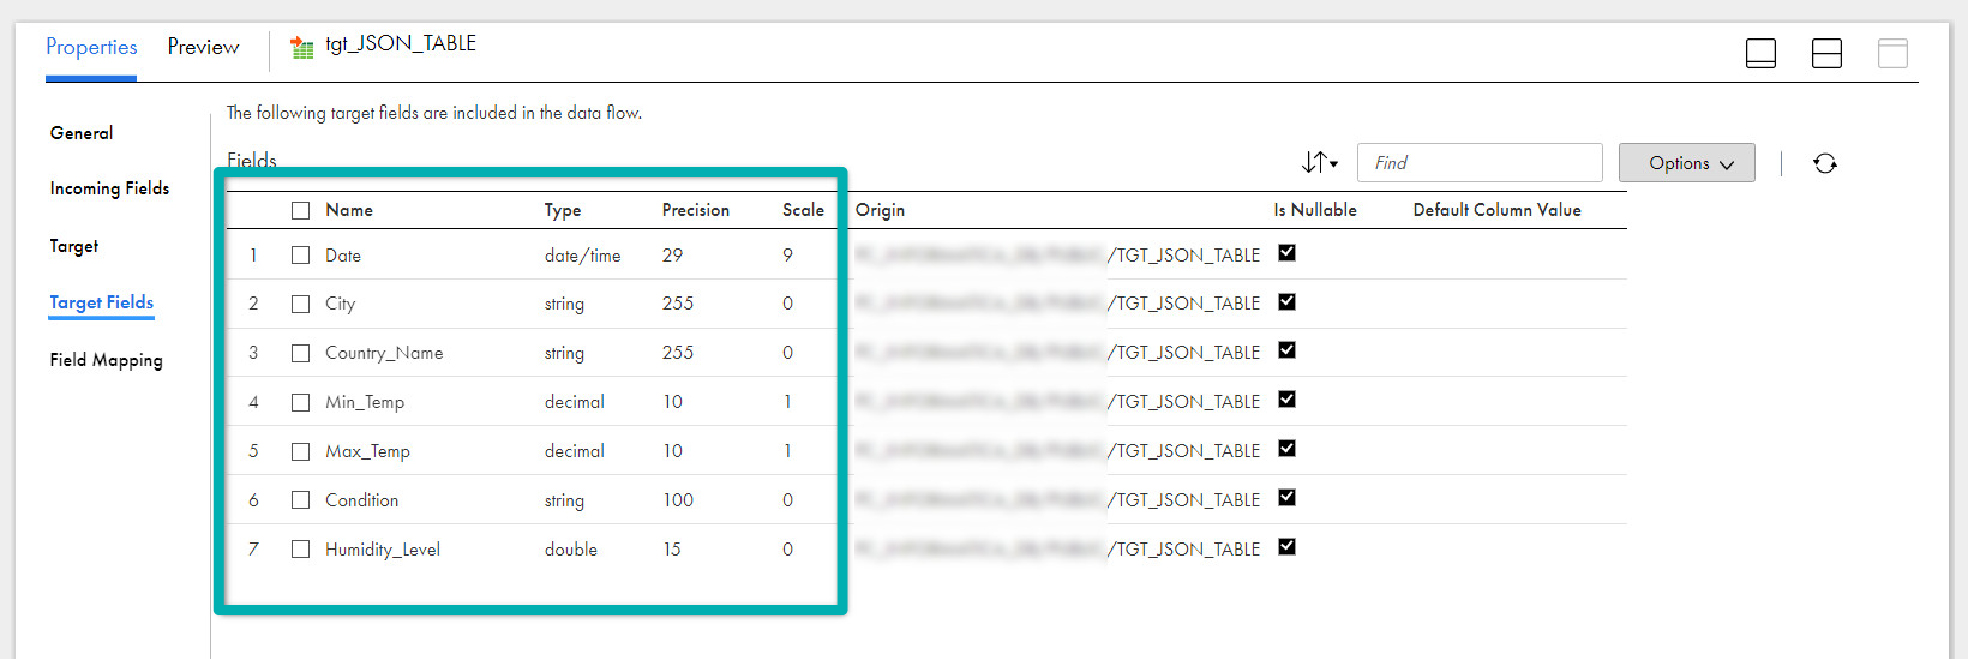
- In the General tab, enter the name of the target table in the Name field; in our case, it’s TGT_JSON_TABLE.
- In the Target tab, select your Target Database connection.
- Click on Select to select a table.
- In the Target Object window, check Create New at Runtime.
- Enter TGT_JSON_TABLE in the Object Name field.
- The target fields are automatically mapped from the incoming fields in the Field Mapping tab.

- Save your work.
Step 8: Configure a Mapping Task to Run the Mapping
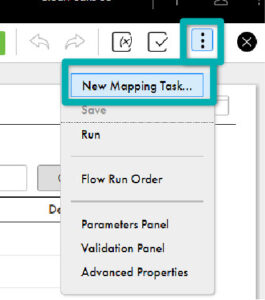
Create a New Mapping Task to run this mapping.
- Click on the 3 dots to create a new mapping task:

- In the New Mapping Task window, enter mct_JSON_to_TABLE in the Name field.
- Select your Location.
- Select your Agent as per your environment.
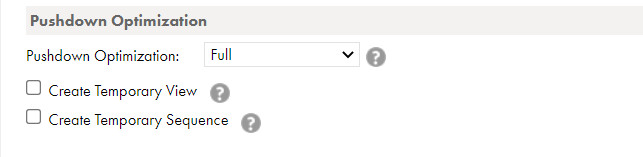
- You can also enable Pushdown to take advantage of your database capabilities to execute your job faster. Pushdown optimisation is a concept to push the transformation logic on the source or target database side:

- Click on Finish.
- Click on Run to execute the mapping task.
- Once the job has been executed, the logs can be seen in the My Jobs tab:

- In the logs you can see the effect of Pushdown:

- Finally, check your data in the target table:

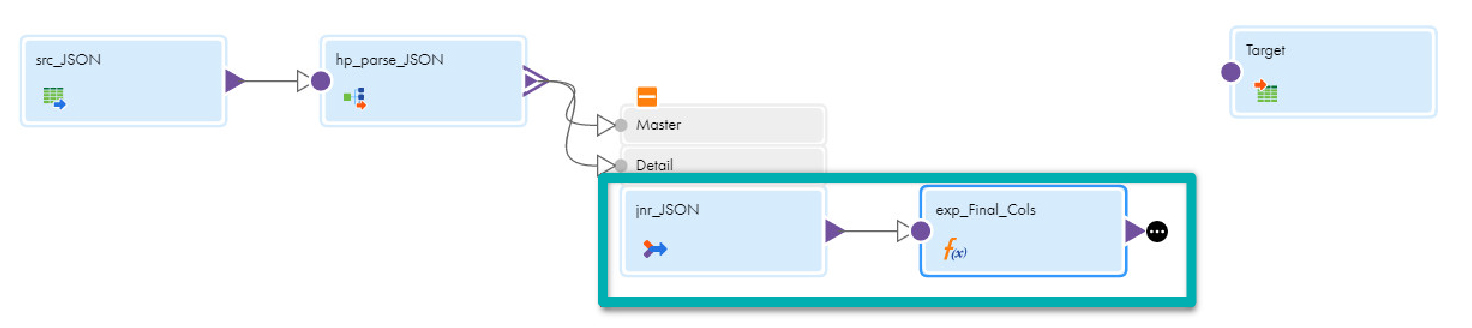
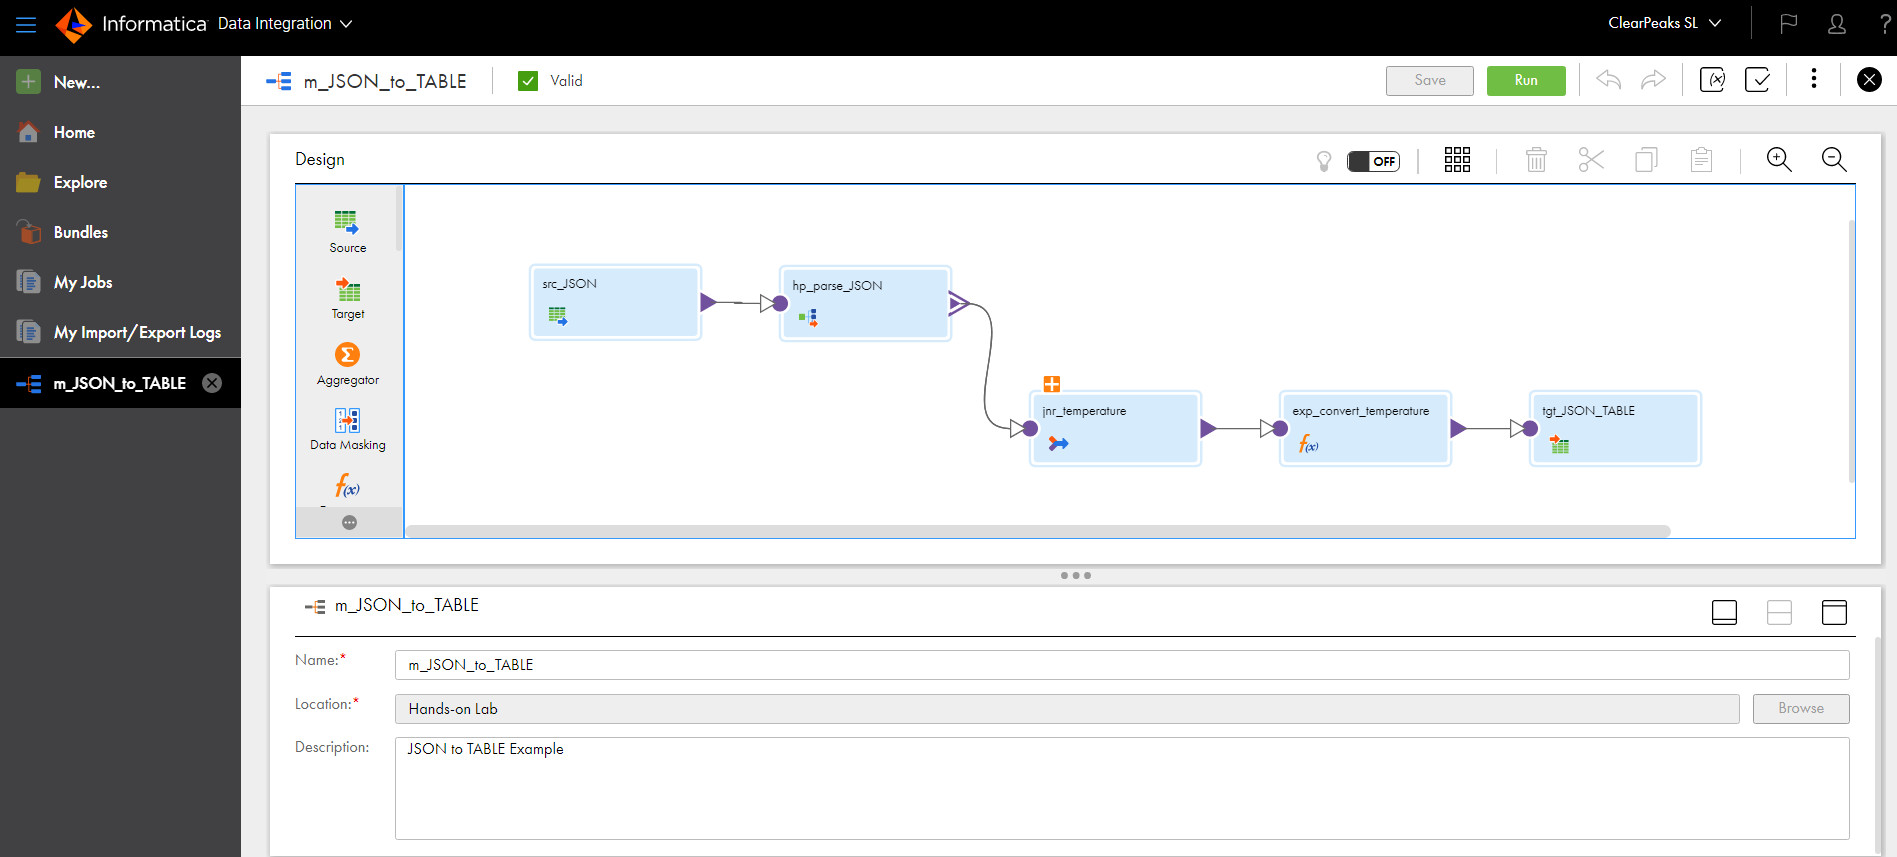
- The final mapping will look like this:


Conclusion
In this blog post we have shown you, step by step, how to integrate a semi-structured format file into a relational database table, and we’ve seen how smooth and easy this is with the powerful features of IICS and Snowflake.
This concludes our series of blog articles about IICS. You can find the previous blog post here. If you have any questions or would like to know more about ETL/ELT solutions, don’t hesitate to contact us. More blog posts about IICS are planned for the future, so stay tuned!
